Magnolia Bakerys Copycat Banana Pudding
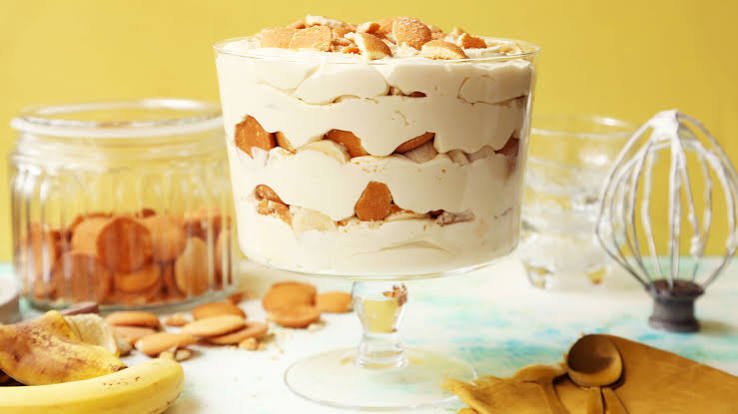
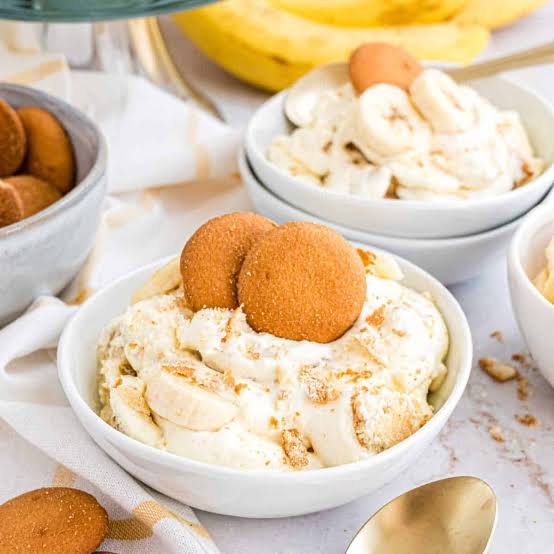
There is something wonderfully comforting about a bowl of Magnolia Bakery’s Copycat Banana Pudding. Layers of ripe bananas, tender vanilla wafers, and silky-smooth pudding come together in a creamy dessert that feels both nostalgic and special. Each spoonful has a lovely mix of soft pudding, fresh banana, and just enough cookie texture to keep every bite interesting.
The best part is how simple this banana pudding recipe is to make at home. You do not need complicated baking techniques or a long list of ingredients. With a few easy steps and some chilling time, you can create a rich, creamy dessert that is perfect for family gatherings, potlucks, holidays, or a simple weekend treat.
What really makes this homemade version stand out is the texture. The vanilla wafers slowly soften as they rest with the pudding, while the banana slices add a fresh, fruity contrast to the smooth and creamy layers. Make it ahead, let everything chill together, and the flavors become even more delicious and well balanced.
Why You’ll Love This Recipe
- Easy to make: This no-bake banana pudding comes together with simple ingredients and straightforward steps, making it ideal for beginners.
- Creamy and smooth: The pudding mixture has a rich, velvety texture that pairs beautifully with soft vanilla wafers.
- Fresh banana flavor: Ripe bananas add natural sweetness and a fruity contrast to the creamy pudding layers.
- Perfect make-ahead dessert: It needs time to chill, so you can prepare it ahead of a party, dinner, or family gathering.
- No oven required: There is no baking involved, which makes this an especially convenient dessert for warm days.
- Classic Southern-style comfort: The combination of banana, vanilla pudding, and cookies creates the familiar flavor many people associate with classic banana pudding.
- Great for sharing: Layer it in a large serving dish or individual cups for an attractive dessert everyone can enjoy.
- Even better after chilling: As the dessert rests, the vanilla wafers become tender and absorb some of the creamy pudding, creating the signature soft texture.
Ingredients
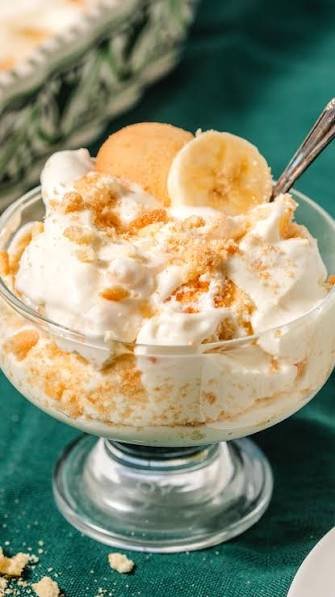
This Magnolia Bakery’s Copycat Banana Pudding uses simple, easy-to-find ingredients. For the best texture and flavor, use ripe bananas and allow enough time for the finished pudding to chill before serving.
For the Pudding
- 1 box (3.4 ounces) instant vanilla pudding mix
- 1 1/2 cups cold whole milk
- 1 can (14 ounces) sweetened condensed milk
- 1 teaspoon pure vanilla extract
- 1 1/2 cups heavy whipping cream
For the Layers
- 4 to 5 ripe but firm bananas
- 1 box (11 ounces) vanilla wafer cookies
Optional Garnish
- A few extra vanilla wafer cookies
- Thin banana slices for topping
- A small amount of freshly whipped cream
For the best results, choose bananas that are yellow with a few small brown spots. They should be sweet and ripe but still firm enough to hold their shape between the layers. Avoid very soft or heavily bruised bananas, as they can become mushy in the pudding.
Ingredient Notes & Substitutions
A few small ingredient choices can make a noticeable difference in the final texture of this Magnolia Bakery’s Copycat Banana Pudding. Here is what to know before you start.
Instant Vanilla Pudding Mix
Use instant vanilla pudding mix rather than cook-and-serve pudding. Instant pudding thickens quickly when combined with cold milk and creates the creamy base needed for this dessert.
For a slightly different flavor, you can use French vanilla pudding mix. It gives the finished pudding a deeper vanilla taste.
Whole Milk
Whole milk produces a richer, creamier pudding. If needed, 2% milk can work, although the finished mixture may be slightly less rich.
Avoid skim milk if possible, since the lower fat content can make the pudding taste thinner.
Sweetened Condensed Milk
Sweetened condensed milk adds sweetness and gives the pudding mixture a smooth, creamy consistency. Do not substitute evaporated milk, as they have very different textures and sweetness levels.
If you prefer a less sweet dessert, you can reduce the amount slightly, but keep in mind that it also contributes to the creamy texture.
Heavy Whipping Cream
Cold heavy cream is whipped until light and fluffy, then folded into the pudding mixture. This creates the airy texture that makes the dessert feel lighter than a traditional custard.
For the best whipped cream, chill the cream before whipping and stop as soon as it reaches soft to medium peaks.
Bananas
Choose ripe bananas that are naturally sweet but still firm. Bananas with a bright yellow peel and a few small brown spots are usually ideal.
If you are preparing the pudding several hours ahead, slice the bananas just before assembling the dessert. This helps reduce browning and keeps the fruit looking fresh.
Vanilla Wafers
Classic vanilla wafer cookies provide the signature cookie layer and gradually soften as they sit in the pudding.
If vanilla wafers are unavailable, you can use another crisp vanilla-flavored cookie with a similar size and texture. Shortbread cookies can also work, although they will create a richer, more buttery result.
Dairy-Free Option
For a dairy-free version, use a plant-based milk that works well with instant pudding mix and replace the heavy cream with a dairy-free whipping alternative. Check every package carefully, since pudding mixes and cookies can vary by brand.
The texture may not be exactly the same as the classic version, but it can still make a satisfying layered banana dessert.
Gluten-Free Option
Use certified gluten-free vanilla pudding mix and gluten-free vanilla cookies. Since regular vanilla wafers often contain wheat, checking the cookie label is especially important.
Budget-Friendly Tip
If you are making this dessert for a crowd, generic vanilla wafers, store-brand pudding mix, and store-brand condensed milk can help lower the cost without changing the basic preparation. The ripe bananas and creamy pudding will still provide plenty of flavor.
Kitchen Tools Needed
You do not need any special equipment to make this Magnolia Bakery’s Copycat Banana Pudding. A few basic kitchen tools are all you need to mix, whip, slice, and layer the dessert.
Mixing Bowls
Use a medium bowl for preparing the pudding mixture and a separate large bowl for whipping the heavy cream. Chilled bowls can also help the cream whip a little faster.
Electric Hand Mixer
A hand mixer makes whipping the heavy cream quick and easy. A stand mixer works just as well if you already have one.
Whisk
A whisk is useful for combining the pudding mix, milk, sweetened condensed milk, and vanilla extract until smooth and lump-free.
Rubber Spatula
A flexible rubber spatula is ideal for gently folding the whipped cream into the pudding mixture without knocking out too much air.
Sharp Knife
Use a sharp knife to slice the bananas evenly. Thin, uniform slices make the layers easier to assemble and give each serving a good balance of banana and pudding.
Large Serving Dish
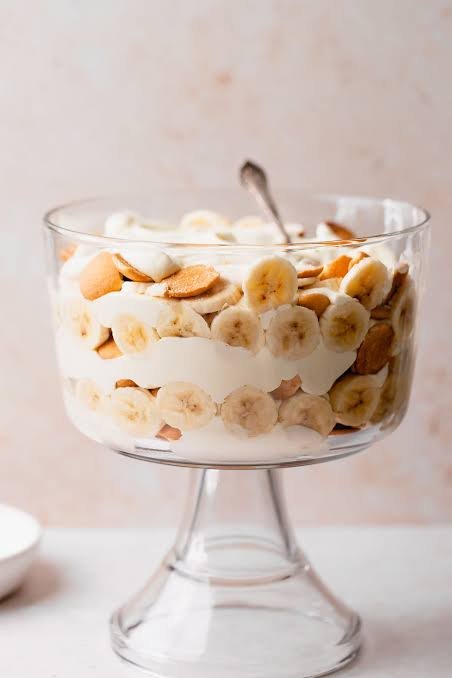
A deep 9-by-13-inch baking dish or similar serving dish works well for a family-sized banana pudding. A glass dish is especially nice because you can see the creamy layers from the outside.
Optional Individual Cups
For parties or gatherings, assemble the pudding in small dessert cups or jars. This makes serving simple and gives each guest their own neatly layered portion.
Plastic Wrap
Keep plastic wrap handy if you plan to chill the pudding for several hours. Pressing it gently over the surface can help prevent the top from drying out.
Step-by-Step Instructions
Making this Magnolia Bakery’s Copycat Banana Pudding is mostly about creating smooth layers and giving the dessert enough time to chill. Follow these steps for a creamy pudding with tender cookies and fresh banana slices.
Step 1: Prepare the Pudding Base
In a large mixing bowl, whisk together the instant vanilla pudding mix and cold whole milk. Continue whisking for about 2 minutes, or until the mixture begins to thicken and looks completely smooth.
Add the sweetened condensed milk and vanilla extract. Whisk again until everything is evenly combined.
The pudding should be thick enough to coat the back of a spoon. If you still see dry pudding mix or small lumps, keep whisking until the mixture is smooth.
Step 2: Chill the Pudding
Cover the bowl and place it in the refrigerator for about 10 to 15 minutes.
This short rest gives the pudding time to thicken before the whipped cream is added. Do not skip this step if your pudding mixture looks loose.
Step 3: Whip the Heavy Cream
Pour the cold heavy whipping cream into a clean mixing bowl.
Using an electric hand mixer, beat the cream on medium-high speed until it becomes fluffy and forms soft to medium peaks. When you lift the beaters, the cream should hold its shape but still look smooth.
Be careful not to overbeat it. If the cream becomes grainy or starts looking like butter, it has been whipped too far.
Step 4: Fold the Whipped Cream Into the Pudding
Remove the chilled pudding mixture from the refrigerator.
Add the whipped cream gradually and gently fold it in with a rubber spatula. Use slow, sweeping motions rather than stirring vigorously.
Continue folding until the mixture is evenly combined and has a light, creamy texture.
Step 5: Slice the Bananas
Peel the bananas and cut them into thin, even slices.
Aim for slices that are thick enough to hold their shape but thin enough to layer easily. If you are not assembling the pudding immediately, wait to slice the bananas until just before layering.
Step 6: Start the First Layer
Place a layer of vanilla wafers across the bottom of your serving dish.
Try to cover most of the surface without worrying about making every gap perfect. Small spaces can be filled with broken cookie pieces.
Step 7: Add the Banana Slices
Arrange a layer of banana slices over the vanilla wafers.
Spread them out fairly evenly so each serving will contain a good amount of banana. Avoid piling too many slices in one area.
Step 8: Add the Creamy Pudding
Spoon part of the pudding mixture over the bananas.
Use a spatula to gently spread it into an even layer, making sure the pudding reaches the edges of the dish.
Step 9: Repeat the Layers
Continue layering vanilla wafers, banana slices, and pudding until all the ingredients have been used.
For a large dish, two to three complete layers usually work well. Finish with a generous layer of the creamy pudding mixture on top.
Step 10: Add the Finishing Touches
Decorate the top with a few vanilla wafers. You can arrange whole cookies around the edges or add crushed wafers for a simple finish.
If desired, add a few fresh banana slices just before serving rather than several hours ahead. This keeps them looking fresher.
Step 11: Chill Before Serving
Cover the finished banana pudding and refrigerate it for at least 4 hours.
For the best texture, let it chill overnight. This gives the vanilla wafers enough time to soften while the banana and pudding flavors meld together.
Step 12: Serve
When ready to serve, scoop all the way down through the layers so each portion includes pudding, bananas, and softened vanilla wafers.
Serve the banana pudding cold for the creamiest texture.
Common Mistakes to Avoid
Using warm milk: Cold milk helps instant pudding thicken properly.
Overwhipping the cream: Stop once soft to medium peaks form. Overwhipped cream can make the pudding mixture heavy and grainy.
Stirring the whipped cream too aggressively: Fold gently to preserve its airy texture.
Using overly ripe bananas: Very soft bananas can become mushy during chilling. Firm, ripe bananas work better.
Assembling too far in advance: Overnight chilling is excellent, but keeping the pudding for several days can cause the bananas to darken and the cookies to become overly soft.
Serving immediately: The dessert needs time in the refrigerator for the cookies to absorb some of the creamy pudding. Rushing this step means you will miss the soft, classic texture that makes banana pudding so appealing.
Expert Tips
A few simple techniques can make a big difference in the texture, appearance, and overall flavor of your Magnolia Bakery’s Copycat Banana Pudding.
Use Very Cold Ingredients
Keep the milk and heavy whipping cream cold before mixing. Cold ingredients help the pudding thicken properly and allow the cream to whip into a light, stable texture.
Do Not Rush the Whipped Cream
Whip the heavy cream just until soft to medium peaks form. The cream should look smooth and fluffy, not stiff or grainy. This gives the pudding a lighter texture.
Fold, Do Not Stir
When combining the whipped cream and pudding, use a rubber spatula and gently fold them together. Vigorous stirring can remove the air from the whipped cream and leave you with a heavier pudding.
Choose the Right Bananas
The bananas should be ripe enough to taste naturally sweet but firm enough to hold their shape. If the peel is heavily browned and the fruit feels very soft, save those bananas for banana bread instead.
Slice Bananas Evenly
Consistent banana slices make the pudding easier to layer and help distribute the fruit throughout the dessert. Aim for slices about 1/4 inch thick.
Layer With Purpose
Spread each layer evenly rather than adding everything in large piles. This ensures every serving has a balanced combination of creamy pudding, bananas, and vanilla wafers.
Let It Chill
Do not underestimate the chilling time. At least 4 hours allows the vanilla wafers to soften and absorb some of the pudding while the banana and vanilla flavors meld together.
For an especially tender, bakery-style texture, refrigerate the pudding overnight.
Add Fresh Bananas at the Right Time
If presentation matters, reserve a few banana slices for the top and add them shortly before serving. Bananas exposed to air for too long can darken.
Make the Layers Look Beautiful
For a glass serving dish, arrange a few banana slices and vanilla wafers along the outer edge as you build the layers. This creates visible layers and makes the dessert look polished without requiring complicated decoration.
Taste Before Layering
If you prefer a less sweet dessert, taste the pudding mixture before assembling. The vanilla wafers and bananas will add additional sweetness as the pudding rests, so there is no need to make the base overly sweet.
Give the Cookies Time to Soften
The texture of the vanilla wafers changes as the pudding chills. Freshly assembled pudding has more cookie crunch, while a well-chilled pudding develops softer, cake-like cookie layers.
For the classic texture, give the dessert several hours in the refrigerator before serving.
Variations
Once you have the basic Magnolia Bakery’s Copycat Banana Pudding recipe down, it is easy to adjust the layers and flavors to suit different occasions. Here are several simple ways to customize it.
Chocolate Banana Pudding
For a chocolate twist, use chocolate wafer cookies in place of some or all of the vanilla wafers. You can also add a light dusting of cocoa powder between the layers for a richer chocolate flavor.
Strawberry Banana Pudding
Add thinly sliced fresh strawberries along with the bananas. The berries bring a bright, slightly tart flavor that works beautifully with the creamy vanilla pudding.
Caramel Banana Pudding
Drizzle a small amount of caramel sauce between the layers. Keep the drizzle light so it does not overpower the banana and vanilla flavors.
For extra texture, add a few chopped toasted pecans to each layer.
Peanut Butter Banana Pudding
Add small spoonfuls of creamy peanut butter between the pudding layers, or gently warm the peanut butter and drizzle it over the vanilla wafers.
The combination of banana, vanilla, and peanut butter creates a familiar dessert flavor with a richer finish.
Coconut Banana Pudding
Add a layer of lightly toasted shredded coconut for a tropical variation. Toasting the coconut first gives it a warm, nutty flavor and a delicate crunch.
Banana Cream Pie Version
Turn the pudding into a banana cream pie-inspired dessert by adding crushed vanilla wafers to the bottom and using a pie dish instead of a deep serving dish. Top with whipped cream and extra cookie crumbs.
Individual Banana Pudding Cups
Instead of assembling everything in one large dish, divide the ingredients among small dessert cups or jars. Layer the cookies, bananas, and pudding in each container.
This is especially convenient for parties because each serving is ready to grab from the refrigerator.
Gluten-Free Banana Pudding
Use gluten-free vanilla cookies and verify that the instant pudding mix and other packaged ingredients are gluten-free. The rest of the preparation can remain essentially the same.
Dairy-Free Banana Pudding
Use a suitable dairy-free milk, dairy-free condensed milk alternative, and plant-based whipping cream. Choose dairy-free cookies as well.
Because different dairy-free products vary in thickness, check the pudding consistency before assembling and adjust the chilling time if needed.
Lighter Banana Pudding
For a lighter version, use reduced-fat milk and a lighter whipped topping instead of heavy cream. The pudding will have a less rich texture, but the bananas and vanilla wafers will still provide plenty of familiar flavor.
Extra Banana Version
If you are a serious banana lover, add an additional layer of sliced bananas. Keep the slices relatively thin so the dessert does not become too wet or difficult to scoop.
Cookie-Crunch Version
If you prefer more texture, reserve some vanilla wafers and crush them just before serving. Sprinkle the crumbs over individual portions for a fresh cookie crunch alongside the soft pudding layers.
Storage Instructions
Proper storage helps keep your banana pudding creamy while slowing down browning and keeping the layers fresh.
Refrigerator Storage
Cover the banana pudding tightly with plastic wrap or place it in an airtight container. Store it in the refrigerator at 40°F (4°C) or below.
For the best texture and appearance, enjoy it within 2 to 3 days. The vanilla wafers will continue to soften as the pudding sits, while the bananas may gradually darken.
If possible, keep the pudding chilled until just before serving. Do not leave it sitting at room temperature for extended periods.
Can You Make It Ahead?
Yes. In fact, making it several hours ahead is recommended.
Prepare the pudding, assemble the layers, cover the dish, and refrigerate it for at least 4 hours. Making it the night before works especially well because the cookies have enough time to soften and blend with the creamy pudding.
For the freshest appearance, wait until shortly before serving to add any decorative banana slices or extra cookies on top.
Can You Freeze Banana Pudding?
Freezing is not recommended for this recipe.
The bananas can become watery and change texture after thawing, while the creamy pudding may lose some of its smooth consistency. The vanilla wafers can also become overly soft.
For the best results, prepare only as much banana pudding as you expect to serve within a few days.
Do You Reheat Banana Pudding?
No. This is a chilled dessert and should be served directly from the refrigerator.
Keep leftovers refrigerated and return the dish to the refrigerator promptly after serving.
Frequently Asked Questions
Can I make Magnolia Bakery’s Copycat Banana Pudding the day before?
Yes. Preparing it the day before is actually a great option. The extra chilling time allows the vanilla wafers to soften and the flavors to blend. Keep the pudding covered and refrigerated until serving.
How long should banana pudding chill?
Chill the assembled pudding for at least 4 hours. For the softest, most cohesive texture, refrigerating it overnight works especially well.
Why is my banana pudding runny?
A runny pudding can happen if the pudding mixture was not allowed to thicken properly, warm milk was used, or the whipped cream was folded in before the pudding had set. Make sure to use cold milk and give the pudding base enough time to thicken.
How do I keep bananas from turning brown?
Use ripe but firm bananas and slice them shortly before assembling the dessert. Keeping the finished pudding refrigerated also helps slow down browning. For the best appearance, add decorative banana slices shortly before serving.
Can I use homemade vanilla pudding?
Yes. Homemade vanilla pudding can be used, although the texture and sweetness will differ from the instant pudding version. Make sure the homemade pudding is completely chilled before folding in the whipped cream.
Can I use whipped topping instead of heavy cream?
Yes. Prepared whipped topping can be substituted for freshly whipped heavy cream when convenience is important. The texture will be slightly different, but it can still produce a creamy banana pudding.
What type of bananas are best for banana pudding?
Firm, ripe bananas are ideal. Look for yellow bananas with a few small brown spots. They should taste sweet but still be firm enough to hold their shape when sliced.
Why do the vanilla wafers get soft?
The cookies naturally absorb moisture from the pudding as the dessert chills. This soft, tender texture is part of what makes classic layered banana pudding so appealing.
Can I make banana pudding in individual cups?
Absolutely. Small glasses, dessert cups, or jars work well for individual servings. Simply repeat the cookie, banana, and pudding layers until each container is filled.
Can I use another type of cookie?
Yes. Vanilla wafers are the classic choice, but crisp vanilla cookies, shortbread, or suitable gluten-free cookies can also work. Choose a cookie that is firm enough to soften gradually without falling apart immediately.
How long does homemade banana pudding last?
For the best quality, eat it within 2 to 3 days and keep it refrigerated. The bananas will gradually darken and the cookies will become softer the longer the pudding sits.
Can I freeze banana pudding?
Freezing is not recommended. The bananas and creamy pudding can develop an undesirable texture after thawing, so refrigeration is the better storage method.
Ingredients
Method
- In a large bowl, whisk the instant vanilla pudding mix with the cold whole milk for about 2 minutes, until smooth and thickened.
- Add the sweetened condensed milk and vanilla extract. Whisk until fully combined.
- Cover the pudding mixture and refrigerate for 10 to 15 minutes to help it firm up.
- Pour the cold heavy whipping cream into a separate bowl. Using an electric mixer, beat until soft to medium peaks form.
- Gently fold the whipped cream into the chilled pudding mixture with a rubber spatula. Continue folding until smooth and evenly combined.
- Slice the bananas into even pieces, about 1/4 inch thick.
- Arrange a layer of vanilla wafers across the bottom of a deep serving dish.
- Add a layer of banana slices over the cookies.
- Spoon a layer of the creamy pudding mixture over the bananas and spread it evenly
- Repeat the cookie, banana, and pudding layers until the ingredients are used.
- Finish with a layer of pudding and decorate with additional vanilla wafers or other toppings if desired.
- Cover and refrigerate for at least 4 hours. For the best texture, chill overnight.
- Serve cold, scooping through all the layers so each portion contains pudding, bananas, and softened vanilla wafers.
Video
Notes
- Use cold milk and cold heavy cream for the best texture.
- Choose bananas that are ripe but still firm.
- Do not overwhip the heavy cream.
- Fold the whipped cream gently into the pudding to keep the mixture light.
- Allow at least 4 hours of chilling time so the vanilla wafers can soften.
- For the freshest appearance, add decorative banana slices shortly before serving.
- Store leftovers covered in the refrigerator and enjoy within 2 to 3 days.
- Freezing is not recommended because the bananas and creamy pudding can change texture after thawing.
Final Thoughts
There is a reason banana pudding remains such a beloved classic. The combination of creamy vanilla pudding, sweet ripe bananas, and soft vanilla wafers creates a simple dessert with layers of comforting texture and flavor.
This Magnolia Bakery’s Copycat Banana Pudding is especially easy to prepare because there is no oven involved. Once the layers are assembled, the refrigerator does most of the work. A few hours of chilling transforms the crisp cookies into tender layers while giving the banana and vanilla flavors time to come together.
For the best results, use firm ripe bananas, cold ingredients, and plenty of chilling time. Whether you serve it at a family dinner, bring it to a potluck, or prepare it for a weekend dessert, this creamy banana pudding is simple enough for beginners and special enough for sharing.
If you make this recipe, try one of the variations above or keep it classic with plenty of vanilla wafers and fresh banana slices. Then share how your banana pudding turned out and which version you enjoyed most.