
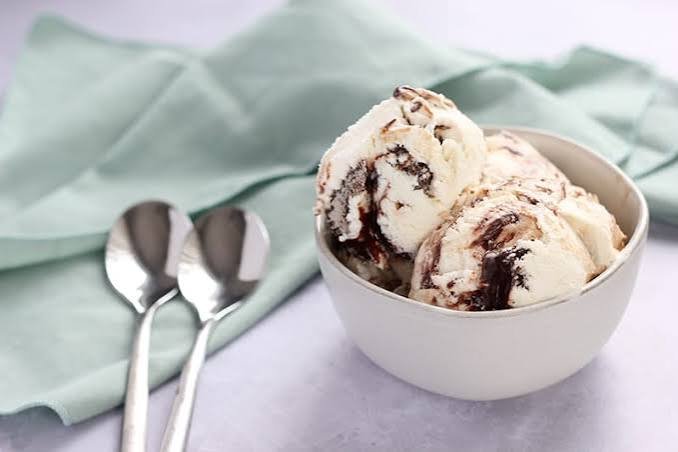
No Churn Fudgy Brownie Batter Ice Cream
If rich chocolate brownies and creamy ice cream are two of your favorite desserts, this No-Churn Fudgy Brownie Batter Ice Cream brings them together in one irresistible treat. It has a smooth, creamy base with deep chocolate flavor, chewy brownie pieces, and ribbons of fudgy chocolate in every scoop.
The best part is how simple it is to make. You do not need an ice cream maker or any complicated equipment. With a handful of easy ingredients and a little freezer time, you can make a homemade frozen dessert that feels special enough for a summer gathering but simple enough for a weeknight craving.
Every spoonful has a wonderful mix of textures. The ice cream is soft and velvety, while the brownie chunks add rich, fudgy bites throughout. A swirl of chocolate fudge sauce makes the whole dessert even more indulgent without making the recipe complicated.
If you have been looking for an easy homemade brownie ice cream recipe without the hassle of churning, this is a delicious place to start. Keep reading for simple ingredient tips, step-by-step instructions, and helpful tricks for getting the creamiest texture possible.
Why You’ll Love This Recipe
- No ice cream maker required: This easy no-churn ice cream comes together with simple kitchen tools and freezes beautifully.
- Rich brownie flavor: Chocolate brownie pieces and fudgy chocolate create a dessert that tastes like a brownie fresh from the oven, but in a cold, creamy form.
- Creamy and smooth: Whipped cream gives the ice cream a light, velvety texture that stays scoopable after freezing.
- Easy ingredients: You only need a few common ingredients, making this a convenient homemade dessert when a chocolate craving hits.
- Perfect for brownie lovers: The combination of creamy vanilla-chocolate ice cream, fudgy brownie chunks, and chocolate swirls gives every bite plenty of texture.
- Great make-ahead dessert: Since the ice cream needs several hours to freeze, it is ideal for preparing ahead of a family dinner, party, or weekend treat.
- Easy to customize: Add extra brownie pieces, chocolate chips, fudge sauce, or your favorite toppings to make each batch your own.
Ingredients
Here is what you need to make this creamy no-churn brownie batter ice cream. Most of the ingredients are easy to find, and each one has a simple job in creating the right flavor and texture.
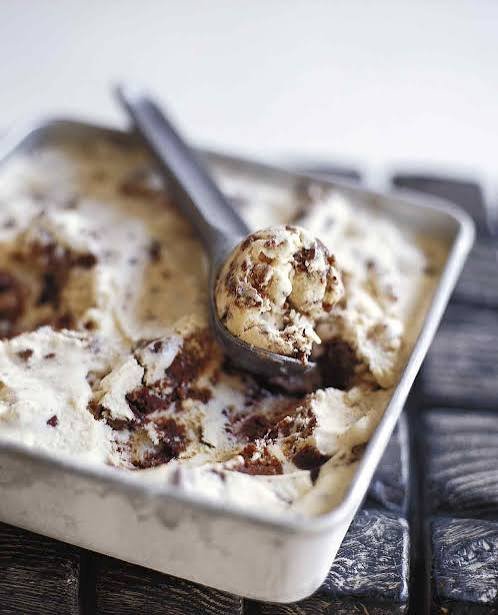
For the Ice Cream Base
- 2 cups heavy whipping cream: The foundation of the creamy ice cream base. Use cold heavy cream for the best whipping results.
- 1 can sweetened condensed milk, 14 ounces: Adds sweetness and helps create a rich, smooth texture without cooking a custard.
- 1 teaspoon pure vanilla extract: Balances the chocolate and adds a soft vanilla flavor.
- 1/2 cup unsweetened cocoa powder: Gives the ice cream its deep chocolate taste. Use good-quality cocoa for a richer result.
- 1/4 cup creamy peanut butter: Adds extra richness and gives the brownie batter flavor a subtle nutty note.
- 1/3 cup powdered sugar: Helps sweeten and thicken the chocolate mixture without adding a grainy texture.
For the Brownie Pieces and Fudge Swirl
- 1 cup prepared fudgy brownies, cut into small pieces: Homemade or store-bought brownies both work well. Choose brownies that are soft and chewy rather than cakey.
- 1/2 cup chocolate fudge sauce: Creates rich chocolate ribbons throughout the ice cream.
- 2 tablespoons mini chocolate chips: Optional, but they add a pleasant little crunch and extra chocolate flavor.
For Serving
- Extra brownie pieces: Optional for topping each scoop.
- Chocolate fudge sauce: Drizzle over the finished ice cream just before serving.
- Whipped cream: Optional for a classic ice cream sundae finish.
Ingredient Notes & Substitutions
A few small ingredient choices can make a noticeable difference in the texture and flavor of your no-churn ice cream. Here are some helpful tips before you start.
Heavy Whipping Cream
Use heavy whipping cream with enough fat to whip into firm, fluffy peaks. Keep it refrigerated until you are ready to use it. For the lightest ice cream texture, avoid letting the cream sit at room temperature for too long.
If needed, heavy cream can be used in place of heavy whipping cream as long as it has a similar fat content.
Sweetened Condensed Milk
Sweetened condensed milk provides both sweetness and creaminess, so it is an important part of the no-churn base. Do not substitute it with evaporated milk. They are very different ingredients and will not produce the same texture.
Cocoa Powder
Unsweetened cocoa powder gives the ice cream its chocolate flavor without adding extra sweetness. Natural cocoa powder works well, while Dutch-process cocoa can give the finished dessert a darker color and smoother chocolate taste.
Peanut Butter
Creamy peanut butter adds richness and a subtle nutty flavor that pairs beautifully with chocolate. If you prefer a nut-free version, simply leave it out and add a little extra cocoa powder if desired.
Avoid using very dry or overly thick natural peanut butter unless it has been thoroughly stirred and is easy to blend.
Brownies
This is a great recipe for using leftover brownies. Homemade or store-bought brownies both work. For the best texture, use fudgy brownies with a soft center.
Cut the brownies into small bite-sized pieces. Large chunks can become difficult to scoop once frozen.
For a gluten-free version, use certified gluten-free brownies and check the labels on your other ingredients.
Chocolate Fudge Sauce
Store-bought fudge sauce keeps this recipe quick and convenient. You can also use homemade chocolate sauce if you have some on hand.
For a stronger chocolate flavor, add a little extra fudge sauce between the layers instead of mixing it completely into the base.
Mini Chocolate Chips
These are optional, but they add small pockets of chocolate throughout the ice cream. Regular chocolate chips can also work, although mini chips distribute more evenly.
For a dairy-free version, use dairy-free whipping cream, sweetened condensed milk made specifically for dairy-free recipes, dairy-free brownies, and dairy-free chocolate products. Always check ingredient labels carefully when preparing food for an allergy.
Kitchen Tools Needed
You do not need an ice cream maker for this recipe. A few basic kitchen tools are all you need to prepare the creamy chocolate base and assemble the brownie layers.
- Large mixing bowl: Gives you enough room to combine the ingredients without making a mess.
- Electric hand mixer or stand mixer: Makes whipping the heavy cream quick and easy. A sturdy whisk can work too, although it takes more effort.
- Rubber spatula: Ideal for gently folding the whipped cream into the chocolate mixture without knocking out too much air.
- Measuring cups and spoons: Helpful for keeping the ingredient ratios accurate.
- Small microwave-safe bowl: Useful for gently warming the fudge sauce if it is too thick to drizzle.
- Loaf pan or freezer-safe container: A metal loaf pan works especially well because its long, shallow shape makes layering and scooping easy.
- Parchment paper: Optional, but lining the container can make the frozen ice cream easier to lift out.
- Ice cream scoop: Not required for making the recipe, but helpful for serving neat, rounded scoops.
Helpful Tip
Chill your mixing bowl and beaters for about 10 to 15 minutes before whipping the cream if your kitchen is warm. Cold equipment helps the cream whip faster and hold its shape better.
Step-by-Step Instructions
1. Prepare the Brownie Pieces
Cut the brownies into small, bite-sized pieces and set them aside. If the brownies are very soft, chill them for 15 to 20 minutes first. This makes them easier to cut and helps them hold their shape when folded into the ice cream.
2. Make the Chocolate Mixture
In a medium bowl, combine the sweetened condensed milk, cocoa powder, creamy peanut butter, powdered sugar, and vanilla extract.
Whisk until the mixture looks smooth and evenly blended. Make sure there are no dry pockets of cocoa powder or streaks of peanut butter remaining.
The mixture should be thick, glossy, and rich in color.
3. Whip the Cream
Pour the cold heavy whipping cream into a large mixing bowl.
Using an electric mixer, beat the cream on medium-high speed until firm peaks form. When you lift the beaters, the whipped cream should hold its shape without looking grainy.
Do not overbeat the cream. Once firm peaks form, stop mixing.
4. Fold the Mixtures Together
Add about one-third of the whipped cream to the chocolate mixture and gently fold it in with a rubber spatula.
Once loosened, add the remaining whipped cream in two additions. Fold gently from the bottom of the bowl upward until the mixture is smooth and evenly combined.
Avoid vigorous stirring. The goal is to keep as much air in the whipped cream as possible so the finished ice cream stays light and creamy.
5. Add the Brownie Pieces
Gently fold most of the brownie pieces into the ice cream mixture, reserving a handful for layering and topping.
If you are using mini chocolate chips, fold them in at this stage as well.
Do not overmix. A few visible brownie pieces throughout the mixture will give you better texture in every scoop.
6. Layer the Ice Cream
Spread about half of the ice cream mixture into a freezer-safe loaf pan or container.
Drizzle several spoonfuls of chocolate fudge sauce over the surface. Add a few brownie pieces, then use a knife or skewer to make a few gentle swirls through the mixture.
Add the remaining ice cream mixture and repeat with another layer of fudge sauce and brownie pieces.
Finish with a light drizzle of fudge sauce and the remaining brownie pieces.
7. Create the Fudge Swirls
Use the tip of a butter knife to gently swirl the fudge sauce through the top layer.
Do not stir deeply or completely blend the sauce into the ice cream. A few loose swirls create attractive ribbons of chocolate and give you pockets of fudgy flavor when you scoop it later.
8. Cover and Freeze
Cover the container tightly with plastic wrap or a secure lid.
Place it in the freezer for at least 6 hours, or preferably overnight, until the ice cream is firm throughout.
For the smoothest texture, keep the container level while it freezes and avoid repeatedly opening the freezer during the first few hours.
9. Let It Soften Before Scooping
When you are ready to serve, let the ice cream sit at room temperature for about 5 to 10 minutes.
This short resting time allows the ice cream to soften slightly, making it much easier to scoop while keeping the brownie pieces firm and fudgy.
Common Mistakes to Avoid
Overwhipping the cream: Stop as soon as firm peaks form. Overwhipped cream can become grainy and make the finished ice cream less smooth.
Folding too aggressively: Gentle folding preserves the air in the whipped cream. Stirring too hard can make the mixture dense.
Using warm fudge sauce: Very warm sauce can soften the ice cream mixture too much. Let warmed sauce cool slightly before layering.
Cutting brownies too large: Large chunks can make the frozen ice cream difficult to scoop. Small pieces distribute more evenly.
Skipping enough freezer time: No-churn ice cream needs enough time to become firm. Give it at least 6 hours for the best consistency.
Expert Tips
A few simple techniques can make your homemade no-churn ice cream even creamier and easier to scoop.
Keep Everything Cold
Cold heavy cream whips more efficiently and creates a stronger base for the ice cream. Keep the cream refrigerated until the moment you are ready to use it.
If your kitchen is warm, chill the mixing bowl and beaters before starting.
Do Not Overmix the Base
Once the whipped cream is folded into the chocolate mixture, use slow, gentle movements. Overmixing removes the air that gives no-churn ice cream its soft, creamy texture.
Stop folding as soon as you no longer see obvious streaks of whipped cream.
Use Fudgy Brownies
Soft, chewy brownies are better than cakey brownies for this recipe. They stay pleasantly tender even after freezing and give the ice cream those rich brownie bites that make every scoop interesting.
If your brownies are especially soft, chill them briefly before cutting.
Make the Brownie Pieces Small
Small brownie chunks spread throughout the ice cream more evenly. They also make the dessert easier to scoop and eat.
Aim for pieces around 1/2 inch rather than large cubes.
Add the Fudge Sauce in Layers
Instead of mixing all the fudge sauce directly into the ice cream, layer it between portions of the base. This creates distinct chocolate ribbons throughout the finished dessert.
A gentle swirl is enough. Too much mixing will disappear the contrast between the creamy base and fudge sauce.
Choose a Shallow Freezer Container
A loaf pan or another wide, shallow freezer-safe container helps the ice cream freeze more evenly. It also makes it easier to scoop out attractive portions.
Cover the surface well to protect the ice cream from freezer odors and ice crystals.
Give It a Few Minutes Before Scooping
Homemade ice cream can become quite firm after several hours in the freezer. Let it rest on the counter for 5 to 10 minutes before scooping.
You should be able to press the scoop into the ice cream without forcing it.
Add Toppings Just Before Serving
For extra texture, finish each serving with brownie crumbs, a little fudge sauce, chocolate chips, or a spoonful of whipped cream. Adding toppings at the last minute keeps them fresh and gives the dessert a more polished presentation.
Variations
This no-churn fudgy brownie batter ice cream is easy to customize, so you can adjust the flavor and texture to suit your preferences.
Peanut Butter Chocolate Brownie Ice Cream
For a stronger peanut butter flavor, swirl a few spoonfuls of creamy peanut butter into the ice cream before freezing. Add extra brownie pieces for a classic chocolate and peanut butter combination.
Double Chocolate Brownie Ice Cream
Add extra mini chocolate chips to the ice cream base and finish the top with additional fudge sauce. For an even deeper chocolate flavor, replace part of the brownie pieces with chocolate brownie bites.
Chocolate Mint Brownie Ice Cream
Add 1/2 teaspoon of peppermint extract to the chocolate mixture. Start with a small amount because peppermint can quickly become overpowering. Stir in chocolate chips and brownie pieces for a refreshing variation.
Salted Chocolate Brownie Ice Cream
Sprinkle a small pinch of flaky sea salt over each layer of fudge sauce. The salt balances the sweetness and makes the chocolate flavor taste richer.
Gluten-Free Brownie Ice Cream
Use gluten-free brownies and confirm that the cocoa powder, chocolate chips, fudge sauce, and other packaged ingredients are gluten-free. This gives you an easy gluten-free dessert without changing the basic method.
Dairy-Free Version
Use dairy-free heavy whipping cream, dairy-free sweetened condensed milk, dairy-free brownies, and chocolate products made without dairy. Choose products that work well for frozen desserts and check labels carefully if allergies are a concern.
Nut-Free Version
Simply leave out the peanut butter and choose brownies, chocolate chips, and fudge sauce that are made without nuts or produced in a suitable nut-free facility when necessary.
Brownie Sundae Style
Turn each scoop into a full dessert by adding whipped cream, warm fudge sauce, brownie crumbs, chocolate chips, and a few chopped nuts if desired.
Healthier-Inspired Option
For a lighter variation, use smaller portions and serve the ice cream with fresh strawberries or raspberries. You can also reduce the amount of added chocolate toppings while keeping the brownie pieces for texture.
Keep in mind that changing the main ingredients can affect the sweetness and frozen texture, so substitutions may require a little adjustment.
Storage Instructions
Proper storage helps keep your no-churn fudgy brownie batter ice cream creamy and protects it from freezer burn.
Freezer Storage
Store the ice cream in a tightly sealed, freezer-safe container. Press a piece of plastic wrap directly against the surface before adding the lid if you want extra protection from ice crystals.
For the best texture and flavor, enjoy the ice cream within 1 to 2 weeks. It can remain frozen longer, but the texture may gradually become firmer and less creamy.
Before Serving
Homemade ice cream usually becomes quite firm after spending several hours in the freezer. Let the container sit at room temperature for about 5 to 10 minutes before scooping.
If it is still too hard, give it another few minutes. Avoid leaving the entire container out for an extended period.
Refreezing
It is best to scoop only what you plan to eat and return the remaining ice cream to the freezer promptly. Repeated thawing and refreezing can create ice crystals and make the texture less smooth.
Can You Store It in the Refrigerator?
No. This recipe is designed to be stored frozen. Keeping it in the refrigerator will cause the ice cream to melt and lose its intended texture.
If the ice cream has completely melted, it is better not to refreeze it because the finished texture will not be the same.
Frequently Asked Questions
Can I make this brownie batter ice cream without an ice cream maker?
Yes. That is one of the main advantages of this recipe. The whipped cream and sweetened condensed milk create a creamy base that freezes without traditional churning.
How long does no-churn ice cream take to freeze?
Plan on at least 6 hours for the ice cream to become firm. Freezing it overnight gives you an even better consistency and makes it easier to prepare ahead.
Why is my homemade ice cream too hard?
No-churn ice cream can become firm when it is stored in a very cold freezer for several hours. Let it sit at room temperature for 5 to 10 minutes before scooping.
Can I use store-bought brownies?
Absolutely. Store-bought fudgy brownies are a convenient option and work well in this recipe. Choose soft, chewy brownies rather than very cakey ones.
Can I use brownie batter instead of baked brownies?
For this recipe, baked brownie pieces are the better choice. Using raw homemade brownie batter can raise food safety concerns because of ingredients such as uncooked flour and eggs. If you want a brownie batter flavor, use a properly prepared edible brownie batter made with heat-treated flour and no raw eggs.
Can I make this ice cream ahead of time?
Yes. It is an excellent make-ahead dessert. Prepare it the day before serving and keep it covered in the freezer until you are ready to scoop.
How can I make the ice cream extra chocolatey?
Use high-quality unsweetened cocoa powder, add extra mini chocolate chips, and create generous swirls of chocolate fudge sauce between the layers.
Can I leave out the peanut butter?
Yes. If you do not want peanut butter, simply omit it. The chocolate and brownie flavors will still make a rich and creamy dessert.
How do I prevent ice crystals from forming?
Use a freezer-safe airtight container and cover the surface closely before sealing it. Keeping the container tightly covered also helps prevent the ice cream from absorbing freezer odors.
What is the best container for no-churn ice cream?
A metal loaf pan is a convenient choice because its shallow shape helps the ice cream freeze evenly. A freezer-safe plastic or glass container with a tight-fitting lid also works well.
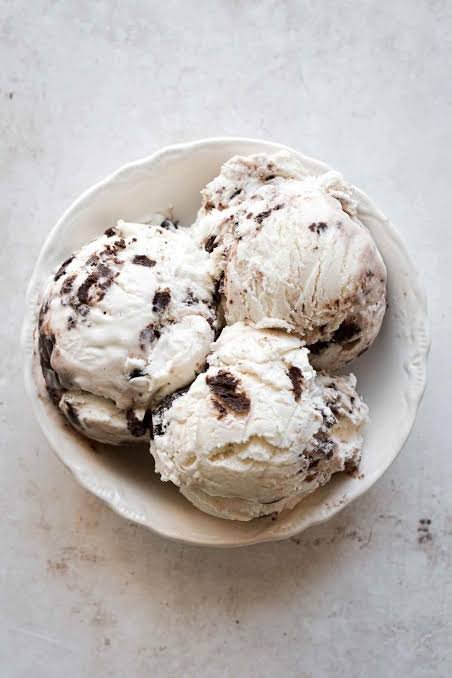

No Churn Fudgy Brownie Batter Ice Cream
Ingredients
Method
- Cut the brownies into small bite-sized pieces. Set aside a few pieces for layering and topping
- In a medium bowl, whisk together the sweetened condensed milk, cocoa powder, peanut butter, powdered sugar, and vanilla until smooth
- Pour the cold heavy whipping cream into a large bowl. Beat with an electric mixer until firm peaks form. Do not overbeat
- Gently fold about one-third of the whipped cream into the chocolate mixture to loosen it
- Fold in the remaining whipped cream in two additions. Use a rubber spatula and mix gently until no large streaks remain
- Fold in most of the brownie pieces and the mini chocolate chips, if using
- Spread half of the mixture into a freezer-safe loaf pan or container. Drizzle with some fudge sauce and add a few brownie pieces
- Add the remaining ice cream mixture and repeat with more fudge sauce and brownie pieces.
- Use a butter knife to gently swirl the fudge sauce through the top. Do not overmix.
- Cover tightly and freeze for at least 6 hours, preferably overnight
- Let the ice cream stand at room temperature for 5 to 10 minutes before scooping. Serve with extra brownie pieces, fudge sauce, or whipped cream if desired
Video
Notes
- Keep the heavy cream cold for the best whipped texture.
- Use fudgy brownies rather than cakey brownies for soft brownie bites.
- Fold the whipped cream gently to keep the ice cream light and creamy.
- Do not use hot fudge sauce when assembling the ice cream. Let it cool slightly if warmed.
- Store leftovers tightly covered in the freezer and enjoy within 1 to 2 weeks for the best texture.
- Calorie information is an estimate and can vary depending on the specific brands and quantities used.
Final Thoughts
No-Churn Fudgy Brownie Batter Ice Cream is the kind of homemade dessert that makes a simple chocolate craving feel a little more special. The creamy chocolate base, soft brownie pieces, and rich fudge swirls create a satisfying combination of flavors and textures without requiring an ice cream maker.
It is also easy to prepare ahead, which makes it a handy dessert for summer gatherings, family dinners, or a quiet night at home. Keep a container in the freezer, and you have a homemade chocolate treat ready whenever the craving strikes.
For the best results, remember to keep your cream cold, fold gently, use fudgy brownie pieces, and give the ice cream a few minutes to soften before scooping.
If you make this recipe, try your favorite variation or topping and enjoy it your own way. A little extra fudge sauce and a few brownie crumbs on top make a particularly tempting finish.

One Comment