Chocolate Cream Pie Cookie Cups
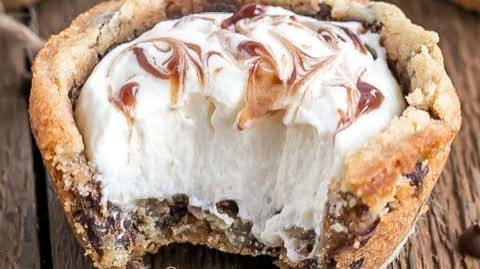
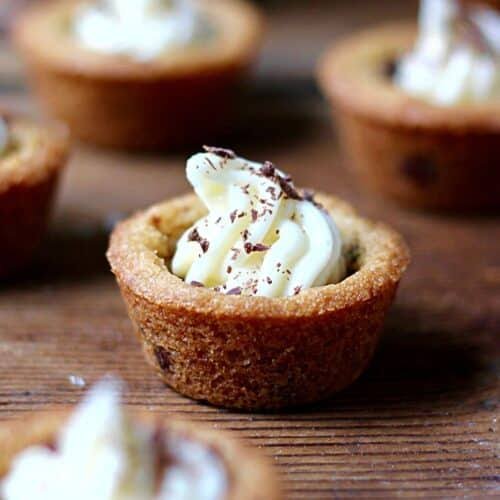
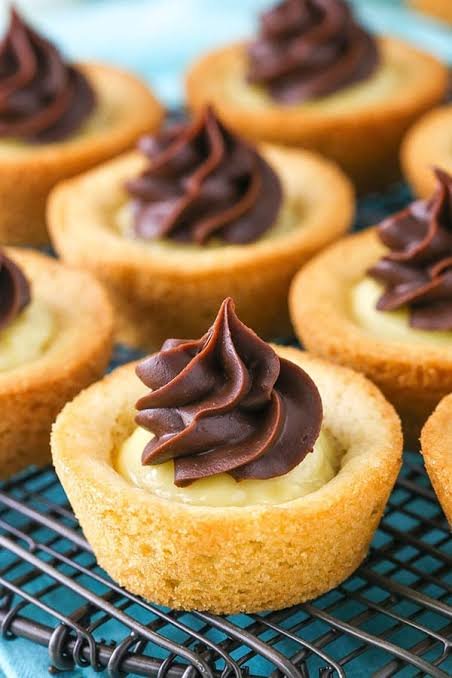
There is something wonderfully tempting about a dessert that combines two classic treats in one bite. These Chocolate Cream Pie Cookie Cups feature soft, rich chocolate cookie cups filled with a silky chocolate cream filling and finished with a light swirl of whipped cream. Each little cup has a tender cookie texture on the outside and a cool, creamy center that makes every bite feel like a miniature chocolate pie.
What makes this recipe especially appealing is that you get all the comforting flavors of a classic chocolate cream pie without having to fuss with a full-size pie crust. The individual cookie cups are easy to portion, simple to serve, and perfect for parties, holidays, family gatherings, or whenever you want a homemade chocolate dessert that feels a little special. The combination of buttery chocolate cookie, smooth pudding-style filling, fluffy whipped cream, and delicate chocolate shavings creates a beautiful contrast of textures.
If you enjoy chocolate desserts but want something more interesting than an ordinary cookie, these cookie cups are a wonderful choice. They look elegant on a dessert table, yet the preparation is approachable enough for beginner bakers. Better still, the individual portions make them easy to chill ahead of time and serve when you are ready.
Why You’ll Love This Recipe
- Two desserts in one: These Chocolate Cream Pie Cookie Cups combine the rich, tender texture of chocolate cookies with the creamy filling you expect from a classic chocolate cream pie.
- Easy individual portions: Instead of slicing and serving a whole pie, each dessert is already portioned into its own little cookie cup.
- Rich chocolate flavor: Cocoa in the cookie base and chocolate in the creamy filling give these treats a satisfying chocolate taste without making them overly heavy.
- Creamy and crunchy in every bite: The soft cookie shell contrasts beautifully with the smooth chocolate filling and fluffy whipped cream topping.
- Great for make-ahead desserts: The cookie cups and filling can be prepared ahead, making this recipe especially convenient when you are entertaining.
- Beginner-friendly: You do not need advanced baking skills or complicated decorating techniques. A standard muffin pan does most of the work.
- Perfect for special occasions: Serve them at birthdays, holidays, dinner parties, potlucks, or casual family gatherings when you want a dessert that looks impressive without being difficult.
- Easy to customize: Add chocolate curls, mini chocolate chips, crushed cookies, chopped nuts, or a drizzle of chocolate sauce to give each batch your own personal touch.
Ingredients
The ingredients for these Chocolate Cream Pie Cookie Cups are simple and easy to find. You will need a few pantry staples for the chocolate cookie cups, plus ingredients for the smooth cream filling and finishing touches.
For the Chocolate Cookie Cups
- 1 cup all-purpose flour
- 1/3 cup unsweetened cocoa powder
- 1/2 teaspoon baking soda
- 1/4 teaspoon salt
- 1/2 cup unsalted butter, softened
- 1/2 cup granulated sugar
- 1/4 cup packed light brown sugar
- 1 large egg
- 1 teaspoon vanilla extract
For the Chocolate Cream Filling
- 1/2 cup granulated sugar
- 1/4 cup unsweetened cocoa powder
- 3 tablespoons all-purpose flour
- 2 cups whole milk
- 2 large egg yolks
- 2 tablespoons unsalted butter
- 1 teaspoon vanilla extract
- 1/4 teaspoon salt
For the Whipped Cream Topping
- 1 cup cold heavy whipping cream
- 2 tablespoons powdered sugar
- 1/2 teaspoon vanilla extract
For Garnishing
- Chocolate shavings or finely grated chocolate
- Mini chocolate chips, optional
- Extra whipped cream, optional
Ingredient Notes & Substitutions
A few small ingredient choices can make a noticeable difference in the texture and flavor of these Chocolate Cream Pie Cookie Cups. Here are some helpful tips before you start baking.
All-Purpose Flour
All-purpose flour gives the cookie cups enough structure to hold the creamy filling while keeping the shells tender. Measure the flour carefully by spooning it into a measuring cup and leveling the top.
Unsweetened Cocoa Powder
Regular unsweetened cocoa powder works well here and gives the cookie cups a deep chocolate flavor. Avoid using sweetened cocoa drink mix, which can change both the sweetness and texture of the cookies.
Butter
Use softened unsalted butter for the cookie dough. It should be soft enough to press easily with your finger but not melted. Melted butter can make the cookie cups spread too much during baking.
If needed, salted butter can be used. Simply reduce or omit the added salt in the cookie mixture.
Granulated and Brown Sugar
Using both sugars gives the cookie cups a balanced sweetness and a pleasantly soft texture. Brown sugar also adds a subtle caramel-like note that complements the chocolate.
Egg
The egg helps bind the cookie dough and gives the baked cups structure. For the best results, use a large egg at room temperature.
Vanilla Extract
Vanilla rounds out the chocolate flavor and adds a warm, bakery-style aroma. Pure vanilla extract is ideal, but imitation vanilla can work in a pinch.
Whole Milk
Whole milk creates a richer, creamier chocolate filling. You can substitute 2% milk if necessary, although the filling may be slightly less rich.
For a dairy-free version, use an unsweetened plant-based milk such as oat milk or almond milk. Choose one with a neutral flavor for the best result.
Heavy Whipping Cream
Cold heavy whipping cream is important for making a fluffy topping that holds its shape. Keep the cream refrigerated until you are ready to whip it.
For a shortcut, prepared whipped topping can be used instead of homemade whipped cream.
Powdered Sugar
Powdered sugar sweetens the whipped cream while helping it stay smooth. If you prefer a less sweet dessert, reduce the amount slightly.
Chocolate Garnish
Chocolate shavings make the finished cookie cups look polished and add a little extra chocolate flavor. You can also use mini chocolate chips, finely chopped chocolate, or a light drizzle of melted chocolate.
Gluten-Free Option
For gluten-free Chocolate Cream Pie Cookie Cups, use a reliable 1-to-1 gluten-free baking flour in place of the all-purpose flour. Make sure the cocoa powder and other packaged ingredients are certified gluten-free if cross-contact is a concern.
Budget-Friendly Tip
You do not need premium chocolate products for this recipe. Good-quality unsweetened cocoa powder and basic baking chocolate work beautifully. If you already have cocoa powder and chocolate chips in your pantry, they can also be used to decorate the finished desserts.
Kitchen Tools Needed
You do not need a long list of specialty equipment to make these Chocolate Cream Pie Cookie Cups. A few basic kitchen tools are enough to shape the cookie cups, prepare the filling, and finish the dessert.
- 12-cup muffin pan: This gives the cookie dough its individual cup shape. A standard metal muffin pan works well.
- Mixing bowls: Use one medium bowl for the dry ingredients and another larger bowl for the cookie dough.
- Electric hand mixer or stand mixer: Helpful for creaming the butter and sugars until light and smooth. You can mix by hand with a sturdy whisk and spatula, but it will require a little more effort.
- Measuring cups and spoons: Accurate measurements are important, especially for flour, cocoa powder, and leavening ingredients.
- Rubber spatula: Useful for scraping the bowl and gently mixing the dough without overworking it.
- Small saucepan: Needed to prepare the smooth chocolate cream filling on the stovetop.
- Whisk: A whisk helps prevent lumps while the chocolate filling cooks.
- Cooling rack: Allows the baked cookie cups to cool evenly before filling.
- Piping bag: Optional, but useful for adding the whipped cream neatly to each cookie cup.
- Cookie scoop: Optional but helpful for dividing the dough into evenly sized portions. An even amount of dough helps all the cookie cups bake at the same rate.
- Small spoon or rounded measuring spoon: Useful for gently pressing the centers of the warm cookies to create the cup shape if you do not have a dedicated tool.
Step-by-Step Instructions
Making these Chocolate Cream Pie Cookie Cups is easier when you work in stages. Bake the cookie shells first, prepare the chocolate cream filling while they cool, then add the whipped cream just before serving.
1. Prepare the Oven and Muffin Pan
Preheat your oven to 350°F (175°C). Lightly grease a standard 12-cup muffin pan, making sure the sides and bottoms are coated.
A light coating of nonstick spray helps the baked cookie cups release cleanly without making the edges greasy.
2. Mix the Dry Ingredients
In a medium bowl, whisk together the all-purpose flour, cocoa powder, baking soda, and salt.
Mix until the cocoa is evenly distributed and there are no visible pockets of flour. Set the bowl aside while you prepare the cookie dough.
3. Cream the Butter and Sugars
In a large mixing bowl, beat the softened butter, granulated sugar, and brown sugar until the mixture becomes smooth and creamy.
This usually takes about 2 to 3 minutes with an electric mixer. Scrape down the sides of the bowl as needed so everything blends evenly.
The butter should be soft, but it should not look melted or oily.
4. Add the Egg and Vanilla
Beat in the egg and vanilla extract until fully incorporated.
The mixture may look slightly loose at this point, which is normal. Make sure the egg is completely blended before adding the dry ingredients.
5. Make the Chocolate Cookie Dough
Gradually add the dry ingredients to the butter mixture. Mix on low speed just until a soft chocolate dough forms.
Do not overmix. Once you no longer see streaks of dry flour, stop mixing. Overworking the dough can make the finished cookie cups tougher than you want.
6. Divide the Dough
Use a cookie scoop or spoon to divide the dough evenly among the 12 muffin cups.
Place the dough in the center of each cup and gently press it down and slightly up the sides. You want to create a small hollow in the middle that will eventually hold the chocolate cream filling.
Try to keep the dough thickness fairly even around each cup.
7. Bake the Cookie Cups
Place the muffin pan in the preheated oven and bake for approximately 10 to 12 minutes.
The cookie cups should look set around the edges while the centers remain slightly soft. Avoid waiting for the centers to look completely firm because they will continue cooking as they cool.
8. Shape the Centers While Warm
Remove the pan from the oven. If the centers have puffed up, gently press them down while the cookies are still warm.
Use the back of a small spoon, the end of a wooden spoon, or a rounded measuring spoon to create a deeper indentation.
Work gently so you do not press completely through the cookie base.
Let the cookie cups cool in the pan for several minutes before transferring them to a cooling rack.
9. Prepare the Chocolate Cream Filling
While the cookie cups cool, combine the sugar, cocoa powder, and flour in a small saucepan.
Gradually whisk in the whole milk until smooth. Add the egg yolks and salt, then place the saucepan over medium heat.
Cook while whisking frequently. As the mixture heats, it will gradually thicken into a smooth chocolate custard.
Do not leave the saucepan unattended. Scraping the bottom and whisking regularly helps prevent scorching and lumps.
10. Finish the Filling
Once the chocolate mixture has thickened enough to coat the back of a spoon, remove it from the heat.
Stir in the butter and vanilla extract until the butter melts completely and the filling becomes glossy and smooth.
If you notice any small lumps, pass the filling through a fine-mesh sieve while it is still warm.
Allow the chocolate filling to cool until it is no longer hot before adding it to the cookie cups.
11. Fill the Cookie Cups
Spoon or pipe the cooled chocolate cream filling into the center of each cookie cup.
Fill them generously, but leave a little room at the top for the whipped cream.
If the filling is still very warm, wait a little longer. Hot filling can soften the cookie shells and make the whipped cream melt.
12. Make the Whipped Cream
Pour the cold heavy whipping cream into a chilled mixing bowl. Add the powdered sugar and vanilla extract.
Beat until soft to medium peaks form.
Stop mixing as soon as the cream holds its shape. Overwhipping can make the cream grainy and eventually turn it into butter.
13. Add the Whipped Cream
Spoon or pipe a small mound of whipped cream over each chocolate-filled cookie cup.
For a neat bakery-style finish, use a piping bag fitted with a star tip. For a more relaxed homemade look, simply spoon the whipped cream onto each one.
14. Garnish and Chill
Finish the cookie cups with chocolate shavings, grated chocolate, or a few mini chocolate chips.
For the best texture, refrigerate the finished cookie cups for at least 30 minutes before serving. The chilled filling becomes firmer and creamier, while the cookie shell stays tender.
Common Mistakes to Avoid
Do not overbake the cookie cups. The centers should remain slightly soft when they come out of the oven.
Do not skip shaping the centers. Pressing the warm cookies creates enough space for the chocolate filling.
Do not add hot filling to the cookies. Allow it to cool first so the cookie shells do not become soggy.
Do not overwhip the cream. Stop once it reaches soft to medium peaks for a smooth, fluffy topping.
Do not overfill the muffin pan with dough. Even portions create evenly shaped cookie cups that are easier to fill and serve.
Expert Tips for Perfect Chocolate Cream Pie Cookie Cups
A few simple techniques can make these cookie cups noticeably better. The goal is a tender chocolate shell, a smooth cream filling, and a light topping that stays fluffy.
Use Soft, Not Melted, Butter
The butter should be soft enough to cream easily with the sugars but still hold its shape. If it is melted, the dough can become too loose and the cookie cups may spread instead of keeping their shape.
Measure Flour Correctly
Too much flour can make the cookie shells dry and dense. For the most consistent results, spoon the flour into your measuring cup and level it with the back of a knife rather than scooping directly from the container.
Give the Cookies a Deep Center
The indentation is what turns an ordinary chocolate cookie into a proper cookie cup. Press the centers while the cookies are still warm and flexible. If they cool too much, they become harder to shape without cracking.
Watch the Chocolate Filling Carefully
Cook the filling over medium heat and whisk frequently. The mixture can thicken quickly near the end, so stay close to the saucepan. Once it reaches a creamy custard consistency, remove it from the heat.
Strain the Filling for Extra Smoothness
If you want an especially silky chocolate cream, pour the cooked filling through a fine-mesh sieve before cooling it. This catches any tiny bits of cooked egg or flour and leaves you with a smooth, velvety filling.
Cool the Filling Properly
The chocolate filling should be cool or just slightly warm before it goes into the cookie cups. If it is too hot, it can soften the cookie shell and cause the whipped cream to lose its shape.
Chill Before Serving
A short chill gives the filling time to firm up and makes the cookie cups easier to handle. It also creates a pleasant contrast between the tender chocolate cookie and cool, creamy center.
Use Cold Cream
For the fluffiest whipped cream, start with heavy cream straight from the refrigerator. A chilled mixing bowl can also help the cream whip faster and hold its shape longer.
Add the Topping Just Before Serving
For the freshest presentation, pipe the whipped cream shortly before serving. If you are preparing the cookie cups ahead of time, keep them refrigerated and add the final chocolate garnish when ready to serve.
Make Even-Sized Cookie Cups
Using a cookie scoop helps divide the dough evenly. Consistent portions mean the cookie cups finish baking at about the same time and look more uniform when arranged on a dessert platter.
Add a Little Extra Chocolate
For a richer chocolate experience, use finely grated chocolate over the whipped cream. The tiny chocolate pieces add a delicate texture without overpowering the creamy filling.
Let Them Rest Before Serving
If the cookie cups have been refrigerated for several hours, let them sit at room temperature for about 5 to 10 minutes before serving. This takes the chill off the cookie while keeping the filling pleasantly cool and creamy.
Variations
These Chocolate Cream Pie Cookie Cups are easy to customize, so you can adjust the flavors, toppings, and ingredients to suit different occasions or dietary preferences.
Peanut Butter Chocolate Cookie Cups
Add a small spoonful of creamy peanut butter to the center of each cookie cup before adding the chocolate filling. The salty, nutty peanut butter pairs beautifully with the rich chocolate flavors.
For extra texture, sprinkle chopped roasted peanuts over the whipped cream.
Double Chocolate Version
For an even richer dessert, add a handful of mini chocolate chips to the cookie dough before baking. Finish the chilled cookie cups with chocolate curls or a light drizzle of melted chocolate.
Mint Chocolate Cookie Cups
Add a small amount of peppermint extract to the chocolate cream filling. Start with just a few drops because peppermint can become quite strong.
Top each cookie cup with whipped cream and finely chopped dark chocolate.
Chocolate Oreo-Style Version
Crush chocolate sandwich cookies and sprinkle the crumbs over the whipped cream. You can also mix a small amount of cookie crumbs into the chocolate filling for extra crunch.
Salted Chocolate Version
Finish each cookie cup with a very small pinch of flaky sea salt and chocolate shavings. The salt brings out the cocoa flavor while balancing the sweetness of the filling.
Caramel Chocolate Cookie Cups
Drizzle a little caramel sauce over the whipped cream before serving. Add a pinch of flaky salt for a sweet and salty combination.
Gluten-Free Version
Replace the all-purpose flour with a quality 1-to-1 gluten-free baking flour designed for cookies. Check all packaged ingredients carefully if you need the finished dessert to be completely gluten-free.
Dairy-Free Version
Use plant-based butter in the cookie dough and a suitable dairy-free milk for the chocolate filling. Coconut-based or other dairy-free whipping cream can be used for the topping.
Choose unsweetened products when possible so you can control the overall sweetness.
Lighter Version
For a slightly lighter dessert, use reduced-fat milk in the chocolate filling and a smaller amount of whipped cream on top. You can also make the cookie cups slightly smaller for naturally smaller portions.
Mini Cookie Cups
Use a mini muffin pan to create bite-sized chocolate cream pie cups. Reduce the baking time and begin checking them early because smaller cookies will cook faster.
These are especially convenient for parties, dessert tables, and potlucks.
Holiday Version
Decorate the finished cookie cups according to the occasion. Use crushed peppermint candies for winter gatherings, colorful sprinkles for birthdays, or finely chopped nuts for a cozy holiday dessert.
Fresh Berry Topping
Add a few thinly sliced strawberries or fresh raspberries on top of the whipped cream. The bright fruit provides a refreshing contrast to the rich chocolate filling.
Mocha Chocolate Cups
Add a small amount of instant espresso powder to the chocolate filling. Coffee intensifies the chocolate flavor without making the dessert taste strongly like coffee.
For the best balance, start with a small amount and adjust according to taste.
Storage Instructions
These Chocolate Cream Pie Cookie Cups are best stored chilled because the creamy filling and whipped cream topping need to stay cold.
Refrigerator Storage
Place the finished cookie cups in an airtight container and refrigerate them for up to 3 days.
If you are stacking them, place a sheet of parchment paper between layers and make sure the container has enough height so the whipped cream is not crushed.
For the best texture and appearance, keep the cookie cups covered when refrigerated. This prevents them from absorbing refrigerator odors and helps keep the cookie shells from drying out.
Make-Ahead Storage
You can prepare the chocolate cookie cups a day ahead and store them separately in an airtight container at room temperature once completely cooled.
The chocolate cream filling can also be prepared ahead and refrigerated in a covered container. Give it a gentle stir before filling the cookie cups.
For the freshest presentation, add the whipped cream and chocolate garnish shortly before serving.
Freezer Storage
The baked cookie cups can be frozen without the cream filling or whipped cream topping.
Place the completely cooled cookie cups in a freezer-safe container, separating layers with parchment paper. Freeze for up to 2 months.
Thaw them in the refrigerator or at room temperature before filling.
The finished cookie cups with chocolate cream filling can also be frozen, but the texture of the whipped cream may change after thawing. For the best results, add fresh whipped cream after the cookie cups have thawed.
How to Serve After Chilling
If the cookie cups have been refrigerated overnight, let them sit at room temperature for about 5 to 10 minutes before serving. This allows the cookie shell to soften slightly while keeping the chocolate filling cool and creamy.
Can You Reheat Them?
These cookie cups are meant to be served chilled or slightly cool, so reheating is not recommended. Heating can soften the cookie shell too much and cause the chocolate cream and whipped cream to lose their texture.
Frequently Asked Questions
Can I make Chocolate Cream Pie Cookie Cups ahead of time?
Yes. The cookie cups can be baked a day ahead and stored in an airtight container. The chocolate cream filling can also be prepared in advance and refrigerated. For the best appearance, add the whipped cream and chocolate garnish closer to serving time.
How do I keep the cookie cups from sticking to the muffin pan?
Lightly grease the muffin pan before adding the dough. A nonstick muffin pan can make removal even easier. Let the baked cookie cups cool for several minutes before carefully lifting them out.
Why did my cookie cups lose their shape?
The dough may have been too warm, or the cookie cups may have been overfilled. Make sure the butter is softened rather than melted, divide the dough evenly, and gently press the centers again while the cookies are warm.
Can I use store-bought whipped cream?
Yes. Homemade whipped cream gives the freshest flavor and texture, but prepared whipped topping can be used when you want to save time.
Can I use milk chocolate instead of dark chocolate?
Yes. Milk chocolate can be used for the garnish or added to the filling if you prefer a sweeter chocolate flavor. Keep in mind that milk chocolate will make the overall dessert sweeter.
How do I make the chocolate filling smooth?
Whisk the filling frequently while it cooks and avoid using excessively high heat. If you notice small lumps after cooking, strain the warm filling through a fine-mesh sieve before cooling.
Can I make these gluten-free?
Yes. Replace the all-purpose flour with a quality gluten-free 1-to-1 baking flour. Check the labels of your other ingredients if you need to avoid gluten completely.
Can I make these dairy-free?
Yes. Use dairy-free butter, plant-based milk, and dairy-free whipping cream. Choose products with mild flavors so they do not overpower the chocolate.
Can I use a mini muffin pan?
Yes. Mini Chocolate Cream Pie Cookie Cups are perfect for parties and bite-sized desserts. Because the smaller cookie cups bake more quickly, start checking them earlier than the standard-size version.
How long do Chocolate Cream Pie Cookie Cups last?
When stored properly in the refrigerator, the finished cookie cups are best enjoyed within about 3 days. Keep them covered in an airtight container for the best texture and freshness.
Can I freeze the cookie cups?
Yes. The baked cookie shells can be frozen for up to 2 months. For the best texture, freeze the cookie cups without the whipped cream and add fresh topping after thawing.
What can I use instead of chocolate shavings?
You can use mini chocolate chips, finely chopped chocolate, cocoa powder, crushed chocolate sandwich cookies, or a drizzle of melted chocolate. Fresh berries also make a lovely topping.
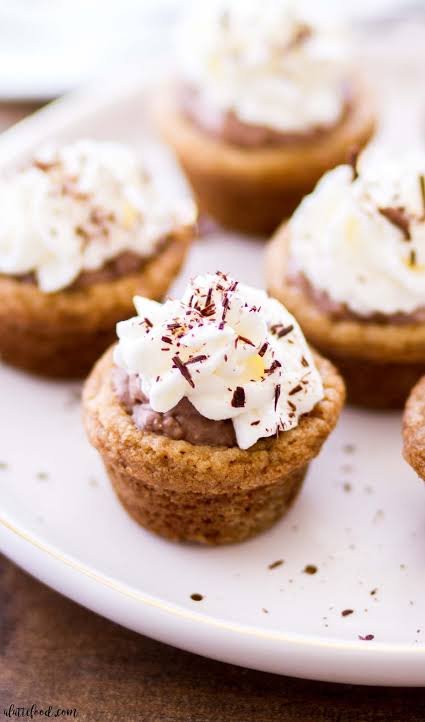

Chocolate Cream Pie Cookie Cups
Ingredients
Method
- Preheat the oven to 350°F (175°C). Lightly grease a standard 12-cup muffin pan.
- In a medium bowl, whisk together the flour, cocoa powder, baking soda, and salt.
- In a separate large bowl, beat the softened butter, granulated sugar, and brown sugar until smooth and creamy.
- Beat in the egg and vanilla extract until fully combined.
- Gradually add the dry ingredients and mix just until a soft chocolate dough forms. Avoid overmixing.
- Divide the dough evenly among the muffin cups. Press each portion gently into the bottom and slightly up the sides to create a cup shape
- Bake for 10 to 12 minutes, until the edges are set and the centers are still slightly soft.
- Remove the pan from the oven. While the cookies are warm, gently press the centers down with the back of a small spoon or rounded measuring spoon to deepen the cavities.
- Let the cookie cups cool in the pan for several minutes, then transfer them to a cooling rack.
- To make the filling, combine the sugar, cocoa powder, and flour in a small saucepan. Gradually whisk in the milk until smooth.
- Add the egg yolks and salt. Cook over medium heat, whisking frequently, until the mixture thickens into a smooth chocolate custard.
- Remove from the heat and stir in the butter and vanilla until smooth and glossy. If needed, strain the filling through a fine-mesh sieve.
- Allow the filling to cool, then spoon or pipe it into the cooled cookie cups.
- For the whipped cream, beat the cold heavy cream, powdered sugar, and vanilla until soft to medium peaks form.
- Spoon or pipe whipped cream over each chocolate-filled cookie cup.
- Garnish with chocolate shavings or mini chocolate chips.
- Refrigerate for at least 30 minutes before serving.
Video
Notes
- Do not overbake the cookie cups. Slightly soft centers create a more tender texture.
- Shape the cookie centers while they are still warm and flexible.
- Cool the chocolate filling before adding it to the cookie shells.
- Keep the finished cookie cups refrigerated.
- For the freshest presentation, add whipped cream shortly before serving.
- Store leftovers in an airtight container in the refrigerator for up to 3 days.
- The baked cookie shells can be frozen for up to 2 months without the filling or whipped cream.
Final Thoughts
These Chocolate Cream Pie Cookie Cups bring together everything that makes a chocolate dessert so satisfying: tender chocolate cookie shells, smooth homemade cream filling, and fluffy whipped cream in one easy individual dessert. The contrast between the soft cookie and cool, velvety filling makes each bite especially enjoyable.
They are simple enough for a weekend baking project but polished enough for holidays, dinner parties, birthdays, and dessert tables. You can also prepare parts of the recipe ahead of time, which makes serving them much easier when you have guests.
If you enjoy classic chocolate cream pie, these individual cookie cups are a fun way to give that familiar dessert a fresh presentation. Try them with your favorite chocolate garnish, fresh berries, or a drizzle of caramel, and make the recipe your own.
Serve them chilled, add a little extra whipped cream if you like, and enjoy every creamy, chocolate-filled bite.