No Bake Easter Cheesecake Mousse
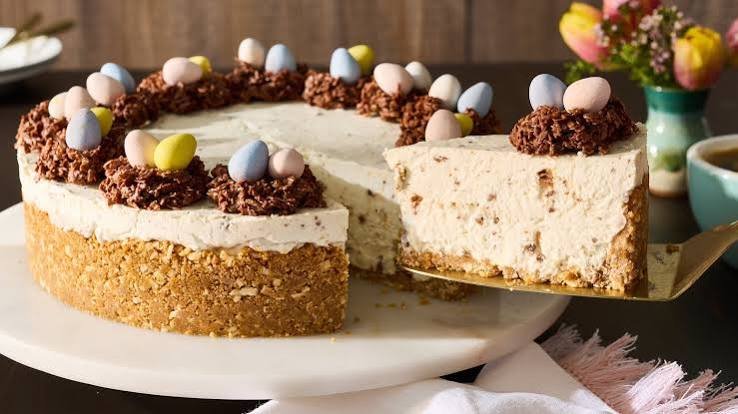
Easter desserts do not have to be complicated to feel special. This No-Bake Easter Cheesecake Mousse is a creamy, fluffy treat layered with sweet cookie crumbs and finished with festive Easter toppings. Each spoonful combines the smooth richness of cheesecake with a light mousse texture, making it a lovely dessert for spring celebrations, family dinners, and holiday gatherings.
The best part is how simple it is to prepare. There is no oven, no water bath, and no waiting around for a cheesecake to bake and cool. The mousse comes together easily, then chills until perfectly cold and creamy. Served in individual dessert cups, it also makes a pretty presentation without requiring complicated decorating skills.
You can prepare these Easter cheesecake mousse cups ahead of time, which makes them especially handy when your holiday menu is already keeping you busy. Add colorful sprinkles, chocolate eggs, crushed cookies, or your favorite seasonal candy just before serving for a festive finishing touch.
If you are looking for an easy Easter dessert that feels homemade, looks beautiful on the table, and has a wonderfully smooth texture, this no-bake mousse is a recipe worth saving.
Why You’ll Love This Recipe
There is a lot to appreciate about this easy Easter dessert, especially when you want something festive without spending hours in the kitchen.
- No oven required: This cheesecake mousse is completely no-bake, so it is perfect when you want a simple dessert without heating up the kitchen.
- Creamy and fluffy texture: Cream cheese gives the mousse a rich cheesecake flavor, while whipped cream keeps the texture light, airy, and spoonably soft.
- Easy to make ahead: The mousse needs time to chill, making it a convenient dessert to prepare earlier in the day or the night before Easter.
- Perfect for Easter: Colorful sprinkles, mini chocolate eggs, crushed cookies, or pastel candies turn each serving into a festive spring dessert.
- Simple ingredients: You only need a handful of familiar ingredients, most of which are easy to find at any grocery store.
- Great for individual servings: Spoon the mousse into small glasses, dessert cups, or jars for an attractive presentation and easy serving.
- Easy to customize: Change the cookie crumbs, toppings, or decorations to create your own version for Easter brunch, a family dinner, or another spring celebration.
- Beginner-friendly: The recipe does not require advanced baking skills. With a few simple mixing techniques and enough chilling time, you can create a smooth, creamy cheesecake mousse at home.
Ingredients
This No-Bake Easter Cheesecake Mousse uses simple ingredients that come together to create a rich, creamy, and fluffy dessert. For the best texture, use full-fat cream cheese and make sure it is softened before mixing.
For the Cookie Crust
- 12 Oreo-style chocolate sandwich cookies, finely crushed
- 2 tablespoons unsalted butter, melted
The crushed cookies create a buttery, chocolatey base with a little crunch underneath the creamy mousse. You can crush them in a food processor or place them in a sealed bag and crush them with a rolling pin.
For the Cheesecake Mousse
- 8 ounces cream cheese, softened to room temperature
- 1/2 cup granulated sugar
- 1 teaspoon pure vanilla extract
- 1 cup heavy whipping cream, cold
- 1/2 cup powdered sugar
The softened cream cheese provides the classic cheesecake flavor, while cold heavy cream helps create a light and airy mousse. Powdered sugar adds sweetness without making the mixture grainy.
For the Easter Topping
- 1/2 cup crushed chocolate sandwich cookies, optional
- Pastel Easter sprinkles, as needed
- Mini chocolate Easter eggs or seasonal candies, for decorating
- Whipped cream, optional
You can use as much or as little decoration as you like. Pastel sprinkles and small chocolate eggs give the dessert a cheerful Easter look, while a little whipped cream adds an extra creamy finish.
Ingredient Checklist
For easy shopping, you will need:
- Cream cheese
- Granulated sugar
- Powdered sugar
- Vanilla extract
- Heavy whipping cream
- Chocolate sandwich cookies
- Unsalted butter
- Easter sprinkles
- Mini chocolate eggs or other Easter candy
- Whipped cream, optional
Ingredient Notes & Substitutions
A few small ingredient choices can make a big difference in the texture and flavor of your No-Bake Easter Cheesecake Mousse. Here is what to know before you start.
Cream Cheese
Use full-fat, block-style cream cheese for the smoothest and richest mousse. Let it soften at room temperature before mixing so it blends easily without leaving small lumps.
Avoid using cream cheese straight from the refrigerator. Cold cream cheese can be difficult to beat smoothly.
For a lighter option, reduced-fat cream cheese can be used, although the mousse may be slightly less rich and firm.
Heavy Whipping Cream
Keep the heavy whipping cream cold until you are ready to whip it. Cold cream reaches stiff peaks more easily and gives the mousse its soft, airy texture.
For the best results, use heavy cream or heavy whipping cream rather than regular milk or half-and-half. Those lighter dairy products do not provide enough fat to create a stable mousse.
Sugar
Granulated sugar sweetens the cream cheese mixture, while powdered sugar helps sweeten and stabilize the whipped cream.
If you prefer a slightly less sweet dessert, you can reduce the granulated sugar a little. Avoid removing too much sugar, since it also contributes to the overall texture.
Vanilla Extract
Pure vanilla extract gives the cheesecake mousse a warm, classic flavor. If you only have vanilla bean paste, you can use it instead.
For a slightly different flavor, try adding a small amount of lemon zest. The fresh citrus note works especially well with the creamy cheesecake filling.
Chocolate Sandwich Cookies
Chocolate sandwich cookies create a rich, slightly crunchy base that contrasts nicely with the soft mousse.
You can substitute them with:
- Graham crackers for a classic cheesecake-style crust
- Golden sandwich cookies for a vanilla version
- Chocolate wafer cookies for a deeper chocolate flavor
- Gluten-free chocolate sandwich cookies for a gluten-free option
If you change the cookies, adjust the amount of melted butter slightly if needed. The crumbs should hold together when gently pressed without becoming greasy.
Butter
Melted unsalted butter binds the cookie crumbs together and gives the crust a richer texture. Salted butter can also work if that is what you have available.
For a dairy-free version, use a suitable plant-based butter and choose dairy-free cookies and cream cheese.
Easter Decorations
This is where you can have fun with the recipe. Pastel sprinkles, crushed chocolate eggs, mini candy-coated chocolates, colorful sugar pearls, or small chocolate pieces all work beautifully.
If serving the dessert to young children, choose toppings that are easy to eat and avoid very hard candies.
Allergy-Friendly Options
For a gluten-free Easter cheesecake mousse, use certified gluten-free cookies and check the labels on your other ingredients and Easter candy.
For a dairy-free version, use dairy-free cream cheese, dairy-free whipping cream, dairy-free butter, and suitable cookies. Since different brands behave differently, the final mousse may have a slightly different texture.
A Simple Budget-Friendly Tip
You do not need specialty Easter decorations to make this dessert look festive. A small amount of pastel sprinkles and a few crushed cookies can create a beautiful finish without adding much to your grocery bill.
Kitchen Tools Needed
You do not need a long list of special equipment to make this easy Easter dessert. A few basic kitchen tools are enough to prepare the cookie base, creamy cheesecake filling, and festive toppings.
Essential Tools
- Mixing bowls: Use separate bowls for the cookie crumbs and cheesecake mousse.
- Electric hand mixer: Makes it easier to beat the cream cheese and whip the heavy cream until smooth and fluffy.
- Rubber spatula: Helpful for gently folding the whipped cream into the cheesecake mixture without losing too much air.
- Measuring cups and spoons: Accurate measurements help keep the mousse balanced and consistent.
- Food processor: The quickest way to turn the cookies into fine crumbs.
Helpful Alternatives
If you do not have a food processor, place the cookies in a sturdy resealable bag and crush them with a rolling pin or the bottom of a heavy glass.
A stand mixer can also be used instead of a hand mixer. Just be careful not to overbeat the whipped cream.
For Serving
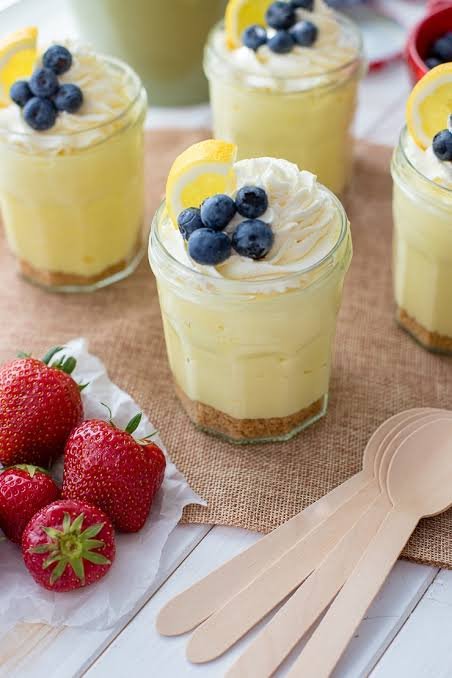
- Small dessert glasses or cups: Ideal for individual cheesecake mousse servings.
- Small spoon: Useful for layering the cookie crumbs and mousse neatly.
- Piping bag: Optional, but helpful if you want to add a neat swirl of whipped cream on top.
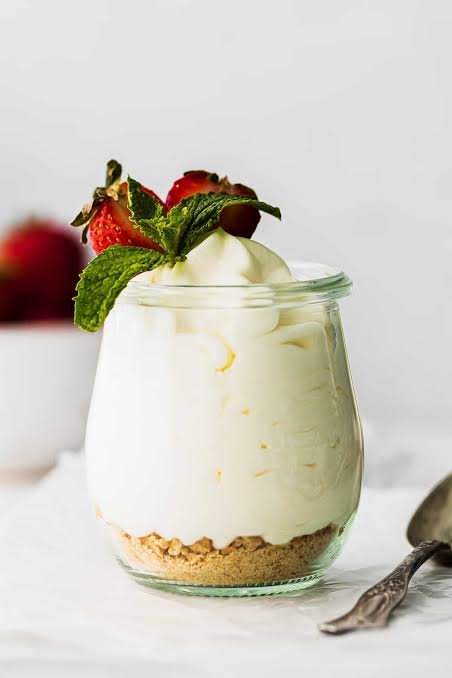
Clear glasses work particularly well because they show the layers of chocolate cookie crumbs and creamy mousse, making the dessert look festive before anyone takes the first bite.
Step-by-Step Instructions
This No-Bake Easter Cheesecake Mousse comes together in a few simple stages. The key is to keep the cream cold, soften the cream cheese properly, and fold the mixtures gently so the finished mousse stays light and fluffy.
1. Prepare the Cookie Crumbs
Place the chocolate sandwich cookies in a food processor and pulse until they become fine crumbs. You can also put the cookies in a sturdy resealable bag and crush them with a rolling pin.
If you want some texture in the finished dessert, leave a few slightly larger cookie pieces instead of crushing everything into a fine powder.
2. Make the Cookie Base
Combine the cookie crumbs with melted butter and stir until the crumbs are evenly coated.
Spoon a small amount into the bottom of each serving glass or dessert cup. Press the crumbs down gently with the back of a spoon.
Do not pack the crumbs too tightly. A loose, crumbly layer gives the dessert a more pleasant texture when you scoop into it.
3. Soften the Cream Cheese
Let the cream cheese sit at room temperature until softened. This usually takes about 30 minutes.
Place it in a mixing bowl and beat until completely smooth. Scrape down the sides of the bowl as needed.
The mixture should look creamy with no visible lumps before you add the other ingredients.
4. Sweeten the Cheesecake Mixture
Add the granulated sugar and vanilla extract to the softened cream cheese.
Beat until the sugar is well incorporated and the mixture looks smooth and creamy. Take a moment to scrape the bottom and sides of the bowl so everything is evenly mixed.
5. Whip the Heavy Cream
Pour the cold heavy whipping cream into a clean mixing bowl.
Using an electric mixer, beat the cream on medium-high speed until soft peaks begin to form. Add the powdered sugar gradually, then continue mixing until stiff peaks form.
The whipped cream should hold its shape when you lift the beaters, but avoid mixing beyond this point. Overwhipped cream can become grainy and lose the smooth texture you want.
6. Fold the Whipped Cream Into the Cheesecake Mixture
Add the whipped cream to the cream cheese mixture in batches.
Use a rubber spatula to gently fold everything together. Move the spatula around the sides of the bowl and then through the center rather than stirring aggressively.
Continue folding just until the mixture is evenly blended and looks light, smooth, and fluffy.
7. Layer the Mousse
Spoon or pipe a layer of cheesecake mousse over the cookie crumbs.
Add another layer of cookie crumbs, followed by another layer of mousse. Continue until the glasses are filled, leaving enough room at the top for your Easter decorations.
Using a piping bag makes the layers cleaner, but a spoon works perfectly well for a casual homemade presentation.
8. Chill the Dessert
Cover the dessert cups with lids or plastic wrap and refrigerate for at least 1 hour.
Chilling gives the mousse time to firm up and allows the cookie crumbs to soften slightly. For an even firmer texture and deeper flavor, you can prepare the dessert several hours ahead.
9. Add the Easter Decorations
Decorate the mousse just before serving.
Top each cup with pastel sprinkles, crushed chocolate eggs, mini Easter candies, extra cookie crumbs, or a small swirl of whipped cream.
Adding delicate decorations shortly before serving helps keep them crisp, colorful, and fresh.
Common Mistakes to Avoid
Using cold cream cheese: It can leave lumps in the mousse. Let it soften before mixing.
Whipping warm cream: Cold heavy cream whips more reliably and creates a more stable mousse.
Overmixing the whipped cream: Once stiff peaks form, stop mixing. Too much beating can make the cream grainy.
Stirring too aggressively: Gently fold the whipped cream into the cheesecake mixture to preserve its airy texture.
Skipping the chill time: The mousse needs refrigeration to develop a thicker, spoonable consistency.
Adding decorations too early: Some Easter candies and sprinkles can soften or bleed color when refrigerated for too long.
Make-Ahead Tip
You can assemble the cookie and mousse layers several hours before serving. Keep the covered dessert cups refrigerated, then add the Easter toppings shortly before bringing them to the table.
Expert Tips
A few simple techniques will help you get a smooth, airy cheesecake mousse with layers that look neat and taste balanced.
Use Room-Temperature Cream Cheese
Softened cream cheese blends much more easily than cold cream cheese. Leave it on the counter for about 30 minutes before starting.
This helps create a silky filling without tiny lumps.
Keep the Heavy Cream Very Cold
Cold heavy cream whips faster and holds its shape better. For an extra reliable result, chill your mixing bowl and beaters for a few minutes before whipping.
Do Not Overwhip the Cream
Watch the cream closely as it thickens. Stop when it reaches stiff peaks and holds its shape.
If you continue beating after this point, the cream can become grainy and eventually start turning into butter.
Fold, Do Not Stir
The whipped cream is what gives the cheesecake mixture its light, mousse-like texture. Gently fold it into the cream cheese mixture with a rubber spatula.
Use slow, broad movements and stop as soon as the mixture looks evenly combined.
Crush the Cookies to the Right Texture
Very fine crumbs create a compact, even base, while slightly larger crumbs add more texture.
For the best contrast, try making most of the crumbs fine while leaving a few small cookie pieces throughout the layers.
Chill Before Serving
Although the mousse can look thick immediately after mixing, refrigeration gives it a firmer and more spoonable consistency.
At least 1 hour of chilling is helpful, but making the dessert several hours ahead gives the layers more time to set.
Make the Layers Neat
For clean, attractive layers, use a piping bag or a small spoon to add the mousse gradually.
If using a spoon, add the mousse around the edges of the glass first, then fill the center. This helps prevent large air pockets and keeps the sides looking tidy.
Balance the Sweetness
The cookies, cheesecake filling, and Easter candy all contribute sweetness. If you are using particularly sweet decorations, consider keeping the mousse itself moderately sweet.
A little lemon zest can also brighten the rich cheesecake flavor without making the dessert taste strongly citrusy.
Add Decorations at the Right Time
Keep colorful sprinkles, chocolate eggs, and delicate candy toppings off the mousse until close to serving.
This keeps the decorations crisp and prevents moisture from affecting their color or texture.
Serve It Cold
This mousse has its best texture when served straight from the refrigerator. The filling should be cool, creamy, and firm enough to hold its shape while remaining easy to scoop.
For an Easter gathering, keep the dessert refrigerated until you are ready to serve it.
Variations
One of the best things about this No-Bake Easter Cheesecake Mousse is how easy it is to customize. Keep the creamy cheesecake base and switch up the cookies, toppings, or flavors to suit your gathering.
Chocolate Easter Cheesecake Mousse
For extra chocolate flavor, use chocolate cookie crumbs throughout the layers and add a little finely chopped chocolate between the mousse layers. Finish with chocolate Easter eggs or chocolate curls.
Lemon Cheesecake Mousse
Add 1 to 2 teaspoons of finely grated lemon zest to the cream cheese mixture. The bright citrus flavor cuts through the richness of the cheesecake filling and gives the dessert a fresh spring taste.
Strawberry Cheesecake Mousse
Add a thin layer of finely chopped fresh strawberries between the cookie crumbs and mousse. You can also garnish each serving with a small strawberry just before serving.
For the best texture, pat the berries dry before adding them so excess moisture does not make the mousse watery.
Golden Cookie Version
Swap the chocolate sandwich cookies for vanilla sandwich cookies. The lighter cookie flavor pairs beautifully with the creamy cheesecake filling and creates a pretty contrast with pastel Easter decorations.
Gluten-Free Version
Use certified gluten-free chocolate sandwich cookies and check the labels on the cream cheese, powdered sugar, sprinkles, and Easter candy.
The rest of the recipe can remain essentially the same.
Dairy-Free Version
For a dairy-free option, use dairy-free cream cheese, plant-based whipping cream, dairy-free butter, and dairy-free cookies.
Choose products that whip and set well, since the texture can vary between brands.
Pastel Spring Version
Skip the chocolate toppings and decorate each mousse cup with pastel sprinkles, small sugar pearls, and colorful candy pieces.
This version is especially pretty for Easter brunch or a spring dessert table.
Mini Dessert Cups
For parties, spoon the mousse into small shot glasses or mini dessert cups. Smaller portions make the recipe easier to serve to a crowd and let guests enjoy a little sweet treat without a large serving.
Graham Cracker Cheesecake Mousse
Replace the chocolate cookie crumbs with crushed graham crackers mixed with melted butter. The result tastes more like a traditional cheesecake while keeping the same creamy mousse filling.
Different Holiday Toppings
The cheesecake mousse does not have to be limited to Easter. Change the decorations to match birthdays, baby showers, Valentine’s Day, or other celebrations. The simple mousse base works well with many different toppings and seasonal colors.
Storage Instructions
Because this dessert contains cream cheese and whipped cream, it should be kept refrigerated until serving. Proper storage also helps the mousse maintain its smooth, fluffy texture.
Refrigerator Storage
Cover the individual dessert cups tightly with plastic wrap or place them in an airtight container.
Store the No-Bake Easter Cheesecake Mousse in the refrigerator for up to 3 days. For the freshest texture and toppings, it is best enjoyed within the first 1 to 2 days.
If possible, add delicate sprinkles, whipped cream, and candy decorations shortly before serving rather than several days in advance.
Make-Ahead Instructions
This is an excellent make-ahead Easter dessert.
You can prepare and assemble the mousse cups several hours before your gathering. Cover them and refrigerate until you are ready to serve.
For the prettiest presentation, add the final decorations shortly before serving.
Freezer Storage
The mousse can be frozen, although freezing may slightly change the texture of the whipped cream and cream cheese mixture after thawing.
If you want to freeze it, place the mousse in airtight freezer-safe containers and leave a little space at the top. Freeze for up to 1 month for the best quality.
Do not add delicate sprinkles or candy decorations before freezing.
How to Thaw
Transfer frozen mousse cups to the refrigerator and allow them to thaw slowly for several hours or overnight.
Do not thaw the mousse at room temperature. Slow refrigerator thawing helps the dessert maintain a better texture.
Once thawed, gently check the consistency. If the mousse has separated slightly, avoid vigorous stirring because that can make the texture less fluffy.
Can You Reheat Cheesecake Mousse?
No. This is a chilled, no-bake dessert and should not be reheated.
Keep it refrigerated and serve cold for the smoothest and creamiest texture.
Food Safety Tip
Do not leave the mousse sitting at room temperature for an extended period. When serving it at Easter gatherings, keep the dessert chilled until it is time to eat and return any leftovers to the refrigerator promptly.
Frequently Asked Questions
Can I make No-Bake Easter Cheesecake Mousse the day before?
Yes. This dessert is ideal for making ahead. Prepare the mousse cups, cover them, and refrigerate them overnight. Add delicate Easter decorations shortly before serving for the freshest appearance.
How long does cheesecake mousse need to chill?
Chill the mousse for at least 1 hour before serving. A few hours of refrigeration will give it an even firmer, more spoonable texture.
Why is my cheesecake mousse runny?
The most common causes are under-whipped cream, warm ingredients, or overmixing after the whipped cream has been added. Make sure the heavy cream is cold and whip it until stiff peaks form before gently folding it into the cream cheese mixture.
Can I use whipped topping instead of heavy cream?
Yes. Prepared whipped topping can be used as a shortcut, although the texture and flavor may be slightly different from mousse made with freshly whipped heavy cream.
Can I use reduced-fat cream cheese?
Yes, but full-fat cream cheese generally gives the mousse a richer flavor and firmer texture. Reduced-fat cream cheese may produce a slightly softer filling.
Can I make this dessert without a food processor?
Absolutely. Place the cookies in a sealed bag and crush them with a rolling pin, sturdy glass, or another heavy kitchen tool.
Can I use different cookies?
Yes. Chocolate sandwich cookies, vanilla sandwich cookies, graham crackers, and chocolate wafer cookies can all work. Choose your favorite based on the flavor you want.
Can I make this Easter dessert gluten-free?
Yes. Use certified gluten-free cookies and check the ingredient labels on your other ingredients and Easter decorations.
Can I make it dairy-free?
Yes. Choose dairy-free cream cheese, plant-based whipping cream, dairy-free butter, and suitable cookies. Keep in mind that different dairy-free products can produce slightly different textures.
Can I freeze cheesecake mousse?
Yes, although the texture may change slightly after freezing and thawing. Freeze it in airtight containers for up to 1 month, then thaw it slowly in the refrigerator.
What are the best toppings for Easter cheesecake mousse?
Pastel sprinkles, mini chocolate eggs, crushed cookies, whipped cream, chocolate curls, and colorful Easter candies all work well. Add delicate toppings close to serving time for the best appearance.
Can I serve the mousse in one large dish?
Yes. Instead of individual dessert cups, layer the cookie crumbs and cheesecake mousse in a larger serving dish or trifle bowl. Chill thoroughly before serving and add the Easter decorations on top.

No Bake Easter Cheesecake Mousse
Ingredients
Method
- Crush the chocolate sandwich cookies into fine crumbs using a food processor or a sealed bag and rolling pin.
- Combine the cookie crumbs with the melted butter until evenly moistened. Divide the mixture between 6 dessert cups and gently press it into the bottom of each cup.
- Beat the softened cream cheese in a mixing bowl until smooth and creamy. Add the granulated sugar and vanilla extract, then beat until well combined.
- In a separate clean bowl, beat the cold heavy whipping cream until soft peaks form. Gradually add the powdered sugar and continue beating until stiff peaks form.
- Gently fold the whipped cream into the cream cheese mixture in batches. Fold just until the mousse is smooth and fluffy. Do not overmix.
- Spoon or pipe the cheesecake mousse over the cookie layer in each dessert cup. Add another light layer of cookie crumbs if desired, then finish with another layer of mousse.
- Cover the dessert cups and refrigerate for at least 1 hour, or until the mousse is chilled and firm.
- Just before serving, top each cup with pastel sprinkles, mini chocolate Easter eggs, crushed cookies, whipped cream, or your favorite Easter candy.
Video
Notes
- Use softened full-fat cream cheese for the smoothest mousse.
- Keep the heavy whipping cream cold until you are ready to whip it.
- Stop whipping the cream once stiff peaks form to prevent a grainy texture.
- Fold the whipped cream gently into the cream cheese mixture to keep the mousse light and airy.
- The mousse can be prepared several hours ahead and stored covered in the refrigerator.
- For the best presentation, add sprinkles and candy decorations shortly before serving.
- Store leftovers covered in the refrigerator for up to 3 days.
- Nutritional information is an estimate and will vary depending on the brands and toppings used.
- For a gluten-free version, use certified gluten-free cookies and check all other ingredient labels.
Final Thoughts
This No-Bake Easter Cheesecake Mousse is the kind of dessert that makes holiday entertaining feel a little easier. The creamy cheesecake filling, chocolate cookie crumbs, and colorful Easter toppings come together in individual servings that look festive without requiring complicated baking techniques.
It is also flexible enough to make your own. Try vanilla cookies instead of chocolate, add fresh strawberries or lemon zest, or switch the toppings to match your Easter table. You can prepare the mousse ahead of time, keep it chilled, and decorate each serving just before dessert.
Whether you are planning an Easter dinner, spring brunch, or a simple family gathering, these creamy cheesecake mousse cups are an easy way to finish the meal on a sweet note.
Prepare a batch, add your favorite Easter decorations, and enjoy every creamy spoonful with the people around your table.