Brownie Bottom Oreo Mousse Pie
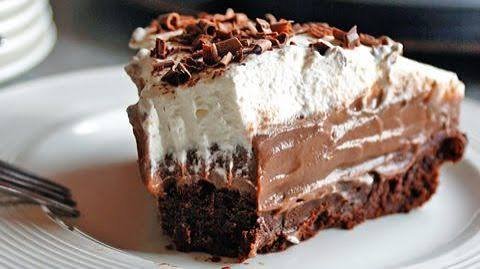
If you love the combination of rich chocolate brownies and crunchy Oreo cookies, this Brownie Bottom Oreo Mousse Pie is the dessert to put on your must-bake list. It starts with a fudgy brownie base and is finished with a smooth, creamy Oreo mousse that feels light and indulgent at the same time. Every bite brings together deep chocolate flavor, sweet cookie crunch, and a soft, velvety mousse.
What makes this Oreo mousse pie especially appealing is the contrast in texture. The brownie layer is dense and chewy, while the mousse is airy and creamy, with crushed Oreos folded throughout for little bites of cookie goodness. It looks impressive enough for a holiday table or dinner party, yet the steps are simple enough for a beginner to follow.
This is also a wonderful make-ahead dessert because the mousse needs time to chill and set. Prepare it in advance, let it rest in the refrigerator, then add your favorite toppings before serving. Whether you are making it for a special celebration or simply want an unforgettable chocolate Oreo dessert at home, this brownie bottom pie delivers a beautiful combination of flavor and texture.
Why You’ll Love This Recipe
There is a lot to appreciate about this Brownie Bottom Oreo Mousse Pie, especially if you enjoy desserts that combine different textures in every bite.
- Two favorite desserts in one: A fudgy brownie base and creamy Oreo mousse come together in one irresistible pie.
- Rich chocolate flavor: The brownie layer adds deep cocoa flavor that pairs beautifully with the sweet cookies and smooth mousse.
- Creamy and crunchy: Crushed Oreos add a pleasant cookie crunch throughout the soft mousse.
- Easy to make: The recipe uses simple ingredients and straightforward steps, making it approachable for beginner bakers.
- Perfect for making ahead: The pie needs time to chill, so you can prepare it several hours before serving.
- Great for special occasions: Its layered appearance makes it a lovely choice for birthdays, holidays, family gatherings, or dinner parties.
- No complicated decorating: A few crushed Oreos or cookie halves on top are enough to make the finished pie look polished.
- A satisfying texture contrast: The chewy brownie bottom balances the light, fluffy mousse for a dessert that never feels one-note.
Ingredients
For this Brownie Bottom Oreo Mousse Pie, you will need a handful of familiar ingredients. Each one has a specific job, from creating the chewy brownie foundation to giving the Oreo mousse its smooth, airy texture.
For the Brownie Bottom
- 1/2 cup unsalted butter, melted and slightly cooled
- 1 cup granulated sugar
- 2 large eggs
- 1 teaspoon vanilla extract
- 1/2 cup unsweetened cocoa powder
- 3/4 cup all-purpose flour
- 1/4 teaspoon salt
- 12 Oreo cookies, roughly chopped
For the Oreo Mousse
- 20 Oreo cookies
- 8 ounces cream cheese, softened to room temperature
- 1/3 cup granulated sugar
- 1 teaspoon vanilla extract
- 1 cup heavy whipping cream, cold
- 1/2 cup powdered sugar
For the Topping
- 6 to 8 Oreo cookies, crushed or halved
- 1/2 cup whipped cream, optional
- Extra Oreo crumbs, optional
Ingredient Tip
Use full-fat cream cheese and cold heavy whipping cream for the best mousse texture. Let the cream cheese soften before mixing so the filling becomes smooth without lumps. For the brownie layer, measure the flour carefully and avoid overmixing the batter, which helps keep the base soft and fudgy rather than cakey.
Ingredient Notes & Substitutions
A few simple ingredient choices can make a noticeable difference in the texture and flavor of your Brownie Bottom Oreo Mousse Pie. Here are some useful swaps and tips to help you work with what you already have in the kitchen.
Butter
Unsalted butter gives you better control over the salt level in the brownie base. If you only have salted butter, you can use it and slightly reduce the added salt.
For a dairy-free option, use a plant-based butter designed for baking. Choose one with a firm texture for the most reliable brownie consistency.
Sugar
Regular granulated sugar works well in both the brownie and mousse. Powdered sugar is used in the whipped cream portion because it dissolves easily and helps create a smooth filling.
Avoid replacing all the sugar with liquid sweeteners, as this can change the structure of both the brownie and mousse.
Cocoa Powder
Use unsweetened cocoa powder for the brownie layer. Natural cocoa powder gives a classic chocolate flavor, while Dutch-process cocoa can provide a darker color and smoother cocoa taste.
All-Purpose Flour
All-purpose flour is ideal for a chewy brownie base. For a gluten-free Oreo mousse pie, use a certified gluten-free all-purpose flour blend and gluten-free sandwich cookies.
Cream Cheese
Full-fat block-style cream cheese is the best choice for a firm, creamy mousse. Avoid using cream cheese spread from a tub when possible because it contains more moisture and may leave the filling softer.
For a lighter variation, reduced-fat cream cheese can work, although the finished mousse may not be quite as rich or firm.
Heavy Whipping Cream
Cold heavy whipping cream helps the mousse become fluffy and hold its shape. Keep it refrigerated until you are ready to whip it.
For a dairy-free version, use a reliable plant-based whipping cream that can be whipped to stiff peaks.
Oreo Cookies
Classic Oreo cookies work beautifully here, but you can experiment with other Oreo varieties for different flavors. Chocolate, mint, peanut butter, or seasonal varieties can each give the mousse pie a slightly different character.
If you are making the recipe gluten-free, choose a certified gluten-free chocolate sandwich cookie.
Budget-Friendly Tips
You do not need specialty baking ingredients for this dessert. Store-brand butter, cream cheese, cocoa powder, and chocolate sandwich cookies can work just as well as premium brands.
If you are trying to keep costs down, skip the extra whipped cream decoration and use a simple sprinkle of crushed Oreo cookies on top. The pie will still look inviting and taste wonderfully rich.
Kitchen Tools Needed
You do not need a long list of specialty equipment to make this Brownie Bottom Oreo Mousse Pie. A few basic kitchen tools will make the process smooth and easy.
- 9-inch pie pan: Use a standard pie dish with enough depth to hold the brownie base and mousse layer.
- Mixing bowls: You will need separate bowls for the brownie batter and Oreo mousse.
- Electric hand mixer or stand mixer: Helpful for whipping the cream until it becomes light and fluffy.
- Rubber spatula: Ideal for gently folding whipped cream and crushed Oreos into the mousse without deflating it.
- Measuring cups and spoons: Accurate measurements help keep the brownie and mousse layers consistent.
- Whisk: Useful for combining the dry brownie ingredients and smoothing the cream cheese mixture.
- Food processor: Optional, but convenient for turning Oreos into fine crumbs quickly.
- Rolling pin and zip-top bag: A simple alternative to a food processor for crushing the cookies.
- Offset spatula: Optional for spreading the mousse evenly across the brownie layer and creating a smooth finish.
Helpful Preparation Tip
Before you start, gather and measure all of your ingredients. Make sure the cream cheese has softened to room temperature while the heavy cream stays cold. Having everything ready makes the mousse easier to prepare and helps prevent unnecessary delays between steps.
Step-by-Step Instructions
This Brownie Bottom Oreo Mousse Pie comes together in a few simple stages. The key is to let the brownie base cool completely before adding the mousse, then give the finished pie enough time to chill and set.
1. Prepare the Pie Pan
Lightly grease a 9-inch pie pan or line the bottom with parchment paper if your pan allows it. Preheat your oven to 350°F.
Having the pan ready before mixing the batter keeps the brownie mixture from sitting too long.
2. Make the Brownie Batter
In a medium bowl, whisk together the melted butter and granulated sugar until well combined. Add the eggs and vanilla extract, then whisk until the mixture looks smooth.
Add the cocoa powder, flour, and salt. Stir gently with a spatula or wooden spoon just until no dry streaks remain.
Do not overmix the batter. A few extra strokes can make the brownie layer tougher instead of soft and fudgy.
3. Add the Oreo Cookies
Roughly chop the Oreo cookies and fold them into the brownie batter. You want a mixture of small and slightly larger cookie pieces so there are little pockets of Oreo throughout the brownie base.
Spread the batter evenly into the prepared pie pan.
4. Bake the Brownie Base
Bake for about 18 to 22 minutes, or until the edges look set and the center is slightly soft.
A toothpick inserted near the center should come out with a few moist crumbs. Do not wait for it to come out completely clean, because that usually means the brownie has been overbaked.
Let the brownie base cool completely in the pan before continuing.
5. Crush the Oreos for the Mousse
While the brownie cools, crush the Oreo cookies for the mousse. A food processor will create fine crumbs quickly, but you can also place the cookies in a zip-top bag and crush them with a rolling pin.
Keep a few slightly larger cookie pieces if you enjoy extra texture in the mousse.
6. Prepare the Cream Cheese Mixture
Place the softened cream cheese in a large mixing bowl. Add the granulated sugar and vanilla extract.
Beat until the mixture is smooth and creamy, scraping down the sides of the bowl as needed. There should be no visible lumps of cream cheese.
7. Whip the Heavy Cream
In a separate chilled bowl, beat the cold heavy whipping cream with the powdered sugar until stiff peaks form.
The whipped cream should hold its shape when you lift the beaters, but be careful not to keep mixing after reaching that stage. Overwhipping can make the cream grainy.
8. Fold the Mousse Together
Add the whipped cream to the cream cheese mixture in batches. Gently fold with a rubber spatula rather than stirring vigorously.
Once the mixture is mostly combined, fold in the crushed Oreo cookies.
The finished mousse should look smooth, fluffy, and evenly speckled with cookie crumbs.
9. Add the Oreo Mousse
Make sure the brownie base is completely cool. Spoon the Oreo mousse over the brownie layer.
Use an offset spatula or the back of a spoon to spread the mousse evenly from edge to edge.
Do not press down firmly, as this can compact the light mousse texture.
10. Chill the Pie
Cover the pie and refrigerate for at least 4 hours, preferably overnight.
This chilling time allows the mousse to firm up and makes the pie much easier to slice. Rushing this step can result in a soft filling that does not hold its shape.
11. Add the Topping
Just before serving, decorate the top with crushed Oreo cookies, Oreo halves, or small swirls of whipped cream.
Keep the topping simple if you prefer. The contrast between the pale mousse and dark cookie crumbs already gives the pie an attractive finish.
12. Slice and Serve
Use a sharp knife to cut the chilled pie into slices. For cleaner cuts, wipe the knife between slices.
Serve the pie cold so the brownie stays fudgy and the Oreo mousse keeps its creamy, airy texture.
Common Mistakes to Avoid
- Do not overbake the brownie base.
- Do not add mousse while the brownie is still warm.
- Do not use cold cream cheese, which can leave lumps in the mousse.
- Do not overwhip the heavy cream.
- Do not aggressively stir the whipped cream into the filling.
- Do not skip the chilling time.
- Do not cut the pie before the mousse has fully set.
Expert Tips
A few small techniques can make a big difference in the finished Brownie Bottom Oreo Mousse Pie. These tips will help you get a fudgy brownie base, smooth mousse, and clean slices every time.
Keep the Brownie Fudgy
The biggest secret to a soft brownie layer is avoiding overbaking. Start checking the brownie a few minutes before the expected baking time. The center should look set around the edges but still have a slight softness in the middle.
The brownie will continue to firm up as it cools, so it does not need to look completely firm when it comes out of the oven.
Cool the Brownie Completely
This step is easy to overlook, but it matters. Warm brownies can soften the mousse and make the layers difficult to keep separate.
Let the brownie cool completely before spreading the Oreo mousse over the top. If you are short on time, place the pan on a wire rack to help the base cool more quickly.
Use Softened Cream Cheese
Room-temperature cream cheese blends much more smoothly than cold cream cheese. Let it sit out for about 30 minutes before preparing the mousse.
If the cream cheese is still firm, the finished filling can contain small lumps that are difficult to remove later.
Keep the Whipping Cream Cold
While the cream cheese should be softened, the heavy cream should remain cold. Cold cream whips more efficiently and produces a stable, fluffy texture.
For an even better result, chill your mixing bowl and beaters for a few minutes before whipping the cream.
Fold Gently
Once the whipped cream is ready, use a rubber spatula and fold it into the cream cheese mixture with gentle movements.
The goal is to keep as much air in the whipped cream as possible. That air is what gives the Oreo mousse its light, fluffy texture.
Crush Oreos to Different Sizes
For a more interesting texture, do not turn every Oreo into fine crumbs. A combination of fine crumbs and small cookie pieces gives the mousse more character.
Fine crumbs add Oreo flavor throughout the filling, while larger pieces provide little bites of crunch.
Give the Pie Plenty of Chill Time
Four hours is the minimum recommended chilling time, but overnight is even better when your schedule allows. A longer chill gives the mousse time to firm properly and makes slicing easier.
Make Cleaner Slices
For neat bakery-style slices, use a sharp knife and dip the blade briefly in hot water. Wipe it dry, then slice through the pie.
Repeat between cuts for smooth, defined layers.
Add Toppings Just Before Serving
Oreo crumbs can soften slightly when left on the mousse for a long time. For the best texture and appearance, add the decorative cookie pieces or whipped cream shortly before serving.
Let the Layers Do the Work
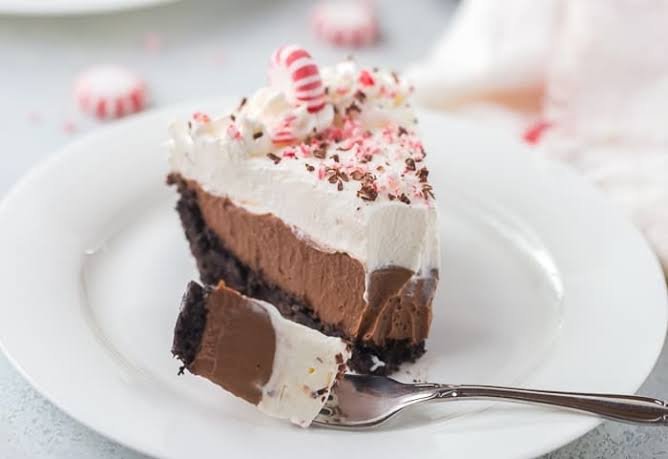
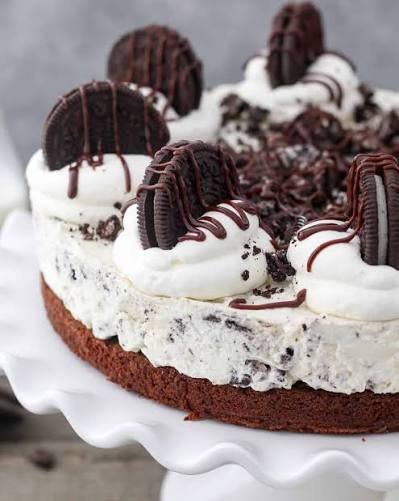
You do not need elaborate decoration for this dessert. The fudgy brownie base, creamy white Oreo mousse, and dark cookie pieces already create a beautiful layered look.
Keeping the finish simple also makes this recipe easier for beginner bakers.
Variations
One of the best things about this Oreo mousse pie is how easy it is to customize. Once you have the brownie base and creamy Oreo mousse, you can change the flavors, textures, and toppings to suit the occasion.
Mint Oreo Mousse Pie
Use mint-flavored Oreo cookies in the mousse and add a small amount of peppermint extract if desired. Keep the extract subtle because peppermint can quickly become overpowering.
A few chocolate shavings on top make a simple finishing touch.
Peanut Butter Oreo Pie
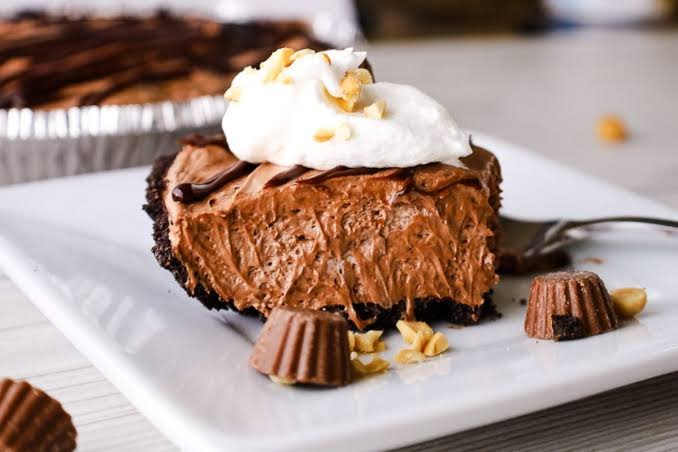
For a peanut butter twist, swirl a few spoonfuls of creamy peanut butter over the brownie base before adding the mousse. You can also fold small chocolate peanut butter cups into the mousse.
The combination of chocolate, peanut butter, and Oreo cookies creates a rich dessert with plenty of texture.
Extra Chocolate Oreo Pie
For serious chocolate lovers, replace some of the regular Oreo cookies with chocolate-flavored sandwich cookies. Add a thin drizzle of melted chocolate over the chilled mousse before serving.
You can also sprinkle chocolate cookie crumbs over the top for an extra-dark chocolate finish.
Birthday Cake Oreo Version
Swap the classic cookies for birthday cake flavored Oreos. Add a few colorful sprinkles to the mousse for a festive dessert that works especially well for birthdays and celebrations.
Gluten-Free Version
Use certified gluten-free chocolate sandwich cookies and a certified gluten-free all-purpose flour blend for the brownie layer.
Always check the labels of packaged ingredients if you are preparing the dessert for someone with celiac disease or a gluten allergy.
Dairy-Free Version
Use dairy-free butter, dairy-free cream cheese, and a plant-based whipping cream suitable for desserts. Choose dairy-free sandwich cookies as well.
Because different dairy-free products contain different amounts of moisture, the mousse may have a slightly different texture from the traditional version.
Lighter Version
For a somewhat lighter dessert, use reduced-fat cream cheese and a lighter whipped topping. Keep in mind that the mousse may be softer and less rich than the original.
You can also reduce the amount of topping without changing the main recipe.
Mini Oreo Mousse Pies
Turn the recipe into individual desserts by dividing the brownie batter among small oven-safe ramekins or a muffin-style baking pan. Adjust the baking time because smaller portions will cook faster.
Once cooled, top each brownie with Oreo mousse and chill until firm.
Seasonal Oreo Variations
Seasonal Oreo flavors are an easy way to give this dessert a new personality throughout the year. Try holiday varieties, chocolate-filled versions, or limited-edition flavors when available.
Keep the brownie base the same and simply change the cookies and topping to create a different version.
Storage Instructions
Because this Brownie Bottom Oreo Mousse Pie contains a creamy mousse layer, it should be kept refrigerated until you are ready to serve it.
Refrigerator Storage
Cover the pie tightly with plastic wrap or place it in an airtight container and refrigerate for up to 4 days.
For the best texture, keep the pie chilled and add decorative Oreo pieces or whipped cream shortly before serving. Over time, the cookies on top may soften slightly, but the pie will still be enjoyable.
Avoid leaving the pie at room temperature for extended periods, especially in a warm kitchen.
Freezer Storage
You can freeze the assembled pie if you want to prepare it well in advance. Cover it tightly with plastic wrap, followed by a layer of aluminum foil, to help protect it from freezer odors and freezer burn.
Freeze for up to 1 month for the best quality.
For easier storage, you can also freeze individual slices in airtight freezer-safe containers.
How to Thaw
Move the frozen pie from the freezer to the refrigerator and allow it to thaw slowly for several hours or overnight.
Do not thaw it at room temperature. Slow refrigerator thawing helps the mousse maintain a smoother texture.
Can You Refreeze It?
It is best not to refreeze the pie after it has completely thawed. Repeated freezing and thawing can affect the texture of the mousse and make it less creamy.
Serving After Storage
Serve the pie chilled directly from the refrigerator. This keeps the mousse firm and makes the layers easier to slice.
If the pie has been frozen, allow it to thaw completely in the refrigerator before cutting. Once thawed, add fresh Oreo crumbs or whipped cream on top for the best presentation.
Storage Tip
If you know you will be serving the pie later, prepare it the day before. Overnight chilling gives the mousse plenty of time to set and makes the dessert easier to slice neatly.
Frequently Asked Questions
Can I make Brownie Bottom Oreo Mousse Pie ahead of time?
Yes. This is an excellent make-ahead dessert. You can prepare the pie the day before serving and keep it covered in the refrigerator overnight. Add any whipped cream or decorative Oreo pieces shortly before serving.
How long does Oreo mousse pie need to chill?
Allow the pie to chill for at least 4 hours. For the firmest mousse and cleanest slices, chilling it overnight is even better.
Can I use a boxed brownie mix for the bottom?
Yes. If you want to save time, you can use your favorite boxed brownie mix for the base. Prepare and bake it according to the package directions, preferably in a 9-inch pie pan, then let it cool completely before adding the mousse.
Why is my mousse too soft?
The mousse may be too soft if the heavy cream was not whipped enough, the cream cheese was too warm, or the pie did not chill long enough. Make sure the whipped cream reaches stiff peaks and give the finished pie plenty of refrigerator time.
Can I use whipped topping instead of heavy cream?
Yes. A prepared whipped topping can be used as a shortcut. The texture may be slightly different, but it can make the mousse faster and easier to prepare.
Can I make this pie without a food processor?
Absolutely. Place the Oreos in a sealed zip-top bag and crush them with a rolling pin, bottle, or the bottom of a sturdy measuring cup.
Can I use a different type of cookie?
Yes. Chocolate sandwich cookies, gluten-free sandwich cookies, or another favorite chocolate cookie can be substituted for classic Oreos. The flavor and texture will vary slightly depending on the cookie you choose.
Can I make this recipe gluten-free?
Yes. Use certified gluten-free chocolate sandwich cookies and a gluten-free flour blend suitable for baking. Check all packaged ingredients carefully if the dessert is being prepared for someone with celiac disease or a gluten allergy.
Can I freeze Brownie Bottom Oreo Mousse Pie?
Yes. Wrap the pie tightly and freeze it for up to 1 month for the best quality. Thaw it slowly in the refrigerator before serving.
How do I get clean slices?
Chill the pie thoroughly before cutting. Use a sharp knife warmed briefly under hot water, then wipe it dry before slicing. Clean and rewarm the knife between cuts for neat layers.
Can I make individual Oreo mousse pies?
Yes. You can divide the recipe into smaller portions and adjust the brownie baking time accordingly. Individual servings are especially convenient for parties and gatherings.
Should I add Oreo toppings before or after chilling?
For the best appearance and texture, add decorative Oreo pieces, crumbs, or whipped cream shortly before serving. This helps prevent the cookies from becoming too soft.


Brownie Bottom Oreo Mousse Pie
Ingredients
Method
- Preheat the oven to 350°F and lightly grease a 9-inch pie pan.
- Whisk together the melted butter and granulated sugar. Add the eggs and vanilla and mix until smooth.
- Add the cocoa powder, flour, and salt. Stir just until the dry ingredients disappear.
- Fold the chopped Oreos into the brownie batter and spread the mixture evenly in the prepared pie pan.
- Bake for 18 to 22 minutes, until the edges are set and the center remains slightly soft. Cool completely.
- Crush the Oreo cookies for the mousse, keeping some pieces slightly larger for texture.
- Beat the softened cream cheese, granulated sugar, and vanilla until smooth and creamy.
- In a separate bowl, whip the cold heavy cream with the powdered sugar until stiff peaks form.
- Gently fold the whipped cream into the cream cheese mixture, then fold in the crushed Oreos.
- Spread the Oreo mousse evenly over the completely cooled brownie base.
- Cover and refrigerate for at least 4 hours, or preferably overnight.
- Before serving, decorate with crushed Oreos, Oreo halves, and optional whipped cream. Slice with a sharp knife and serve chilled.
Video
Notes
- Cool the brownie completely before adding the mousse.
- Do not overbake the brownie, as the base should remain soft and fudgy.
- Use softened cream cheese to prevent lumps.
- Keep the heavy cream cold for the best whipping results.
- Fold the whipped cream gently to maintain the mousse’s airy texture.
- For the cleanest slices, chill the pie overnight.
- Add decorative Oreo cookies shortly before serving for the best texture.
- Nutritional information is an estimate and can vary depending on the brands and exact ingredients used.
Final Thoughts
Brownie Bottom Oreo Mousse Pie is the kind of dessert that makes an ordinary gathering feel a little more special. The fudgy brownie bottom provides a rich chocolate foundation, while the creamy Oreo mousse adds a soft, airy contrast with plenty of cookie flavor in every bite.
It is simple enough for a beginner to make, but the finished layers look polished enough for birthdays, holidays, dinner parties, or weekend dessert tables. The best part is that you can prepare it ahead of time and let the refrigerator do most of the work.
For the best results, give the brownie plenty of time to cool, whip the cream until properly firm, and allow the finished pie to chill completely before slicing. Those small details make a noticeable difference in the final texture.
If you make this Oreo mousse pie, try adding your favorite Oreo variety or a simple topping of crushed cookies to make it your own. Serve each chilled slice with a little extra whipped cream if you like, then enjoy the contrast of fudgy brownie, creamy mousse, and crunchy chocolate cookies.
This is a dessert worth keeping in your recipe collection whenever you need an easy chocolate treat that looks as good as it tastes.