
No Bake Chocolate Nutter Butter Mousse Pie
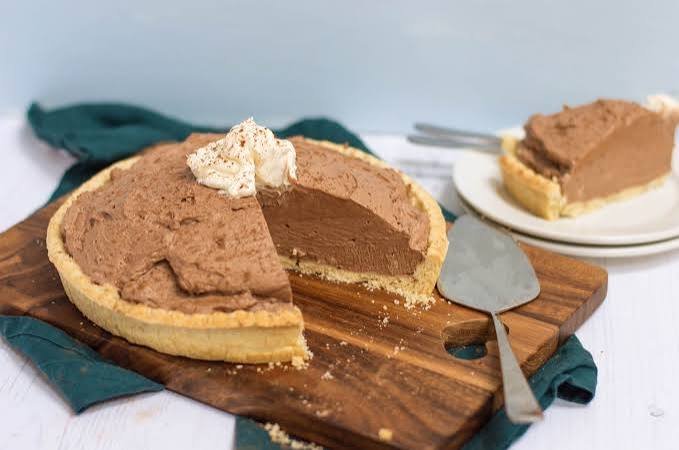
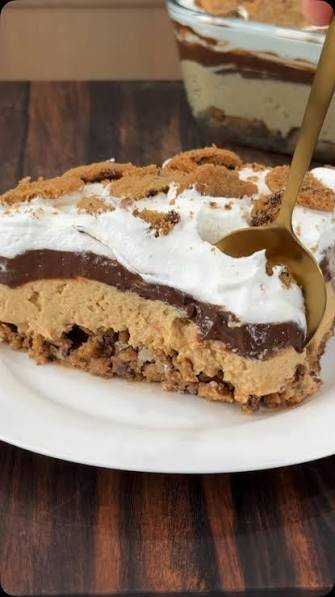
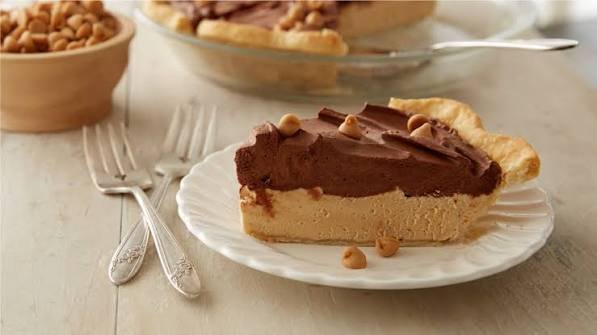
If chocolate and peanut butter are a favorite combination in your house, this No Bake Chocolate Nutter Butter Mousse Pie belongs on your dessert table. It starts with a buttery Nutter Butter cookie crust, followed by a smooth chocolate mousse layer and a light, creamy peanut butter cookie mousse. Every forkful brings together rich chocolate, sweet peanut butter, and a soft cookie crunch in one irresistible bite.
The best part is that there is no oven involved. Once the crust and mousse layers are prepared, the refrigerator does the rest of the work. The finished pie is cool, creamy, and beautifully layered, making it a wonderful choice for holidays, family gatherings, birthdays, or any time you want an impressive dessert without turning on the oven.
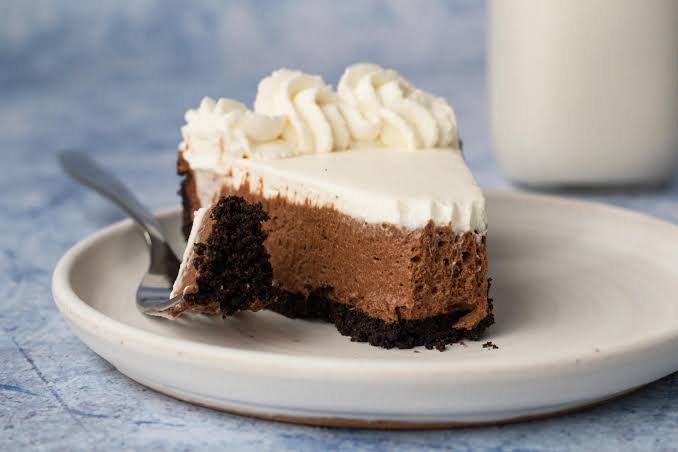
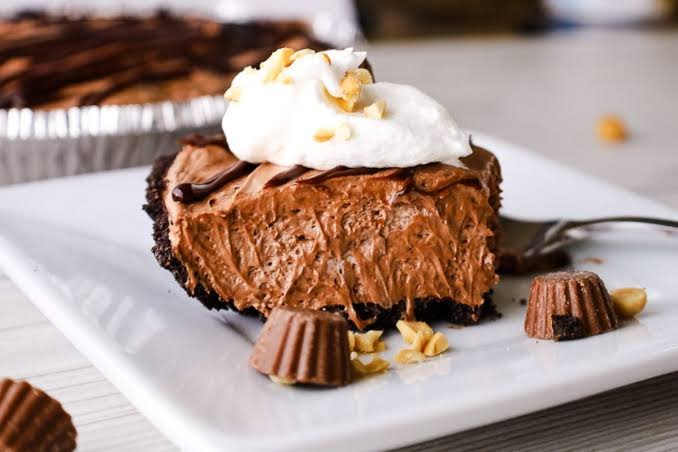
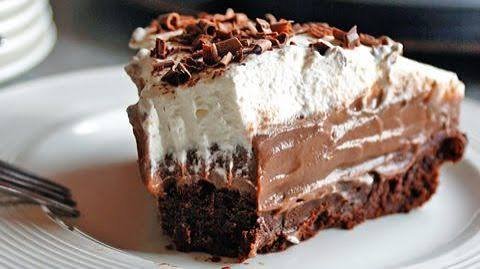
What makes this pie especially enjoyable is the contrast in texture. The cookie crust gives you a firm, buttery base, while the chocolate mousse melts softly on your tongue. The Nutter Butter mousse adds a fluffy peanut butter flavor with little pieces of cookie throughout. Finish it with whipped cream, a drizzle of peanut butter, and extra cookie crumbs for a dessert that looks as good as it tastes.
If you love no-bake desserts, chocolate mousse, and classic peanut butter treats, this easy mousse pie is a recipe worth keeping close. The layers can be prepared ahead of time, and once properly chilled, each slice cuts into a creamy, picture-perfect dessert.
Why You’ll Love This Recipe
- No oven required: This is an easy no-bake dessert that comes together without heating up the kitchen.
- Chocolate and peanut butter in every bite: Rich chocolate mousse pairs beautifully with creamy peanut butter and sweet Nutter Butter cookies.
- Soft, fluffy texture: The mousse layers are light and creamy rather than heavy, creating a smooth contrast with the crisp cookie crust.
- A simple cookie crust: Crushed Nutter Butter cookies make a flavorful crust without the need for traditional pastry dough.
- Great for making ahead: The pie needs time to chill, so you can prepare it several hours before serving and keep it refrigerated until dessert time.
- Perfect for special occasions: Its layered appearance makes it feel elegant enough for celebrations while the preparation remains beginner-friendly.
- Easy to customize: Add chocolate shavings, cookie crumbs, whipped cream, or a peanut butter drizzle to make each slice your own.
- A family-friendly favorite: The familiar combination of chocolate, peanut butter, and cookies makes this mousse pie especially appealing to both kids and adults.
Ingredients
This no-bake chocolate Nutter Butter mousse pie uses simple ingredients that work together to create a rich cookie crust and two creamy mousse layers.
For the Nutter Butter Cookie Crust
- 24 Nutter Butter sandwich cookies
- 5 tablespoons unsalted butter, melted
For the Chocolate Mousse Layer
- 4 ounces semi-sweet chocolate, finely chopped
- 1 tablespoon granulated sugar
- 1/2 teaspoon vanilla extract
- 1 cup heavy whipping cream, cold
- 2 tablespoons powdered sugar
For the Nutter Butter Mousse
- 8 Nutter Butter sandwich cookies, finely crushed
- 4 ounces cream cheese, softened
- 1/2 cup creamy peanut butter
- 1/3 cup powdered sugar
- 1 teaspoon vanilla extract
- 1 cup heavy whipping cream, cold
For the Topping
- 1 cup heavy whipping cream, cold
- 2 tablespoons powdered sugar
- 4 to 6 Nutter Butter cookies, roughly chopped
- 2 tablespoons creamy peanut butter, slightly warmed for drizzling
- Chocolate shavings, optional
For the best texture, use full-fat cream cheese and cold heavy whipping cream. If possible, let the cream cheese soften at room temperature before mixing so the peanut butter mousse becomes smooth and creamy without lumps.
Ingredient Notes & Substitutions
A few small ingredient choices can make a big difference in the texture and flavor of this no-bake pie. Here are some practical tips and easy substitutions to help you work with what you already have.
Nutter Butter Cookies
Nutter Butter sandwich cookies are the star of the crust and mousse, giving the pie its signature peanut butter cookie flavor. Keep some cookies finely crushed for the crust and save a few larger pieces for texture and decoration.
If Nutter Butter cookies are unavailable, you can substitute another peanut butter sandwich cookie. The flavor will be slightly different, but the pie will still have a delicious peanut butter base.
Butter
Unsalted butter is ideal for the cookie crust because it lets you control the salt level. Melt the butter gently and allow it to cool for a few minutes before combining it with the cookie crumbs.
Salted butter works too. If you use it, you may want to avoid adding any extra salt elsewhere in the recipe.
Chocolate
Semi-sweet chocolate gives the mousse a balanced chocolate flavor without making the pie overly sweet. Dark chocolate can be used for a deeper, less-sweet taste.
Milk chocolate is also an option if you prefer a softer, sweeter chocolate flavor.
Heavy Whipping Cream
Cold heavy whipping cream is essential for creating a stable, fluffy mousse. Keep it refrigerated until you are ready to whip it.
For the best results, use heavy cream with enough fat to whip properly. Lighter dairy products generally will not produce the same thick, airy texture.
Cream Cheese
Full-fat cream cheese creates the richest and smoothest peanut butter mousse. Make sure it is softened before mixing so the filling stays creamy instead of developing small lumps.
Reduced-fat cream cheese can be used, although the mousse may be slightly softer.
Peanut Butter
Use smooth, creamy peanut butter for an even mousse texture. Conventional creamy peanut butter is usually the easiest choice.
Natural peanut butter can work, but stir it very well first. If the oil has separated, an unevenly mixed peanut butter can make the mousse softer or slightly greasy.
Powdered Sugar
Powdered sugar dissolves easily into the mousse and whipped cream, helping keep the texture smooth. It also adds sweetness without the graininess that granulated sugar can sometimes create in cold desserts.
Dairy-Free Option
For a dairy-free version, use plant-based butter, dairy-free cream cheese, dairy-free whipping cream, and chocolate that is clearly labeled dairy-free. Also check the cookie ingredients carefully, since not every peanut butter sandwich cookie is made with the same ingredients.
Gluten-Free Option
The easiest way to make this pie gluten-free is to replace the Nutter Butter cookies with certified gluten-free peanut butter sandwich cookies. Check every packaged ingredient label to make sure it meets your dietary needs.
A Simple Budget-Friendly Tip
If you are trying to keep the ingredient cost down, skip the decorative chocolate shavings and extra peanut butter drizzle. The cookie pieces and creamy mousse already give the finished pie plenty of flavor and texture.
Kitchen Tools Needed
You do not need a long list of specialty equipment to make this no-bake mousse pie. A few basic kitchen tools are enough.
- 9-inch pie dish: A standard pie plate gives the crust and mousse layers enough room to set evenly.
- Food processor: Useful for turning the Nutter Butter cookies into fine crumbs quickly. A sturdy zip-top bag and rolling pin also work.
- Mixing bowls: Use separate bowls for the chocolate mousse, peanut butter mousse, and whipped cream.
- Electric hand mixer or stand mixer: Makes whipping the cream quick and easy. You can whisk by hand, but it will take more effort.
- Rubber spatula: Helps fold whipped cream into the mousse gently without losing too much air.
- Measuring cups and spoons: Accurate measurements help keep the mousse layers at the right consistency.
- Microwave-safe bowl: Handy for melting the chocolate in short intervals.
- Offset spatula or spoon: Helpful for spreading each mousse layer into an even surface.
- Plastic wrap: Useful for covering the pie while it chills in the refrigerator.
Optional Helpful Tools
A piping bag with a star tip can be used to create neat whipped cream swirls around the finished pie. A sharp knife is also helpful for cutting clean slices. For especially tidy cuts, wipe the knife clean between slices.
Step-by-Step Instructions
1. Prepare the Cookie Crust
Place the Nutter Butter cookies in a food processor and pulse until they become fine crumbs. Pour in the melted butter and pulse again until the crumbs are evenly moistened.
Press the mixture firmly into the bottom and slightly up the sides of a 9-inch pie dish. Use the flat bottom of a measuring cup to compact the crust evenly.
Refrigerate the crust for at least 20 minutes while you prepare the mousse layers. A well-packed crust will hold together much better when the pie is sliced.
2. Make the Chocolate Mousse
Place the chopped semi-sweet chocolate in a microwave-safe bowl. Heat it in short 20 to 30 second intervals, stirring well after each interval, until smooth. Avoid overheating the chocolate.
Set it aside for a few minutes so it can cool slightly but remain fluid.
In a separate bowl, whip the cold heavy cream with the powdered sugar until soft peaks form. The cream should look fluffy and hold its shape, but it should not become stiff or grainy.
Gently fold the whipped cream into the cooled chocolate in batches. Add the vanilla and continue folding until the mixture is smooth and evenly combined.
3. Add the Chocolate Layer
Remove the chilled crust from the refrigerator. Spoon the chocolate mousse over the crust and spread it gently into an even layer.
Try not to press too firmly, since the mousse gets its light texture from the air incorporated into the whipped cream.
Place the pie back in the refrigerator while you prepare the peanut butter mousse.
4. Prepare the Nutter Butter Mousse
Beat the softened cream cheese, creamy peanut butter, powdered sugar, and vanilla extract in a mixing bowl until smooth.
Scrape down the sides of the bowl as needed. The mixture should be thick, creamy, and free of visible cream cheese lumps.
In another bowl, whip the cold heavy cream until soft to medium peaks form.
Fold the whipped cream gently into the peanut butter mixture. Once the mousse is mostly smooth, fold in the finely crushed Nutter Butter cookies.
5. Layer the Peanut Butter Mousse
Carefully spoon the Nutter Butter mousse over the chocolate layer. Spread it gently with a spatula until the top is smooth and even.
If the chocolate layer feels very soft, chill it for a little longer before adding the peanut butter mousse. This helps keep the layers distinct.
6. Chill the Pie
Cover the pie loosely with plastic wrap and refrigerate it for at least 4 to 6 hours.
For the cleanest slices and the firmest texture, chilling the pie overnight is even better. Do not rush this step. The mousse needs enough time to become stable.
7. Make the Whipped Cream Topping
Just before serving, whip the cold heavy cream with powdered sugar until firm peaks form.
Spread the whipped cream over the top of the chilled pie, or pipe decorative swirls around the edges.
8. Finish the Pie
Sprinkle the top with chopped Nutter Butter cookies. Drizzle lightly with warmed peanut butter and add chocolate shavings if desired.
Let the warmed peanut butter cool slightly before drizzling so it does not melt the whipped cream.
9. Slice and Serve
For neat slices, use a sharp knife warmed under hot water and then dried completely. Cut through the chilled pie with a smooth motion, wiping the knife clean between cuts.
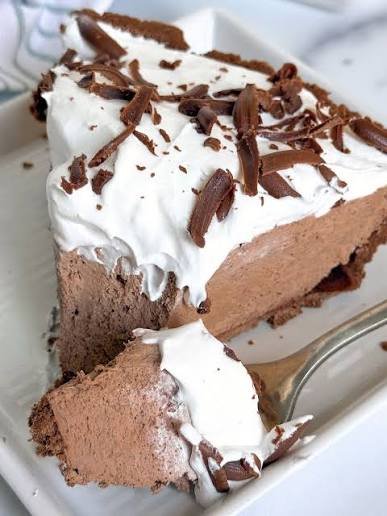
Serve the pie cold. The crust should have a buttery cookie crunch, while the chocolate and peanut butter mousse should be soft, creamy, and airy.
Common Mistakes to Avoid
Do not skip chilling the crust. A cold, firmly packed crust is much easier to layer and slice.
Do not overheat the chocolate. Excessive heat can cause melted chocolate to become thick or grainy.
Do not overwhip the cream. Stop when the cream holds its shape. If it becomes grainy, it has been whipped too far.
Do not stir the whipped cream aggressively into the mousse. Fold gently to preserve the air that gives the filling its fluffy texture.
Do not cut the pie too soon. The mousse needs several hours in the refrigerator to set properly.
Expert Tips
A few simple techniques can make the difference between a good mousse pie and one with beautifully defined layers, a sturdy crust, and an airy filling.
Crush the Cookies Finely
For the crust, aim for very fine cookie crumbs. Larger pieces can make the crust difficult to press together and may cause it to crumble when sliced.
If you do not have a food processor, place the cookies in a sealed bag and crush them with a rolling pin.
Pack the Crust Firmly
Press the cookie mixture firmly into the pie dish, especially around the edges. A measuring cup with a flat base makes this easy.
An evenly packed crust gives each slice a sturdy foundation instead of a loose, crumbly base.
Keep the Cream Cold
Cold heavy cream whips more easily and creates a stronger mousse. For an extra-helpful trick, chill your mixing bowl and beaters for about 10 minutes before whipping.
Let Melted Chocolate Cool Slightly
Chocolate that is extremely hot can deflate whipped cream or create an uneven mousse. Let the melted chocolate cool until it feels warm rather than hot before folding it into the whipped cream.
Fold, Do Not Stir
Use a rubber spatula to gently fold the whipped cream into the chocolate and peanut butter mixtures. Slow, deliberate folds help keep the mousse light and fluffy.
Use Softened Cream Cheese
Room-temperature cream cheese blends much more smoothly with peanut butter and powdered sugar. Cold cream cheese can leave small lumps in the mousse.
Give the Pie Enough Chilling Time
The refrigerator is an important part of the recipe. Four to six hours will allow the mousse to firm up, but overnight chilling usually gives the pie its best sliceable texture.
Make Clean Slices
For bakery-style slices, dip a sharp knife in hot water, dry it thoroughly, and then cut the pie. Repeat the process between slices for cleaner edges.
Balance the Sweetness
If you prefer a less-sweet dessert, use dark chocolate instead of milk chocolate and choose a natural-tasting peanut butter. The slight bitterness of dark chocolate balances the sweet cookie crust nicely.
Add Toppings Just Before Serving
Keep the toppings fresh by adding whipped cream, cookie pieces, and peanut butter drizzle shortly before serving. This keeps the cookies from becoming overly soft and helps the pie look freshly finished.
Variations
This chocolate peanut butter mousse pie is easy to customize. You can keep the classic combination or adjust the flavors and ingredients to suit different preferences.
Chocolate Lovers Version
Use dark chocolate in the mousse and finish the pie with chocolate curls or finely grated chocolate. The darker chocolate creates a deeper flavor that balances the sweetness of the cookie crust.
Extra Peanut Butter Version
For a stronger peanut butter flavor, add an extra drizzle of creamy peanut butter over each slice. You can also fold a small amount of finely chopped Nutter Butter cookies into the mousse for more cookie texture.
Crunchy Peanut Butter Version
If you enjoy texture, replace part of the creamy peanut butter with crunchy peanut butter. The small peanut pieces add a pleasant contrast to the smooth mousse.
Chocolate Cookie Crust
For even more chocolate flavor, replace the Nutter Butter crust with chocolate sandwich cookies. Keep the peanut butter mousse and chocolate mousse layers unchanged for a rich chocolate-peanut butter combination.
Gluten-Free Version
Use certified gluten-free peanut butter sandwich cookies and check the labels on the chocolate, cream cheese, and other packaged ingredients. This allows you to create a gluten-free version without changing the overall preparation.
Dairy-Free Version
Use dairy-free butter, dairy-free cream cheese, dairy-free whipping cream, and dairy-free chocolate. Check the cookie ingredients carefully and choose a suitable peanut butter cookie that fits your dietary needs.
Less-Sweet Version
Choose dark chocolate and reduce the amount of powdered sugar in the mousse if desired. A slightly less-sweet filling lets the roasted peanut butter flavor stand out more clearly.
Mini Mousse Pies
Instead of using one large pie dish, divide the crust and mousse between small dessert cups or individual tart shells. Chill them until firm and top each serving with whipped cream and cookie crumbs.
Holiday Presentation
For parties or holiday dinners, pipe small whipped cream swirls around the edge and add chopped peanut butter cookies on top. You can also finish each slice with a light chocolate drizzle for a polished dessert-table presentation.
Storage Instructions
Proper storage helps keep the mousse light, the crust firm, and the toppings fresh.
Refrigerator Storage
Cover the pie loosely with plastic wrap or place it in an airtight pie container. Store it in the refrigerator for up to 4 days.
For the best texture, keep the pie chilled until you are ready to serve it. Avoid leaving it at room temperature for extended periods because the mousse can soften.
If possible, add whipped cream, cookie pieces, and peanut butter drizzle shortly before serving rather than several days in advance.
Freezer Storage
You can freeze the pie if you want to prepare it well ahead of time. Wrap the chilled pie tightly with plastic wrap, followed by a layer of aluminum foil to help prevent freezer odors and freezer burn.
Freeze for up to 1 month for the best quality.
For easier serving, you can also freeze individual slices in airtight containers. Place parchment paper between slices if stacking them.
How to Thaw
Transfer the frozen pie to the refrigerator and allow it to thaw slowly for several hours or overnight. Avoid thawing it on the kitchen counter, as the mousse can become too soft.
Add fresh whipped cream and toppings after the pie has thawed.
Can You Reheat This Pie?
No. This is a chilled no-bake mousse dessert and should be served cold. Heating it will cause the whipped cream and mousse to lose their structure and can make the filling separate.
Frequently Asked Questions
Can I make this pie ahead of time?
Yes. This pie is ideal for making ahead. Prepare it the day before serving and keep it covered in the refrigerator. Overnight chilling also gives the mousse plenty of time to firm up.
How long does the pie need to chill?
Plan on at least 4 to 6 hours in the refrigerator. For the firmest texture and cleanest slices, chilling it overnight is recommended.
Can I use a store-bought crust?
Yes. A prepared chocolate or graham cracker crust can save time. However, a homemade Nutter Butter cookie crust gives the pie a stronger peanut butter cookie flavor.
Why is my mousse too soft?
The most common reasons are under-whipped cream, warm ingredients, or not enough chilling time. Make sure the heavy cream is cold and allow the finished pie plenty of time to set in the refrigerator.
Can I use crunchy peanut butter?
Yes. Crunchy peanut butter works well if you want small pieces of peanuts throughout the mousse. Creamy peanut butter creates a smoother, more traditional mousse texture.
Can I use a different chocolate?
Absolutely. Semi-sweet chocolate provides a balanced flavor, while dark chocolate makes the mousse richer and less sweet. Milk chocolate can be used for a sweeter, milder result.
Can I freeze Nutter Butter mousse pie?
Yes. Wrap the pie tightly and freeze it for up to 1 month for the best quality. Thaw it slowly in the refrigerator before serving.
How do I get clean slices?
Make sure the pie is thoroughly chilled. Use a sharp knife warmed under hot water, dry the blade completely, and cut with a smooth motion. Clean and warm the knife again between slices.
Can I make individual portions?
Yes. Divide the cookie crust and mousse between small dessert cups or individual serving dishes. Chill until firm and add the toppings just before serving.
Can I make this pie without Nutter Butter cookies?
Yes. Another peanut butter sandwich cookie can be substituted. You can also use a chocolate cookie crust if you prefer a stronger chocolate flavor.

No Bake Chocolate Nutter Butter Mousse Pie
Ingredients
Method
- Crush the Nutter Butter cookies into fine crumbs. Mix with melted butter until evenly moistened.
- Press the mixture firmly into the bottom and slightly up the sides of a 9-inch pie dish. Refrigerate for at least 20 minutes.
- Melt the chopped chocolate in short microwave intervals, stirring between each interval. Let it cool slightly
- Whip 1 cup of cold heavy cream with powdered sugar until soft peaks form. Gently fold the whipped cream into the cooled chocolate mixture
- Spread the chocolate mousse evenly over the chilled cookie crust
- Beat the softened cream cheese, peanut butter, powdered sugar, and vanilla until smooth
- Whip the remaining 1 cup of heavy cream until soft to medium peaks form. Fold it gently into the peanut butter mixture, then fold in the crushed Nutter Butter cookies
- Spread the peanut butter mousse over the chocolate mousse layer.
- Cover and refrigerate for at least 4 to 6 hours, or preferably overnight.
- Before serving, whip the topping cream with powdered sugar until firm peaks form. Spread or pipe it over the chilled pie
- Finish with chopped Nutter Butter cookies, a light peanut butter drizzle, and chocolate shavings if desired
- Slice with a sharp, warm, dry knife for the cleanest presentation.
Video
Final Thoughts
This No Bake Chocolate Nutter Butter Mousse Pie is the kind of dessert that makes a special occasion feel a little easier. The buttery peanut butter cookie crust, creamy chocolate mousse, and fluffy Nutter Butter filling come together in layers that are rich without requiring any baking.
It is also a practical make-ahead dessert. Prepare the pie several hours before serving, let it chill until firm, then add the whipped cream and toppings when you are ready to bring it to the table.
Whether you are making it for a holiday gathering, a family dinner, or simply craving a chocolate and peanut butter dessert, this mousse pie is an easy recipe to keep in your collection.
Slice it cold, add a few extra cookie pieces on top, and enjoy every creamy, chocolatey bite. If you make this recipe, share how you served it and which topping you chose.
6 Comments