No Bake Peanut Butter Marshmallow Pie
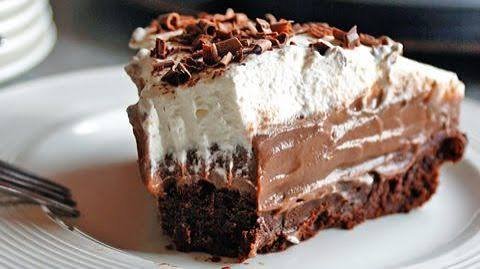
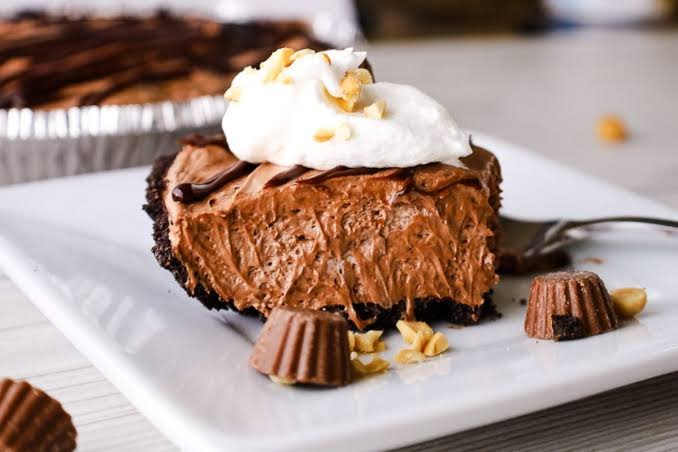
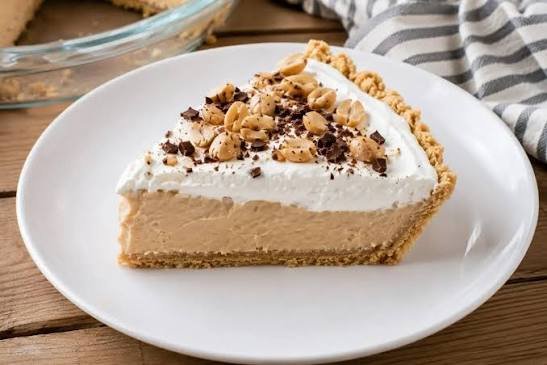
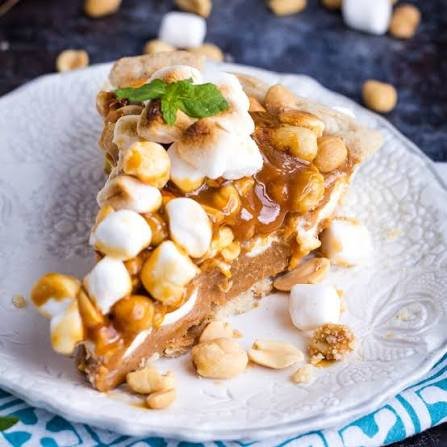
If you love the classic combination of creamy peanut butter and fluffy marshmallow, this No Bake Peanut Butter Marshmallow Pie is the dessert to keep in your back pocket. It has a buttery cookie crust, a smooth peanut butter filling, and a light, cloud-like texture that makes every bite feel rich without being heavy. Best of all, there is no oven required, making it an easy choice for warm days, holidays, family gatherings, or whenever you want a homemade dessert without a lot of fuss.
The filling brings together the nutty richness of peanut butter with the soft sweetness of marshmallow, creating a creamy mousse-like center that slices beautifully once chilled. The crisp cookie crust adds just the right amount of contrast, while a simple whipped cream topping makes the pie feel extra special.
This easy no bake pie is also a wonderful make-ahead dessert. You can prepare it several hours before serving, let it chill until perfectly set, then add your favorite toppings just before bringing it to the table. Whether you are making your first homemade pie or simply looking for a quick peanut butter dessert, this recipe keeps the process simple while delivering plenty of texture and flavor.
Why You’ll Love This Recipe
There is a lot to appreciate about this easy no bake pie, especially when you want a homemade dessert without spending hours in the kitchen.
- No oven required: Perfect for hot days or when you want to keep dessert preparation simple.
- Creamy and fluffy texture: The peanut butter filling is smooth, rich, and wonderfully light from the marshmallow and whipped topping.
- Classic flavor combination: Peanut butter and marshmallow create a sweet, nutty flavor that feels familiar and comforting.
- Simple ingredients: You only need a handful of easy-to-find ingredients to put this pie together.
- Great make-ahead dessert: Prepare it in advance and let it chill until you are ready to serve.
- Beginner-friendly: There is no complicated baking technique or tricky pastry work involved.
- Easy to customize: Add chocolate shavings, crushed cookies, chopped peanuts, or a drizzle of melted chocolate for a personal touch.
- Perfect for gatherings: The creamy filling and crisp crust make this an appealing dessert for holidays, potlucks, birthdays, and family dinners.
The best part is the contrast between the buttery crust and the soft peanut butter marshmallow filling. Once properly chilled, the pie becomes easy to slice while staying creamy and tender in the center.
Ingredients
For this No Bake Peanut Butter Marshmallow Pie, you only need a few simple ingredients. Each one has a specific job, from creating the crisp cookie crust to giving the filling its creamy, fluffy texture.
For the Crust
- 24 chocolate sandwich cookies, finely crushed
- 5 tablespoons unsalted butter, melted
For the Peanut Butter Marshmallow Filling
- 7 ounces marshmallow creme
- 4 ounces cream cheese, softened
- 1/2 cup creamy peanut butter
- 1/3 cup powdered sugar
- 1 teaspoon pure vanilla extract
- 1 cup heavy whipping cream, cold
For the Topping
- 1 cup heavy whipping cream, cold
- 2 tablespoons powdered sugar
- 1/2 teaspoon pure vanilla extract
- 2 tablespoons finely chopped peanuts, optional
- Chocolate shavings or mini chocolate chips, optional
For the smoothest filling, use creamy peanut butter rather than natural peanut butter with a separated layer of oil. Make sure the cream cheese is softened before mixing so the filling blends evenly without lumps.
Ingredient Notes & Substitutions
A few small ingredient choices can make a noticeable difference in the texture and flavor of this no bake peanut butter marshmallow pie. Here is what to know before you start.
Chocolate Sandwich Cookies
Chocolate sandwich cookies create a rich, slightly crisp crust that pairs beautifully with the sweet peanut butter filling. Crush the cookies very finely so the crust holds together when sliced.
Substitution: You can use graham crackers, chocolate wafer cookies, or peanut butter sandwich cookies for a different flavor.
Unsalted Butter
Melted butter binds the cookie crumbs together and helps the crust firm up in the refrigerator.
Substitution: Salted butter works too. If using salted butter, you may want to skip adding any extra salt elsewhere in the recipe.
Marshmallow Creme
Marshmallow creme gives the filling its signature soft, fluffy texture and adds sweetness without requiring large marshmallows to melt.
Substitution: Marshmallow fluff can generally be used in the same amount.
Cream Cheese
Softened cream cheese adds a gentle tang that balances the sweetness of the marshmallow and powdered sugar. Full-fat cream cheese gives the richest, firmest filling.
Substitution: Reduced-fat cream cheese can be used, although the finished pie may be slightly softer.
Creamy Peanut Butter
Regular creamy peanut butter works best because its stable texture blends smoothly into the filling.
Substitution: Crunchy peanut butter can be used if you enjoy small pieces of peanuts throughout the pie. For a nut-free version, use a creamy sunflower seed butter, keeping in mind that the flavor will change.
Powdered Sugar
Powdered sugar sweetens the filling while dissolving easily, helping keep the mixture smooth.
Substitution: Confectioners’ sugar is the same ingredient and can be used interchangeably.
Heavy Whipping Cream
Cold heavy cream is important for creating a thick, fluffy whipped texture. Chill the bowl and beaters for a few minutes before whipping if your kitchen is warm.
Dairy-free option: A reliable dairy-free whipping cream can be substituted, along with dairy-free cream cheese if needed.
Vanilla Extract
Vanilla rounds out the peanut butter and marshmallow flavors and adds a subtle warmth to the filling.
Budget-friendly tip: If you do not have pure vanilla extract, regular vanilla extract works perfectly well here.
Topping Ideas
The topping is completely flexible. Chopped roasted peanuts add crunch, while chocolate shavings or mini chocolate chips bring out the chocolate notes in the cookie crust.
For an extra peanut butter finish, add a light drizzle of warmed peanut butter over the chilled pie just before serving. Let it cool slightly first so it does not soften the filling.
Kitchen Tools Needed
You do not need any specialized equipment to make this no bake peanut butter marshmallow pie. A few basic kitchen tools are enough.
- 9-inch pie dish: A standard pie plate works well for the cookie crust and creamy filling.
- Food processor: The quickest way to turn the cookies into fine crumbs. A zip-top bag and rolling pin also work.
- Mixing bowls: Use separate bowls for the filling and whipped cream.
- Electric hand mixer: Makes whipping the cream quick and easy. A stand mixer works too.
- Rubber spatula: Helpful for gently folding the whipped cream into the peanut butter mixture without deflating it.
- Measuring cups and spoons: Accurate measurements help the filling set properly.
- Flat-bottomed measuring cup: Useful for pressing the cookie crumbs firmly and evenly into the pie dish.
- Refrigerator: Essential for chilling the pie until the filling is firm enough to slice.
For the cleanest presentation, keep a sharp knife nearby and wipe the blade between slices. This helps create neat pieces without dragging the creamy filling across the crust.
Step-by-Step Instructions
This no bake peanut butter marshmallow pie comes together in a few simple stages. Take your time with the chilling and folding steps, since they make the biggest difference in the final texture.
1. Prepare the Cookie Crust
Crush the chocolate sandwich cookies into fine crumbs using a food processor. Pour in the melted butter and pulse until the crumbs look evenly moistened.
Press the mixture firmly into the bottom and slightly up the sides of a 9-inch pie dish. Use the bottom of a measuring cup to create an even, compact layer.
Place the crust in the refrigerator while you prepare the filling. A firm crust is much easier to work with later.
2. Beat the Cream Cheese and Peanut Butter
Add the softened cream cheese, creamy peanut butter, and powdered sugar to a large mixing bowl.
Beat until the mixture is completely smooth and creamy. Scrape down the sides of the bowl as needed so there are no pockets of cream cheese left behind.
Add the vanilla extract and mix briefly to combine.
3. Add the Marshmallow Creme
Add the marshmallow creme to the peanut butter mixture. Beat on low speed until it is incorporated, then mix just until the filling looks smooth and uniform.
Avoid overmixing at this stage. The goal is a creamy mixture without making it unnecessarily dense.
4. Whip the Heavy Cream
Pour the cold heavy whipping cream into a clean mixing bowl. Beat with an electric mixer until stiff peaks form.
The cream should hold its shape when you lift the beaters. If it looks loose or runny, continue whipping for another few seconds, watching carefully so it does not become grainy.
5. Fold the Whipped Cream Into the Filling
Add the whipped cream to the peanut butter marshmallow mixture in two or three additions.
Use a rubber spatula to gently fold rather than aggressively stirring. Continue until no obvious streaks of whipped cream remain.
This gentle folding keeps air in the mixture and gives the finished pie its light, fluffy texture.
6. Fill the Chilled Crust
Remove the crust from the refrigerator and spoon the peanut butter marshmallow filling into it.
Spread the top evenly with a spatula. You can leave it smooth or create soft swirls for a more homemade look.
If you are adding chopped peanuts or chocolate chips inside the pie, sprinkle them over the filling and lightly press them into the surface.
7. Chill Until Firm
Cover the pie loosely and refrigerate for at least 4 hours, or until the filling is firm enough to slice cleanly.
For the best texture, chilling overnight works especially well. The filling becomes more stable while remaining creamy.
Do not rush this step. Cutting into the pie too early can result in a soft filling that does not hold its shape.
8. Add the Topping
Before serving, whip the remaining heavy cream with powdered sugar and vanilla until stiff peaks form.
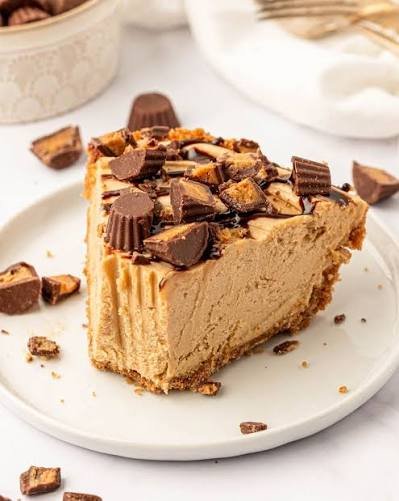
Spread or pipe the whipped cream over the chilled pie. Finish with chopped peanuts, chocolate shavings, or mini chocolate chips if desired.
9. Slice and Serve
For cleaner slices, dip a sharp knife into warm water, wipe it dry, and then cut the pie. Repeat between slices.
Serve the pie cold. The contrast between the firm chocolate cookie crust and the creamy peanut butter marshmallow filling is especially enjoyable when the pie is thoroughly chilled.
Common Mistakes to Avoid
- Using warm cream: Cold heavy cream whips more easily and holds its shape better.
- Skipping the crust chill: A chilled crust is sturdier and less likely to crumble when filled.
- Overmixing the whipped cream: Once stiff peaks form, stop beating.
- Folding too aggressively: Rough mixing can knock out the air that gives the filling its fluffy texture.
- Cutting the pie too soon: Give the filling enough time to set properly in the refrigerator.
Expert Tips
A few simple techniques can make this no bake peanut butter marshmallow pie even smoother, fluffier, and easier to serve.
Use Room-Temperature Cream Cheese
Let the cream cheese soften before mixing. Cold cream cheese can leave small lumps in the filling, while softened cream cheese blends smoothly with the peanut butter and powdered sugar.
Keep the Whipping Cream Very Cold
Cold heavy cream creates a thicker, more stable whipped cream. For an extra reliable result, chill your mixing bowl and beaters for about 10 minutes before whipping.
Do Not Overbeat the Filling
Once the peanut butter, cream cheese, marshmallow creme, and powdered sugar are smooth, stop mixing. Overworking the mixture can make the filling heavier than necessary.
Fold Instead of Stirring
When adding the whipped cream, use a rubber spatula and gently fold from the bottom of the bowl upward. This preserves the air in the whipped cream and gives the pie its soft, mousse-like texture.
Make a Firm Cookie Crust
Press the cookie crumbs firmly into the pie dish, especially around the edges. A loosely packed crust can crumble when you cut the first slice.
Give the Pie Enough Chill Time
Four hours is the minimum recommended chilling time, but an overnight rest gives the filling even more time to firm up. This is especially helpful when preparing the dessert for guests.
Add Toppings Just Before Serving
Chopped peanuts, chocolate shavings, and whipped cream look freshest when added shortly before serving. This also keeps crunchy toppings from becoming soft in the refrigerator.
For Cleaner Slices
Run a sharp knife under warm water, dry it thoroughly, and slice the pie. Clean and warm the knife again between cuts for smooth, bakery-style slices.
Balance the Sweetness
If you prefer a less-sweet dessert, use slightly less powdered sugar in the whipped topping. The marshmallow creme and cookie crust already contribute plenty of sweetness, so a lighter topping can create a more balanced bite.
Variations
This no bake peanut butter marshmallow pie is easy to customize without changing the basic method. Try one of these variations when you want a slightly different flavor or texture.
Chocolate Peanut Butter Pie
Add 2 to 3 tablespoons of unsweetened cocoa powder to the filling for a deeper chocolate flavor. You can also use a chocolate cookie crust and finish the pie with chocolate curls.
Peanut Butter Cup Version
Fold a handful of chopped peanut butter cups into the filling before spreading it into the crust. Add a few extra pieces over the whipped cream for a richer dessert.
Crunchy Peanut Butter Pie
Replace creamy peanut butter with crunchy peanut butter. The small peanut pieces add texture throughout the otherwise smooth filling.
Banana Peanut Butter Pie
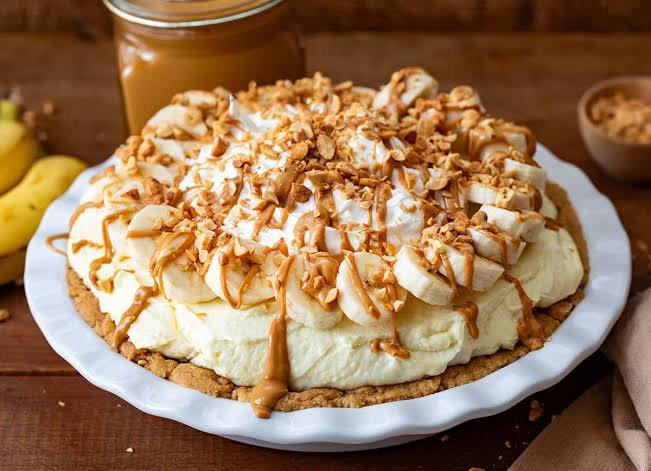
Arrange thin banana slices over the chilled crust before adding the filling. The banana adds natural sweetness and pairs especially well with peanut butter and chocolate cookies.
Gluten-Free Version
Use certified gluten-free chocolate sandwich cookies for the crust and check the labels on the remaining ingredients to ensure they are gluten-free.
Dairy-Free Version
Use dairy-free cream cheese, plant-based whipping cream, and a dairy-free butter substitute. Choose cookies that are also free from dairy if needed.
Nut-Free Version
For a peanut-free alternative, replace the peanut butter with sunflower seed butter. Use a suitable nut-free cookie for the crust and check all ingredient labels for potential cross-contact.
Chocolate Drizzle
Melt a small amount of chocolate and let it cool slightly. Drizzle it over the chilled pie just before serving for a simple chocolate finish.
Salted Peanut Butter Version
Sprinkle a small pinch of flaky salt over the whipped cream topping. The salty contrast can help balance the sweetness of the marshmallow and cookie crust.
Mini Pie Cups
Instead of making one large pie, divide the crust and filling among small dessert cups or mini pie dishes. Chill until firm and serve as individual portions, making this variation especially convenient for parties and gatherings.
Storage Instructions
Proper storage helps keep the crust firm and the peanut butter marshmallow filling creamy.
Refrigerator Storage
Cover the pie loosely with plastic wrap or place it in an airtight pie container. Keep it refrigerated for up to 4 days.
For the best texture, store the pie without delicate toppings when possible. Add fresh whipped cream, chopped peanuts, or chocolate shavings shortly before serving.
Freezer Storage
You can freeze the assembled pie for up to 1 month. Wrap it tightly with plastic wrap, followed by a layer of aluminum foil, to help prevent freezer burn and protect the filling from absorbing other odors.
When ready to serve, transfer the pie to the refrigerator and let it thaw slowly for several hours or overnight.
Can You Freeze Individual Slices?
Yes. Slice the fully chilled pie and wrap each piece individually. Place the wrapped slices in a freezer-safe container or bag.
Individual portions are convenient when you only want a small dessert. Thaw each slice in the refrigerator before serving.
Does This Pie Need to Be Reheated?
No. This is a no bake dessert and should be served chilled. Reheating can soften the filling and cause the whipped cream to lose its structure.
If the pie has been frozen, thaw it in the refrigerator rather than leaving it at room temperature for an extended period.
Best Storage Tip
For the neatest slices, keep the pie thoroughly chilled until serving. If it has been sitting out during a meal, return leftovers to the refrigerator promptly so the creamy filling stays firm and fresh.
Frequently Asked Questions
Can I make this pie ahead of time?
Yes. This is an excellent make-ahead dessert. Prepare it the day before serving and keep it covered in the refrigerator. Overnight chilling also gives the filling plenty of time to firm up.
How long does no bake peanut butter pie need to chill?
Allow at least 4 hours of refrigeration before slicing. For the firmest texture and cleanest slices, chilling overnight is even better.
Can I use natural peanut butter?
For the most consistent texture, regular creamy peanut butter is recommended. Natural peanut butter can separate and may make the filling softer or less stable.
Can I use marshmallow fluff instead of marshmallow creme?
Yes. Marshmallow fluff can generally be substituted for marshmallow creme in the same amount.
Why is my pie filling too soft?
The most common reasons are insufficient chilling, under-whipped cream, or using ingredients that were too warm. Refrigerate the pie longer before slicing and make sure the heavy cream reaches stiff peaks.
Can I use a store-bought crust?
Absolutely. A ready-made chocolate cookie or graham cracker crust can save time and works well with the creamy peanut butter filling.
Can I make this pie without cream cheese?
Cream cheese helps provide structure and a slight tang, so removing it will change the texture. For the best result, use a suitable dairy-free cream cheese if you need a dairy-free option.
Can I use crunchy peanut butter?
Yes. Crunchy peanut butter adds small pieces of peanuts throughout the filling, giving the pie a pleasant contrast to its smooth, fluffy texture.
How long will this pie last in the refrigerator?
When properly covered and refrigerated, the pie can be stored for up to 4 days. Keep it chilled until you are ready to serve.
Can I freeze peanut butter marshmallow pie?
Yes. Wrap the pie tightly and freeze it for up to 1 month. Thaw it gradually in the refrigerator before serving for the best texture.

No Bake Peanut Butter Marshmallow Pie
Ingredients
Method
- Make the crust: Combine the finely crushed chocolate cookies with melted butter until evenly moistened. Press firmly into the bottom and slightly up the sides of a 9-inch pie dish. Refrigerate while preparing the filling
- Prepare the peanut butter mixture: Beat the softened cream cheese, peanut butter, and powdered sugar until smooth. Add the vanilla and mix until combined.
- Add the marshmallow creme: Beat the marshmallow creme into the peanut butter mixture until smooth and evenly blended.
- Whip the cream: In a separate chilled bowl, beat 1 cup of cold heavy cream until stiff peaks form.
- Fold the cream into the filling: Gently fold the whipped cream into the peanut butter mixture in two or three additions. Use a spatula and avoid overmixing.
- Fill the crust: Spoon the filling into the chilled cookie crust and smooth the top.
- Chill: Cover and refrigerate for at least 4 hours, or preferably overnight, until firm
- Prepare the topping: Beat the remaining heavy cream, powdered sugar, and vanilla until stiff peaks form.
- Decorate and serve: Spread or pipe the whipped cream over the chilled pie. Finish with chopped peanuts, chocolate shavings, or mini chocolate chips.
Video
Notes
- Use regular creamy peanut butter for the most reliable texture.
- Make sure the cream cheese is softened before mixing.
- Keep the heavy cream cold so it whips properly.
- Do not skip the chilling time. The filling needs several hours to become firm enough to slice.
- For cleaner slices, use a sharp knife warmed under hot water and wiped dry between cuts.
- Store covered in the refrigerator for up to 4 days.
- The assembled pie can be frozen for up to 1 month.
Final Thoughts
This No Bake Peanut Butter Marshmallow Pie is the kind of dessert that makes homemade baking feel wonderfully simple. With its crisp chocolate cookie crust, creamy peanut butter filling, and fluffy marshmallow texture, every slice brings together a satisfying mix of rich, sweet, and smooth flavors.
It is especially handy when you want to prepare dessert ahead of time or when turning on the oven is the last thing you want to do. The filling can be made with basic ingredients, the pie needs very little hands-on work, and a long chill in the refrigerator does most of the work for you.
Serve it with whipped cream and chopped peanuts for a simple finish, or add chocolate shavings for an extra indulgent touch. However you decorate it, give the pie plenty of time to chill before slicing for the best texture.
If you make this recipe, consider trying one of the variations, such as the chocolate peanut butter or peanut butter cup version. It is an easy recipe to make your own and a sweet addition to any family dinner, holiday table, or casual gathering.