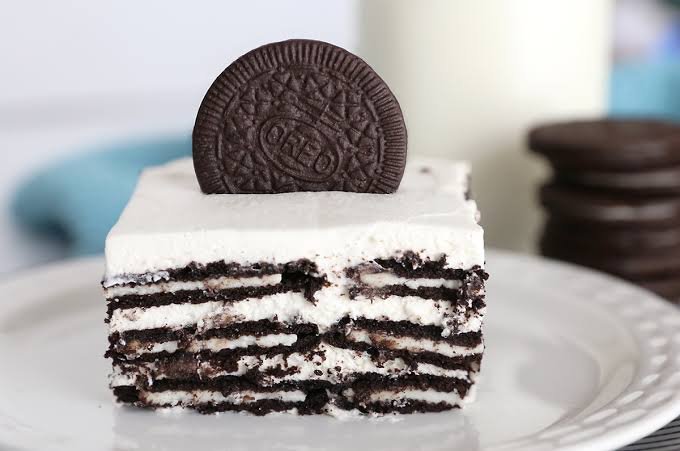
No Bake Oreo Funfetti Icebox Cake
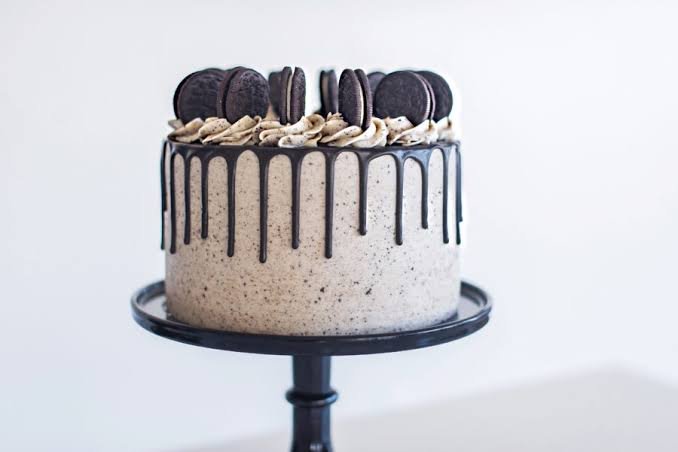
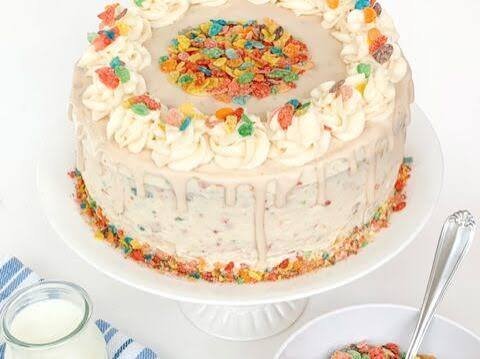
When you want an easy dessert that feels festive without turning on the oven, this No Bake Oreo Funfetti Icebox Cake is the perfect answer. Layers of crunchy Oreo cookies, fluffy vanilla whipped cream, colorful sprinkles, and a creamy filling come together in one wonderfully simple refrigerator dessert.
The magic happens in the fridge. As the cake chills, the Oreo cookies soften into a tender, cake-like texture while the whipped cream becomes smooth and creamy around every layer. Each bite has a little crunch from the cookie pieces, a light vanilla sweetness, and plenty of fun from the colorful sprinkles.
Best of all, this no-bake dessert is easy to prepare ahead of time, making it a great choice for birthdays, holidays, potlucks, summer gatherings, or those moments when you want something sweet without spending hours in the kitchen. With no oven and minimal prep, this Oreo Funfetti icebox cake delivers the kind of homemade dessert that looks special while keeping the process wonderfully simple.
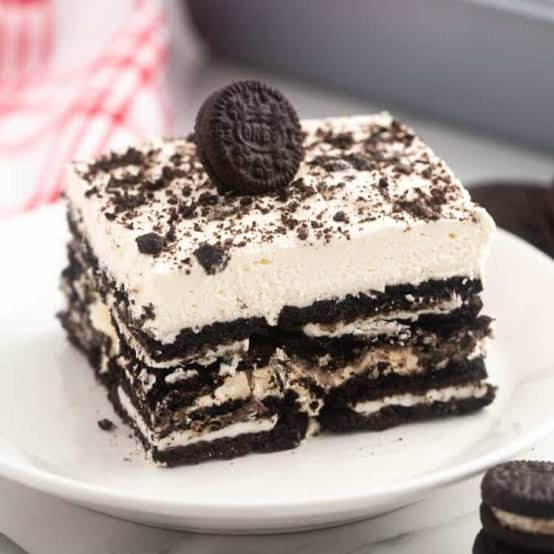
Why You’ll Love This Recipe
There is a lot to appreciate about this easy No Bake Oreo Funfetti Icebox Cake, especially when you need a dessert that looks festive but requires very little hands-on work.
- No oven required: Everything comes together without baking, making this an excellent choice for warm days or busy kitchens.
- Simple ingredients: You only need a handful of easy-to-find ingredients to create the creamy filling and cookie layers.
- Creamy and tender texture: Chilling transforms the crisp Oreo cookies into soft, cake-like layers surrounded by fluffy vanilla cream.
- Fun and colorful: Rainbow sprinkles give the dessert a cheerful appearance that works beautifully for birthdays and celebrations.
- Easy to make ahead: The cake needs time to chill, so you can prepare it in advance and have dessert ready when guests arrive.
- Great for beginners: There is no complicated baking technique, decorating skill, or special equipment required.
- Every bite is different: Some bites have more Oreo, while others have extra creamy filling and colorful sprinkles, giving the dessert plenty of texture and contrast.
- Easy to customize: You can switch up the cookies, sprinkles, or toppings to match different holidays and celebrations.
Ingredient Notes & Substitutions
A few simple ingredient choices can make a noticeable difference in the texture and flavor of your No Bake Oreo Funfetti Icebox Cake.
Oreo Cookies
Classic Oreo cookies work best because their chocolate wafers soften beautifully as the cake chills. You can also use Double Stuf Oreos for a slightly richer filling-to-cookie ratio.
For a different flavor, try Golden Oreos, chocolate-filled sandwich cookies, or another crisp chocolate sandwich cookie.
Heavy Whipping Cream
Use cold heavy whipping cream with enough fat to whip into firm, fluffy peaks. Keep it refrigerated until you are ready to use it.
Avoid replacing it with regular milk because the filling needs the structure that whipped cream provides.
Cream Cheese
Full-fat cream cheese gives the filling a rich, smooth consistency. Let it soften at room temperature before mixing so you do not end up with small lumps.
For a lighter version, reduced-fat cream cheese can work, although the finished filling may be slightly less rich.
Powdered Sugar
Powdered sugar dissolves easily into the cream cheese and helps keep the filling smooth. If you prefer a less-sweet dessert, you can slightly reduce the amount.
Vanilla Extract
Pure vanilla extract adds warmth to the creamy filling. Vanilla bean paste can also be used if you want a more pronounced vanilla flavor.
Rainbow Sprinkles
Use jimmies-style sprinkles for the best texture. They hold their color well and are less likely to bleed into the creamy filling.
For a birthday celebration, match the sprinkle colors to the theme. You can also use seasonal colors for holidays and special occasions.
Gluten-Free Option
To make a gluten-free version, use certified gluten-free chocolate sandwich cookies and check the labels on all packaged ingredients, including sprinkles, to ensure they meet your dietary needs.
Dairy-Free Option
A dairy-free version can be made with dairy-free cream cheese and a suitable plant-based whipping cream. Choose products that whip firmly and follow their package instructions for the best results.
A Budget-Friendly Tip
Store-brand chocolate sandwich cookies can work just as well as name-brand cookies in an icebox cake. Since the cookies soften during chilling and become part of the creamy layers, this is an easy place to save a little money without changing the overall dessert.
Kitchen Tools Needed
You do not need a lot of equipment to make this No Bake Oreo Funfetti Icebox Cake. A few basic kitchen tools are enough to mix the filling, build the layers, and get the dessert ready for the refrigerator.
- 9 x 13-inch baking dish: A rectangular dish gives you plenty of room to create even cookie and cream layers.
- Large mixing bowl: Use this for preparing the creamy filling.
- Medium mixing bowl: Helpful if you prefer to whip the cream separately before folding it into the filling.
- Electric hand mixer or stand mixer: Makes whipping the cream and beating the cream cheese quick and easy.
- Rubber spatula: Ideal for gently folding whipped cream into the cream cheese mixture without losing too much air.
- Measuring cups and spoons: Helpful for keeping the ingredient proportions consistent.
- Food processor: Optional, but useful for quickly crushing Oreos for the topping.
- Rolling pin and zip-top bag: An easy alternative to a food processor for crushing cookies. Place the Oreos in the bag and gently crush them with the rolling pin.
- Plastic wrap: Useful for covering the assembled cake while it chills in the refrigerator.
A mixer is the only tool that is especially helpful for speed. If you do not have one, you can whip the cream by hand with a sturdy whisk, although it will take more effort.
Step-by-Step Instructions
This No Bake Oreo Funfetti Icebox Cake comes together in a few simple layers. The key is to whip the cream properly and give the finished cake enough time to chill so the cookies soften to the perfect cake-like texture.
1. Prepare the Oreo Cookies
Set aside several whole Oreos for the top of the cake. Roughly crush the remaining cookies into pieces, keeping some larger chunks rather than turning everything into fine crumbs.
The larger pieces give the finished dessert more texture and make the Oreo flavor stand out in every bite.
2. Make the Creamy Filling
Place the softened cream cheese in a large mixing bowl. Beat it with the powdered sugar and vanilla extract until the mixture is smooth and creamy.
In a separate bowl, whip the cold heavy cream until it forms firm peaks. The whipped cream should hold its shape when you lift the beaters.
3. Fold Everything Together
Gently fold the whipped cream into the cream cheese mixture using a rubber spatula. Work slowly and avoid vigorous stirring, which can deflate the whipped cream.
Once the filling is smooth and fluffy, fold in the rainbow sprinkles.
Add the sprinkles near the end so they remain colorful instead of bleeding too much into the cream.
4. Start the First Layer
Spread a thin layer of the creamy filling across the bottom of a 9 x 13-inch baking dish.
Arrange a layer of Oreo cookies over the filling, placing them close together so there are not many large gaps.
5. Build the Cake
Spread another layer of the creamy filling over the Oreos. Smooth it gently with a spatula, then add another layer of cookies.
Continue alternating the Oreo cookies and creamy filling until everything has been used, finishing with a generous layer of the cream mixture on top.
Do not worry if the layers are not perfectly even. Once the cake chills and the cookies soften, the layers will settle together beautifully.
6. Add the Funfetti Topping
Sprinkle crushed Oreo pieces and rainbow sprinkles over the top. You can also arrange a few whole or halved Oreos around the surface for a simple decorative finish.
For the neatest appearance, add the final sprinkles shortly before serving if you want them to retain their brightest color.
7. Cover and Refrigerate
Cover the baking dish tightly with plastic wrap and place it in the refrigerator.
Chill the icebox cake for at least 6 hours, although leaving it overnight gives the Oreo cookies even more time to soften and absorb some of the creamy filling.
This chilling step is essential. Cutting into the cake too soon can leave the cookies firm and make the layers harder to serve neatly.
8. Slice and Serve
When ready to serve, remove the cake from the refrigerator and cut it into squares with a sharp knife.
For cleaner slices, wipe the knife between cuts. Serve the cake cold with a few extra sprinkles or Oreo crumbs on top if desired.
Common Mistakes to Avoid
- Do not use warm heavy cream: Cold cream whips more easily and holds its shape better.
- Do not overmix the whipped cream: Fold it gently into the cream cheese mixture to keep the filling light and fluffy.
- Do not rush the chilling time: The refrigerator does most of the work in an icebox cake.
- Do not crush every Oreo into fine crumbs: Larger cookie pieces create a much more enjoyable texture.
- Do not add too many wet ingredients: Excess moisture can make the filling loose and prevent the cake from setting properly.
Expert Tips
A few small techniques can make your No Bake Oreo Funfetti Icebox Cake even smoother, fluffier, and easier to serve.
Chill the Mixing Bowl
For especially fluffy whipped cream, place your mixing bowl and beaters in the refrigerator for about 10 to 15 minutes before whipping the heavy cream. Cold equipment helps the cream whip more efficiently.
Soften the Cream Cheese Properly
Let the cream cheese soften at room temperature before mixing. If it is too cold, the filling can become lumpy. Avoid microwaving it until warm because overly soft cream cheese can make the filling loose.
Whip the Cream to Firm Peaks
Stop whipping once the cream forms firm peaks that hold their shape. Under-whipped cream can make the filling too soft, while over-whipping can give it a grainy texture.
Fold, Do Not Stir
When combining the whipped cream with the cream cheese mixture, use gentle folding motions. This keeps the filling airy and gives the finished icebox cake its light, fluffy texture.
Give the Cookies Enough Time to Soften
The refrigerator is what transforms crisp Oreos into tender, cake-like layers. For the best consistency, prepare the dessert the day before serving whenever possible.
Keep the Layers Even
Spread the filling as evenly as you can before adding the next layer of Oreos. An offset spatula makes this easier, but the back of a regular spoon also works well.
Add Sprinkles Carefully
Some sprinkles can release their color when mixed into a moist filling. For bright, clean-looking layers, use sturdy jimmies and avoid mixing them too aggressively.
Make Cleaner Slices
For neat squares, chill the cake thoroughly and use a sharp knife. Wiping the blade clean between cuts helps keep the Oreo and cream layers distinct.
Add the Final Topping Before Serving
If you want the brightest sprinkles and crispest Oreo crumbs, reserve a little of both and add them just before serving. This gives the finished dessert a fresher appearance and a bit of texture contrast.
Variations
One of the best things about this No Bake Oreo Funfetti Icebox Cake is how easily you can change the flavors and decorations without changing the basic method.
Birthday Cake Oreo Icebox Cake
For an extra birthday-inspired dessert, use Birthday Cake Oreos and add plenty of colorful sprinkles to the creamy filling. A small amount of cake batter flavoring can also give the dessert a stronger birthday cake taste.
Golden Oreo Funfetti Cake
Swap the classic chocolate Oreos for Golden Oreos. The vanilla cookies create a lighter flavor that pairs especially well with the sweet, fluffy filling and rainbow sprinkles.
Chocolate Funfetti Version
For a richer chocolate dessert, add a little unsweetened cocoa powder to the cream cheese mixture and use chocolate Oreos throughout the layers.
Peanut Butter Oreo Cake
Add a few spoonfuls of creamy peanut butter to the filling, then layer with regular Oreos. A drizzle of melted peanut butter over the top makes this variation especially tempting.
Mint Oreo Version
Use mint-flavored Oreo cookies and replace the vanilla extract with a small amount of peppermint or mint extract. Start with a tiny amount because mint extract can become strong quickly.
Strawberry Funfetti Cake
Add thin slices of fresh strawberries between some of the cookie layers. Pat the berries dry first to prevent excess moisture from making the filling watery.
Holiday Funfetti Cake
Change the sprinkle colors to match the occasion. Red and green work well for Christmas, pastel colors are lovely for Easter, and orange, yellow, and brown sprinkles can create a fun fall-inspired dessert.
Gluten-Free Version
Use certified gluten-free chocolate sandwich cookies and verify that the remaining packaged ingredients are also gluten-free. The preparation stays essentially the same.
Dairy-Free Version
Use dairy-free cream cheese and a dairy-free whipping alternative that can be whipped into firm peaks. Also choose cookies that fit your dietary needs.
Lighter Version
For a slightly lighter dessert, use reduced-fat cream cheese and a lighter whipped topping. The texture will be somewhat different, but the cake will still have the classic Oreo and sprinkle combination.
Extra-Crunchy Topping
If you enjoy more texture, reserve some roughly chopped Oreos and sprinkle them over each serving just before eating. The chilled cake stays soft while the fresh cookie pieces provide a pleasant contrast.
Storage Instructions
Because this No Bake Oreo Funfetti Icebox Cake relies on refrigeration to set the creamy layers and soften the cookies, proper storage is important for keeping the best texture.
Refrigerator Storage
Cover the cake tightly with plastic wrap or transfer it to an airtight container. Keep it refrigerated until you are ready to serve.
The cake is best enjoyed within 3 to 4 days. Over time, the Oreo layers will continue to soften, so the texture may become more tender after the first day.
For the best appearance, add any extra Oreo crumbs or colorful sprinkles shortly before serving.
Make-Ahead Instructions
This is an excellent make-ahead dessert. Assemble the cake the day before you plan to serve it and let it chill overnight.
The longer chilling time allows the Oreo cookies to soften evenly and gives the creamy filling time to firm up, making the cake easier to slice.
Freezer Storage
You can freeze the assembled cake if needed. Cover it tightly with plastic wrap, followed by a layer of aluminum foil, to protect it from freezer odors and freezer burn.
For the best quality, enjoy it within about 1 month.
How to Thaw
Move the frozen cake to the refrigerator and allow it to thaw gradually. Do not leave it at room temperature for an extended period.
Depending on the size of the portion or baking dish, thawing may take several hours or overnight. Once softened, keep the cake refrigerated and serve chilled.
Can You Refreeze It?
It is best not to refreeze the cake after it has completely thawed. Repeated freezing and thawing can affect the texture of the whipped cream and make the Oreo layers overly soft.
Frequently Asked Questions
Can I make No Bake Oreo Funfetti Icebox Cake ahead of time?
Yes. In fact, making it ahead is one of the best ways to get the right texture. Prepare the cake several hours before serving, or refrigerate it overnight so the Oreo cookies have enough time to soften.
How long does an Oreo icebox cake need to chill?
Allow at least 6 hours of refrigeration for the layers to set and the cookies to become tender. Overnight chilling usually gives the best texture.
Can I use different Oreo flavors?
Absolutely. Golden Oreos, Birthday Cake Oreos, Double Stuf Oreos, or other seasonal varieties can be used. Keep in mind that different fillings may slightly change the sweetness and texture.
Why is my icebox cake too soft?
The filling may not have been whipped firmly enough, or the cake may not have chilled long enough. Make sure the heavy cream is cold and whipped to firm peaks, then give the assembled cake plenty of refrigerator time.
Can I use whipped topping instead of heavy cream?
Yes. A prepared whipped topping can be used as a shortcut. The texture and sweetness may be slightly different, so adjust the powdered sugar if needed.
Can I make this dessert in a different pan?
Yes. A 9 x 13-inch dish works well for a layered cake, but you can use a smaller rectangular dish for thicker layers or a springform pan for a more cake-like presentation.
Can I add fruit to the cake?
Yes. Thinly sliced strawberries or bananas can be added between layers. Make sure the fruit is dry before adding it so excess moisture does not loosen the filling.
How do I get clean slices?
Chill the cake thoroughly before cutting. Use a sharp knife and wipe the blade clean between slices. This helps keep the creamy layers and Oreo pieces looking neat.
Can I freeze Oreo Funfetti Icebox Cake?
Yes. Wrap it tightly and freeze for up to about 1 month for the best quality. Thaw it gradually in the refrigerator before serving.
What sprinkles work best?
Jimmies are a good choice because they tend to hold their shape and color better in creamy desserts. Avoid using large amounts of very fine sprinkles, which can dissolve and tint the filling.
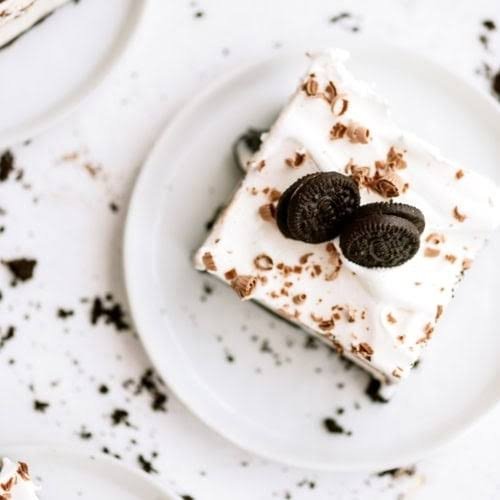

No Bake Oreo Funfetti Icebox Cake
Ingredients
Method
- Chill a large mixing bowl and the beaters for about 10 to 15 minutes. Add the heavy whipping cream and beat until it begins to thicken.
- Gradually add the dry vanilla cake mix and powdered sugar. Continue beating until firm peaks form. Set the whipped cream aside.
- In another bowl, beat the softened cream cheese with the granulated sugar and vanilla until completely smooth.
- Gently fold the whipped cream into the cream cheese mixture. Fold in the rainbow sprinkles, taking care not to overmix.
- Line the bottom of a 9-inch springform pan with parchment paper. A 9-inch square pan can also be used if it is at least 3 inches deep.
- Dip each Golden Oreo briefly into the milk, coating both sides. Arrange the cookies in an even layer across the bottom of the pan, breaking a few if needed to fill larger gaps.
- Spread about one-third of the Funfetti cream mixture over the cookies and smooth the surface.
- Repeat the Oreo and cream layers two more times, finishing with the remaining cream mixture.
- For the topping, whip the remaining heavy cream with the powdered sugar until firm peaks form.
- Spread the whipped cream over the top of the cake. Add extra sprinkles and whole or crushed Golden Oreos as desired.
- Cover the cake and refrigerate for at least 4 hours. For the softest, most cake-like Oreo texture, refrigerate overnight.
- When ready to serve, carefully release the springform pan and slice the cake with a sharp knife.
Video
Final Thoughts
This No Bake Oreo Funfetti Icebox Cake is the kind of dessert that makes entertaining feel much easier. There is no oven to preheat, no complicated baking technique, and no fussy decorating required. Just layer the creamy Funfetti filling with softened Oreo cookies, let the refrigerator do the work, and finish it with plenty of colorful sprinkles.
The combination of tender chocolate cookies, fluffy vanilla cream, and sweet rainbow sprinkles makes every slice feel festive without being difficult to prepare. It is especially handy for birthdays, family gatherings, potlucks, and warm-weather celebrations when a chilled dessert is exactly what you want.
For the best results, give the cake plenty of time to chill, then slice it cold and serve it straight from the refrigerator. Once you see how easily these simple ingredients transform into a beautiful layered dessert, this Oreo icebox cake may become a favorite whenever you need something sweet and effortless.
If you make this recipe, try your favorite Oreo flavor or sprinkle combination and make it your own.