
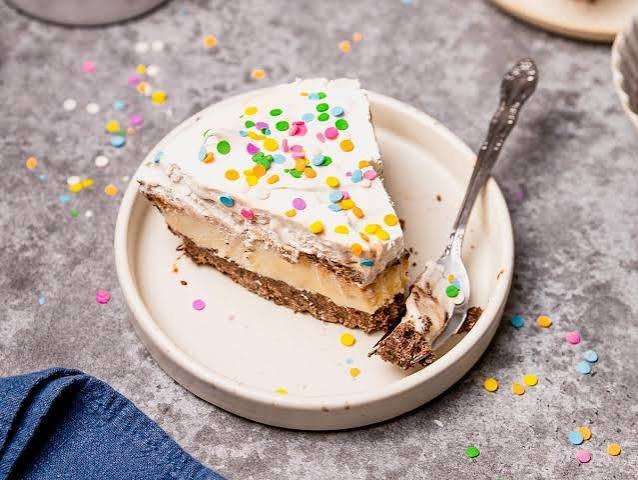
No Bake Pop Tart Ice Cream Pie
If you love the nostalgic taste of frosted Pop-Tarts and the cool, creamy texture of ice cream, this No Bake Pop Tart Ice Cream Pie is a dessert worth making. It combines a buttery cookie crust with a smooth, creamy ice cream filling, sweet fruit swirls, and pieces of Pop-Tarts for a fun dessert that feels both familiar and completely fresh.
The best part is how simple this frozen pie is to put together. There is no oven, no complicated pastry dough, and no special baking skills required. The creamy filling comes together easily, while chopped Pop-Tarts add little bites of soft, sweet texture throughout. A fruity swirl gives each slice a bright contrast against the rich vanilla base.
After a few hours in the freezer, the pie becomes firm enough to slice while staying wonderfully creamy. Serve it straight from the freezer for a refreshing summer dessert, a birthday treat, or an easy make-ahead dessert when you want something a little more playful than traditional ice cream.
If Pop-Tarts were a favorite childhood treat, this pie brings those familiar flavors to the table in an entirely new way.
Why You’ll Love This Recipe
There is something especially fun about turning a classic breakfast treat into a frozen dessert. This No Bake Pop Tart Ice Cream Pie keeps the process simple while giving you plenty of creamy, fruity, and crunchy textures in every slice.
- No baking required: Everything comes together without turning on the oven.
- Easy to prepare: The ingredients need only a few simple steps before the pie goes into the freezer.
- Creamy and crunchy: Smooth ice cream contrasts beautifully with the buttery crust and tender Pop-Tart pieces.
- Nostalgic flavor: Frosted Pop-Tarts bring a familiar sweetness that makes this dessert feel playful and comforting.
- Great for summer: A cold slice is especially refreshing on warm days.
- Make-ahead friendly: Prepare the pie in advance and keep it frozen until you are ready to serve.
- Easy to customize: Switch the Pop-Tart flavor, fruit filling, or toppings to create your own version.
- Perfect for sharing: The pie slices neatly and makes an easy dessert for family dinners, parties, and casual gatherings.
The combination of a crisp cookie crust, velvety ice cream, fruity filling, and sweet Pop-Tart pieces makes every bite interesting without making the recipe complicated.
Ingredients
This No Bake Pop Tart Ice Cream Pie uses simple ingredients that are easy to find at most grocery stores. For the best texture, let the ice cream soften slightly before mixing so it blends smoothly without becoming runny.
For the Crust
- 24 chocolate sandwich cookies, finely crushed
- 5 tablespoons unsalted butter, melted
For the Ice Cream Filling
- 1 quart vanilla ice cream, slightly softened
- 6 frosted strawberry Pop-Tarts, cut into small pieces
- 1 cup strawberry pie filling or strawberry preserves
- 1 teaspoon vanilla extract
For the Topping
- 2 strawberry Pop-Tarts, cut into small pieces
- 1/2 cup whipped cream
- 2 tablespoons strawberry pie filling or preserves
Optional Garnish
- Extra crushed cookies
- Small pieces of strawberry Pop-Tarts
- Fresh strawberries, sliced thinly
For the creamiest filling, choose a good-quality vanilla ice cream with a smooth texture. Strawberry Pop-Tarts work especially well with the fruit filling, but you can easily change the flavor combination to suit your taste.
Ingredient Notes & Substitutions
A few simple ingredient choices can make a noticeable difference in the texture and flavor of your No Bake Pop Tart Ice Cream Pie. The recipe is flexible, so you can adjust it based on what you already have in the kitchen.
Cookies
Chocolate sandwich cookies create a rich, slightly crisp crust that pairs well with the sweet ice cream filling. If you prefer a lighter flavor, use vanilla sandwich cookies or graham crackers instead.
For a graham cracker crust, use about 1 1/2 cups of finely crushed graham crackers and combine them with the melted butter until the crumbs resemble wet sand.
Butter
Unsalted butter gives you better control over the sweetness and salt level. Salted butter also works if that is what you have available. Melt it gently and allow it to cool for a few minutes before mixing it with the cookie crumbs.
Vanilla Ice Cream
Vanilla provides a neutral, creamy base that lets the Pop-Tarts and strawberry filling stand out. You can substitute strawberry, cheesecake, or another complementary ice cream flavor if you want a stronger fruit flavor.
Let the ice cream soften just enough to stir. It should be creamy and scoopable, not melted.
Strawberry Pop-Tarts
Strawberry Pop-Tarts give the pie its signature flavor and a little extra texture. Blueberry, raspberry, or another frosted fruit flavor can be used instead.
For the best texture, cut the Pop-Tarts into small bite-sized pieces rather than crushing them completely. This gives you distinct pieces throughout the creamy filling.
Strawberry Pie Filling or Preserves
Either strawberry pie filling or strawberry preserves works well. Pie filling gives you larger pieces of fruit, while preserves create a smoother fruit swirl.
You can also use raspberry or blueberry preserves for a different flavor combination.
Whipped Cream
Homemade whipped cream gives the topping a fresh, light texture, but store-bought whipped topping works when you want to keep things especially easy.
Dairy-Free Option
For a dairy-free version, use dairy-free vanilla ice cream, plant-based butter, dairy-free sandwich cookies, and Pop-Tarts or similar pastries that meet your dietary needs. Always check package labels because ingredients can vary between products and flavors.
Gluten-Free Option
Use certified gluten-free cookies and a gluten-free pastry alternative that provides a similar fruit-filled, frosted flavor. Check all labels carefully, especially if the dessert is being prepared for someone with celiac disease or a gluten sensitivity.
Kitchen Tools Needed
You do not need much equipment to make this easy frozen dessert. A few basic kitchen tools are enough to prepare, assemble, and freeze the pie.
- 9-inch pie dish: A standard pie dish gives the dessert a good depth and makes it easy to slice and serve.
- Food processor: Helpful for turning the sandwich cookies into fine crumbs. A sealed plastic bag and rolling pin can also do the job.
- Mixing bowls: Use one bowl for the crust and another for combining the ice cream filling.
- Measuring cups and spoons: Useful for keeping the ingredient proportions consistent.
- Rubber spatula: Makes it easier to fold the Pop-Tart pieces and fruit filling into the softened ice cream without overmixing.
- Sharp knife and cutting board: Use these to cut the Pop-Tarts into small pieces.
- Plastic wrap or aluminum foil: Cover the pie tightly while it freezes to help prevent freezer odors and ice crystals.
Optional Helpful Tools
A springform pan can be used instead of a pie dish if you want to remove the frozen pie more easily before serving. An ice cream scoop is also useful for portioning the softened ice cream evenly.
Before you begin, make sure you have enough freezer space for the pie to sit flat. Keeping the pie level while it freezes helps create neat, even slices.
Step-by-Step Instructions
1. Prepare the Cookie Crust
Place the chocolate sandwich cookies in a food processor and pulse until they become fine crumbs. Pour in the melted butter and pulse again until the mixture looks evenly moistened.
If you do not have a food processor, place the cookies in a sealed bag and crush them with a rolling pin. Mix the crumbs and melted butter in a bowl until combined.
2. Press the Crust Into the Pie Dish
Transfer the cookie mixture to a 9-inch pie dish. Press it firmly across the bottom and slightly up the sides.
Use the bottom of a measuring cup or glass to compact the crumbs. A firmly packed crust will hold together much better when you slice the frozen pie.
Place the crust in the freezer while you prepare the filling.
3. Soften the Ice Cream
Take the vanilla ice cream out of the freezer and let it sit at room temperature for several minutes.
You want it soft enough to stir, but it should still be cold and thick. If the ice cream becomes runny, place it back in the freezer for a few minutes before continuing.
4. Mix the Ice Cream Filling
Place the softened vanilla ice cream in a large mixing bowl. Add the vanilla extract and gently stir until smooth.
Fold in the chopped strawberry Pop-Tarts, keeping the pieces evenly distributed throughout the ice cream.
Avoid vigorous mixing because it can break the pastry pieces apart and make the filling too soft.
5. Add the Strawberry Swirl
Spoon about half of the ice cream mixture over the chilled cookie crust and spread it into an even layer.
Add spoonfuls of strawberry pie filling or preserves across the surface. Use a knife or skewer to gently swirl the fruit through the ice cream.
Do not over-swirl. A few visible ribbons of strawberry filling will give the finished pie a prettier appearance and stronger fruit flavor.
6. Add the Remaining Filling
Spread the remaining ice cream mixture over the first layer. Smooth the top gently with a spatula.
Add a few more small spoonfuls of strawberry filling and lightly swirl them into the surface.
7. Freeze the Pie
Cover the pie tightly with plastic wrap or aluminum foil. Place it on a flat surface in the freezer.
Freeze for at least 4 to 6 hours, or until the center is firm. For the cleanest slices, freezing the pie overnight works especially well.
8. Add the Toppings
Once the pie is fully frozen, remove it from the freezer and let it stand for about 5 to 10 minutes.
Top with whipped cream, chopped Pop-Tarts, and a few small spoonfuls of strawberry filling. Add fresh strawberry slices if desired.
9. Slice and Serve
Use a sharp knife to cut the pie into wedges. For cleaner cuts, run the knife under warm water, dry it thoroughly, and then slice.
Serve immediately while the ice cream is firm but creamy.
Common Mistakes to Avoid
- Do not completely melt the ice cream. Melted ice cream can create a loose filling that takes longer to freeze.
- Do not skip chilling the crust. A cold crust is easier to work with and holds its shape better.
- Do not overmix the Pop-Tart pieces. Gentle folding helps preserve their texture.
- Do not rush the freezing time. The pie needs enough time to become firm throughout.
- Do not leave the finished pie uncovered in the freezer. Proper covering helps prevent freezer burn and unwanted odors.
Expert Tips
A few small details can make your No Bake Pop Tart Ice Cream Pie easier to slice and even better in texture. These simple tricks are especially helpful if you are making a frozen pie for the first time.
Keep the Ice Cream Cold and Soft
The ideal ice cream consistency is soft enough to stir but still thick enough to hold its shape. If it becomes too liquid, the filling can take longer to freeze and may develop a harder texture.
Pack the Crust Firmly
Press the cookie crumbs firmly into the pie dish, especially around the edges. A well-packed crust is less likely to crumble when you cut into the frozen pie.
Cut the Pop-Tarts Into Small Pieces
Small pieces distribute more evenly through the filling and make each slice easier to eat. Leave some slightly larger pieces for the topping so their frosted surface remains visible.
Create Gentle Fruit Swirls
Instead of completely mixing the strawberry filling into the ice cream, swirl it lightly. This creates attractive ribbons of fruit and gives you a little strawberry flavor in different parts of each slice.
Freeze the Pie Long Enough
Do not judge the freezing time by the surface alone. The center should be completely firm before slicing. Overnight freezing is a convenient option if you are preparing the dessert ahead of time.
Let It Rest Before Slicing
A frozen pie can be difficult to cut straight from the freezer. Let it sit at room temperature for about 5 to 10 minutes, then use a sharp knife for smoother slices.
Keep the Pie Covered
Cover the pie tightly before freezing. This protects the creamy filling from freezer odors and helps reduce the formation of ice crystals on the surface.
Make It Ahead
This dessert is ideal for preparing in advance. Assemble and freeze the pie the day before serving, then add the whipped cream and other toppings shortly before serving for the freshest appearance.
Variations
One of the best things about this No Bake Pop Tart Ice Cream Pie is how easily you can change the flavors. Keep the creamy ice cream base the same and experiment with different Pop-Tarts, fruit fillings, crusts, and toppings.
Strawberry Cheesecake Pie
Use strawberry cheesecake ice cream instead of vanilla and add a swirl of strawberry preserves. A graham cracker crust gives this version a classic cheesecake flavor.
Blueberry Version
Swap the strawberry Pop-Tarts for blueberry Pop-Tarts and use blueberry pie filling or blueberry preserves. Vanilla ice cream works especially well with the blueberry combination.
Raspberry Vanilla Pie
Use raspberry preserves with vanilla ice cream and a buttery vanilla cookie crust. Add fresh raspberries on top for a bright fruit finish.
Chocolate Lover’s Version
Replace the vanilla ice cream with chocolate ice cream and use chocolate sandwich cookies for the crust. Add chocolate-flavored Pop-Tart pieces and a light drizzle of chocolate sauce before serving.
Birthday Cake Style
Use cake-flavored ice cream, colorful frosted pastry pieces, and a vanilla cookie crust. Add sprinkles to the top just before serving for a fun celebration dessert.
Dairy-Free Version
Choose dairy-free vanilla or strawberry ice cream and plant-based butter. Use dairy-free cookies and a suitable dairy-free pastry alternative for the Pop-Tart pieces.
Gluten-Free Version
Use certified gluten-free cookies and a gluten-free fruit pastry alternative. Choose a pie filling or preserves that are also labeled gluten-free if cross-contact is a concern.
Lighter Version
For a lighter variation, use reduced-fat ice cream and replace some of the cookie crust with crushed graham crackers. Use a smaller amount of whipped cream and fruit preserves on top.
Extra Fruity Version
Fold diced fresh strawberries into the softened ice cream along with the pastry pieces. Keep the fruit pieces small and pat them dry first so they do not add excess moisture to the filling.
Different Crust Ideas
The chocolate cookie crust can be replaced with graham crackers, vanilla sandwich cookies, shortbread cookies, or another crisp cookie that complements your chosen Pop-Tart flavor.
Storage Instructions
Because this No Bake Pop Tart Ice Cream Pie is a frozen dessert, proper storage helps keep the crust crisp, the filling creamy, and the toppings fresh.
Freezer Storage
Cover the pie tightly with plastic wrap, followed by aluminum foil if you want an extra layer of protection. Store it in the freezer for up to 1 week for the best texture and flavor.
For longer storage, keep the pie in an airtight freezer-safe container. The longer it stays frozen, the more likely the crust and Pop-Tart pieces are to lose some of their original texture.
Before Serving
Take the pie out of the freezer and let it sit at room temperature for about 5 to 10 minutes. This allows the ice cream to soften slightly, making the pie easier to slice without becoming too soft.
For clean slices, dip a sharp knife in warm water, dry it, and carefully cut through the pie. Repeat between slices if needed.
Storing Individual Slices
If you have leftovers, cut the pie into individual portions and wrap each slice tightly in plastic wrap. Place the wrapped slices in a freezer-safe container or zip-top freezer bag.
This makes it easy to enjoy a single serving without repeatedly exposing the entire pie to warm air.
What About the Refrigerator?
The pie is best kept frozen. Refrigerating it for an extended period will cause the ice cream to melt and can make the cookie crust soft.
If the pie has been sitting at room temperature long enough for the ice cream to melt significantly, it is better not to refreeze it.
Topping Tip
For the freshest presentation, add whipped cream, fresh fruit, and extra Pop-Tart pieces shortly before serving rather than storing them on the pie for several days.
Frequently Asked Questions
Can I make No Bake Pop Tart Ice Cream Pie ahead of time?
Yes. This pie is ideal for making ahead. Assemble it and freeze it for at least 4 to 6 hours, or preferably overnight. Add whipped cream and fresh toppings shortly before serving.
How long does the ice cream pie need to freeze?
The pie needs about 4 to 6 hours to become firm enough to slice. Freezing it overnight gives the filling plenty of time to set completely.
Can I use a different Pop-Tart flavor?
Absolutely. Strawberry works beautifully with the fruit filling, but blueberry, raspberry, or another frosted fruit flavor can be used. Choose a filling that complements the pastry flavor.
Can I use store-bought whipped topping?
Yes. Store-bought whipped topping is a convenient option and works well when you want to keep the preparation quick and simple.
Why is my ice cream pie difficult to slice?
The pie may simply be too cold. Let it rest at room temperature for about 5 to 10 minutes before slicing. A sharp knife warmed under hot water can also make cleaner cuts.
Can I use homemade ice cream?
Yes. Homemade vanilla ice cream can be used as long as it has a firm, scoopable consistency. Allow it to soften slightly before mixing with the other ingredients.
Can I make this pie without a food processor?
Yes. Place the cookies in a sealed bag and crush them with a rolling pin or the bottom of a heavy glass. Mix the crumbs with melted butter until evenly moistened.
Can I use fresh strawberries instead of strawberry preserves?
Yes. Finely chopped fresh strawberries can be added to the filling or used as a topping. Pat them dry first to remove excess moisture.
How should I store leftover Pop Tart Ice Cream Pie?
Keep leftover pie tightly covered in the freezer. For the best quality, enjoy it within about one week.
Can I make this dessert dairy-free?
Yes. Use dairy-free ice cream, plant-based butter, dairy-free cookies, and a suitable dairy-free pastry alternative. Check ingredient labels carefully because products vary by flavor and brand.
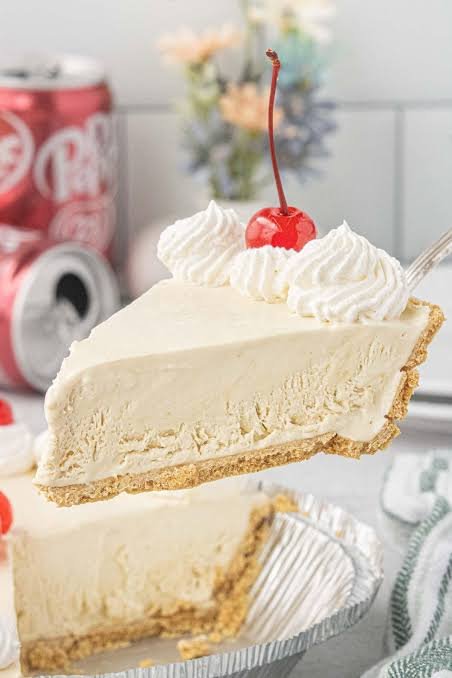

No Bake Pop Tart Ice Cream Pie
Ingredients
Method
- Crush the sandwich cookies into fine crumbs. Mix them with the melted butter until evenly moistened.
- Press the crumb mixture firmly into the bottom and slightly up the sides of a 9-inch pie dish
- Place the crust in the freezer while preparing the filling.
- Let the vanilla ice cream soften slightly. It should be easy to stir but should remain cold and thick.
- Stir the vanilla extract into the softened ice cream.
- Gently fold in the chopped strawberry Pop-Tarts.
- Spread half of the ice cream mixture over the chilled crust.
- Spoon half of the strawberry filling over the ice cream and gently swirl it with a knife.
- Spread the remaining ice cream mixture over the top.
- Add the remaining strawberry filling and create a few light swirls.
- Cover the pie tightly and freeze for at least 4 to 6 hours, or until completely firm.
- Let the frozen pie rest at room temperature for 5 to 10 minutes before slicing.
- Top with whipped cream, chopped Pop-Tarts, strawberry filling, or fresh strawberries just before serving.
- Slice with a sharp knife and serve immediately.
Video
Notes
- Keep the ice cream cold while assembling the pie.
- Do not completely melt the ice cream before mixing.
- Press the cookie crust firmly so it holds together when sliced.
- Avoid overmixing the Pop-Tart pieces to preserve their texture.
- For cleaner slices, warm the knife under hot water and dry it before cutting.
- Store leftover pie tightly covered in the freezer for up to 1 week for the best quality.
Final Thoughts
This No Bake Pop Tart Ice Cream Pie is a simple way to turn familiar pantry treats into a fun frozen dessert. The buttery cookie crust, creamy vanilla ice cream, fruity strawberry swirls, and sweet Pop-Tart pieces come together in a pie that is easy to prepare and satisfying to serve.
Since there is no baking involved, it is a particularly convenient choice for warm days or when you want a make-ahead dessert without spending much time in the kitchen. You can also change the pastry and fruit flavors to create a combination that suits your family.
For the best results, give the pie plenty of time to freeze and let it soften for a few minutes before slicing. That small step makes it much easier to get neat, creamy slices.
Whether you serve it at a family gathering, birthday celebration, or casual weekend dinner, this frozen Pop-Tart dessert brings a playful twist to the classic ice cream pie.
Give it a try, then make it your own with your favorite Pop-Tart flavor and toppings. If you make this recipe, share how you customized it and which flavor combination you enjoyed most.

4 Comments