
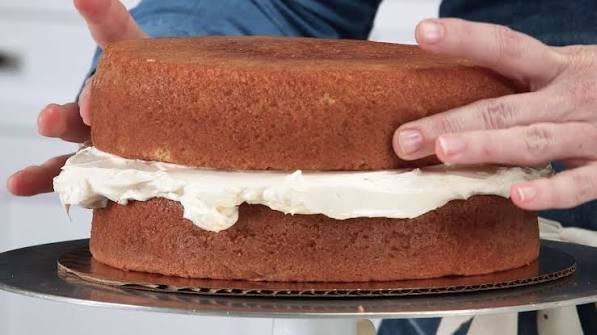
How To Make A Layer Cake
Learning how to make a layer cake is much easier when you break the process into a few simple steps. With soft, fluffy cake layers, a smooth layer of frosting, and a little patience, you can create a beautiful homemade cake that looks special without requiring professional decorating skills.
The best part is that layer cakes are wonderfully flexible. Start with classic vanilla or chocolate cake, then add buttercream, fresh berries, jam, ganache, or your favorite filling between the layers. Each slice gives you a lovely combination of tender cake and creamy frosting, making it perfect for birthdays, holidays, celebrations, or an ordinary weekend when you feel like baking something special.
If you are new to cake decorating, the process can seem intimidating at first. How do you keep the layers even? When should you trim the cake? How much frosting should go between each layer? This beginner-friendly guide walks you through the process from preparing the cake pans to stacking, filling, frosting, and decorating your finished layer cake.
By the time you reach the end, you will have a clear method for making a neat, stable, beautifully frosted layer cake at home, along with practical tips that can help prevent common baking and decorating mistakes.
Why You’ll Love This Recipe
Making a layer cake from scratch can feel like a project, but the process becomes much simpler once you know what to expect. This method keeps each step straightforward while giving you plenty of room to make the cake your own.
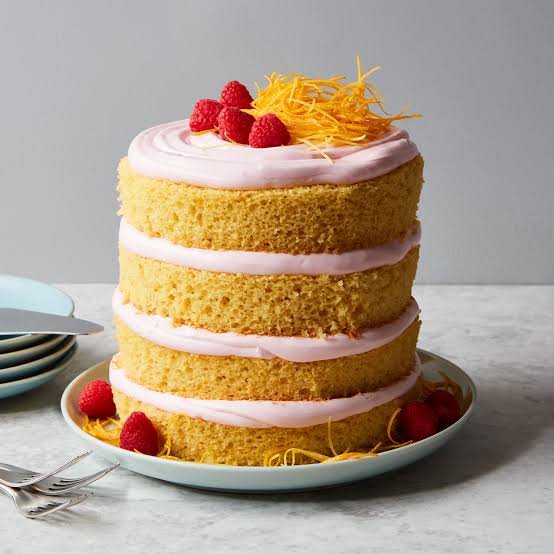
- Beginner-friendly: Clear steps make it easier to bake, stack, and frost your cake with confidence.
- Soft and fluffy layers: Proper mixing and baking help create tender cake layers that hold together beautifully.
- Easy to customize: Use vanilla, chocolate, lemon, strawberry, or another favorite cake flavor.
- Perfect for celebrations: A homemade layer cake works beautifully for birthdays, holidays, showers, and family gatherings.
- Simple decorating: You do not need advanced piping skills to create a polished-looking cake.
- Make-ahead friendly: The cake layers can be prepared ahead of time, making assembly less stressful.
- Better texture with simple techniques: Chilling the layers and using a crumb coat can make frosting much easier.
- Easy to adjust: You can change the frosting, filling, number of layers, or decorations to suit the occasion.
- Great for first-time bakers: This guide explains the small details that often make the biggest difference when learning how to make a layer cake.
The result is a homemade cake with tender layers, creamy frosting, and a beautiful finish that feels thoughtful without being complicated.
Ingredients
The ingredients for a classic layer cake are simple and easy to find. For the best texture, bring refrigerated ingredients such as butter, eggs, and milk to room temperature before you begin.
For the Cake Layers
- 2 1/2 cups all-purpose flour
- 2 1/2 teaspoons baking powder
- 1/2 teaspoon salt
- 1 cup unsalted butter, softened
- 1 3/4 cups granulated sugar
- 4 large eggs, room temperature
- 2 teaspoons vanilla extract
- 1 cup whole milk, room temperature
For the Buttercream Frosting
- 1 cup unsalted butter, softened
- 4 cups powdered sugar
- 2 teaspoons vanilla extract
- 3 to 4 tablespoons heavy cream or milk
- 1/4 teaspoon salt
Optional Filling and Decorations
- 1/2 cup fruit jam or preserves
- Fresh berries
- Chocolate shavings
- Sprinkles
- Crushed cookies
- Extra frosting for piping
These quantities make enough cake and frosting for a classic two-layer cake with a generous frosting finish. If you prefer a taller celebration cake, the recipe can be adjusted for three layers.
Ingredient Notes & Substitutions
A few small ingredient choices can make a noticeable difference in the texture and flavor of your homemade layer cake. Here are some useful tips and easy substitutions.
All-Purpose Flour
All-purpose flour gives the cake enough structure to support multiple layers while keeping the crumb tender. For a softer texture, you can replace part of the all-purpose flour with cake flour.
Butter
Use unsalted butter so you can control the salt in the recipe. Butter should be softened but not melted. Properly softened butter creams smoothly with the sugar and helps create a lighter cake.
For a dairy-free cake, use a good-quality plant-based baking butter designed for baking.
Eggs
Room-temperature eggs blend more easily into the batter and help create an even texture. Place cold eggs in a bowl of warm water for several minutes if you forgot to take them out ahead of time.
Milk
Whole milk adds moisture and richness. You can substitute it with 2% milk if needed. For a richer cake, buttermilk can also work, although it may slightly change the flavor and texture.
For a dairy-free option, use unsweetened almond, oat, or soy milk.
Granulated Sugar
Regular granulated sugar provides sweetness while helping create a tender crumb. Avoid reducing the sugar too much, since it also contributes to the cake’s moisture and structure.
Vanilla Extract
Pure vanilla extract gives the cake a warm, familiar flavor. Vanilla bean paste can be used for a slightly more pronounced vanilla taste.
Powdered Sugar
Powdered sugar is ideal for buttercream because it dissolves easily into the softened butter. If your powdered sugar has noticeable lumps, sift it before mixing.
Heavy Cream or Milk
Heavy cream creates a richer, silkier frosting, while milk produces a slightly lighter buttercream. Add the liquid gradually so you can control the final consistency.
Fruit Jam
Jam is completely optional, but it adds a bright layer of flavor between the cake layers. Strawberry, raspberry, apricot, and blueberry preserves all work well.
Budget-Friendly Tips
You do not need specialty ingredients to make an impressive layer cake. Standard all-purpose flour, regular milk, butter, sugar, and homemade frosting are enough for a delicious result. Save decorative ingredients for special occasions and use seasonal fruit when available.
Allergy-Friendly Options
For a dairy-free cake, use plant-based butter and non-dairy milk. For a gluten-free version, use a reliable 1-to-1 gluten-free baking flour formulated for cakes. Always check ingredient labels if you are baking for someone with a serious food allergy.
Kitchen Tools Needed
You do not need professional baking equipment to make a beautiful layer cake. A few basic kitchen tools will make the process much easier.
- Two 8-inch round cake pans: These create evenly sized layers that are easy to stack.
- Mixing bowls: Use a large bowl for the batter and a separate bowl for the frosting.
- Electric hand mixer or stand mixer: Helps cream the butter and sugar properly and makes frosting smooth.
- Measuring cups and spoons: Accurate measurements are important for consistent baking results.
- Rubber spatula: Useful for scraping the bowl and gently folding ingredients into the batter.
- Whisk: Helps combine the dry ingredients evenly.
- Cooling rack: Allows the baked cake layers to cool properly without becoming soggy underneath.
- Offset spatula: Makes spreading frosting across the top and sides much easier.
- Cake turntable: Optional, but especially helpful when frosting the sides of a layer cake.
- Serrated knife: Useful for trimming domed cake layers and creating an even surface.
- Parchment paper: Helps prevent the cake from sticking to the bottom of the pans.
- Cake board or serving plate: Provides a stable base for assembling and decorating the finished cake.
Helpful Tip for Beginners
If you are making a layer cake for the first time, an offset spatula and serrated knife are two tools worth having. They make leveling the cake and spreading frosting much easier, even if your decorating skills are still developing.
Step-by-Step Instructions
Making a layer cake is mostly about timing, temperature, and a little patience. Follow these steps carefully, especially when cooling and stacking the layers.
1. Prepare the Cake Pans
Preheat your oven to 350°F. Grease two 8-inch round cake pans and line the bottoms with parchment paper. Lightly flour the sides.
This extra preparation helps the baked cakes release cleanly without tearing the edges.
2. Mix the Dry Ingredients
In a medium bowl, whisk together the flour, baking powder, and salt.
Whisking helps distribute the baking powder and salt evenly, so you do not end up with concentrated pockets of either ingredient in the finished cake.
3. Cream the Butter and Sugar
In a large mixing bowl, beat the softened butter and granulated sugar until the mixture looks pale, light, and fluffy, about 3 to 4 minutes.
Do not rush this step. Properly creamed butter creates tiny air pockets that help give the cake a lighter texture.
4. Add the Eggs and Vanilla
Add the eggs one at a time, mixing well after each addition. Scrape down the sides of the bowl as needed, then mix in the vanilla extract.
If the batter looks slightly curdled after adding the eggs, do not worry. It should come together once the dry ingredients and milk are incorporated.
5. Combine the Batter
Add about one-third of the dry ingredients to the butter mixture and mix on low speed. Add half of the milk and continue mixing.
Repeat with another portion of the dry ingredients, followed by the remaining milk. Finish with the last portion of the dry ingredients.
Mix only until the batter is smooth and combined. Overmixing can make the cake dense instead of soft and tender.
6. Divide the Batter Between the Pans
Pour the batter evenly into the prepared cake pans. Use a spatula to gently spread the batter toward the edges.
If you want particularly even layers, divide the batter using a kitchen scale. This simple trick helps both cakes finish baking at nearly the same time.
7. Bake the Cake Layers
Place the pans on the center rack of the preheated oven. Bake for about 25 to 30 minutes, or until the tops spring back lightly when touched and a toothpick inserted into the center comes out clean or with a few moist crumbs.
Avoid opening the oven repeatedly while the cakes are baking. Sudden temperature changes can affect the rise.
8. Cool the Cakes
Let the cakes rest in their pans for about 10 minutes. Then carefully run a thin knife around the edges and turn the cakes onto a cooling rack.
Remove the parchment paper and allow the layers to cool completely before frosting.
This step is essential. Frosting a warm cake can cause the buttercream to soften, slide, or melt.
9. Level the Cake Layers
Once completely cool, inspect the tops of the cakes. If they have a noticeable dome, use a serrated knife to carefully trim the tops until they are flat.
Work slowly and keep the knife level as you cut. Even layers will make the finished cake much more stable.
10. Prepare the Buttercream
Beat the softened butter until smooth and creamy. Gradually add the powdered sugar, mixing on low speed at first to prevent a cloud of sugar from covering your kitchen.
Add the vanilla and salt, then slowly add the heavy cream or milk until the frosting reaches a smooth, spreadable consistency.
If the frosting feels too thick, add a little more liquid. If it becomes too soft, add a small amount of powdered sugar.
11. Place the First Cake Layer
Put the first cake layer cut-side up on a cake board or serving plate.
Add a layer of buttercream over the top and spread it evenly from the center toward the edges. If you are using fruit jam, spread a thin layer of frosting first, then add the jam in the center.
Leave a small border around the edge so the filling does not squeeze out when the next layer is added.
12. Add the Second Layer
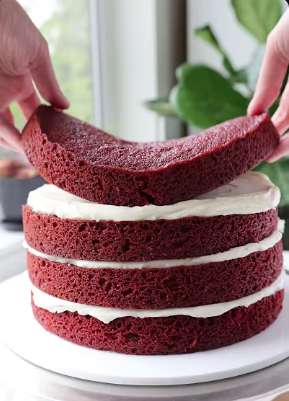
Place the second cake layer gently on top of the frosting. If the cake has been leveled, position the flat side facing down for a neat, stable stack.
Press very lightly to secure the layers. Avoid pushing too hard, or the filling may spill out from the sides.
13. Apply a Crumb Coat
Spread a thin layer of buttercream over the top and sides of the cake. This first layer does not need to look perfect.
Its purpose is to trap loose cake crumbs so they do not appear in the final frosting.
Chill the cake for about 15 to 20 minutes, or until the crumb coat feels firm.
14. Add the Final Layer of Frosting
Spread a thicker layer of buttercream over the chilled cake. Use an offset spatula to smooth the top and sides.
For a simple homemade finish, leave a few gentle swirls in the frosting. For a cleaner appearance, use a cake scraper or bench scraper while slowly turning the cake.
15. Decorate and Serve
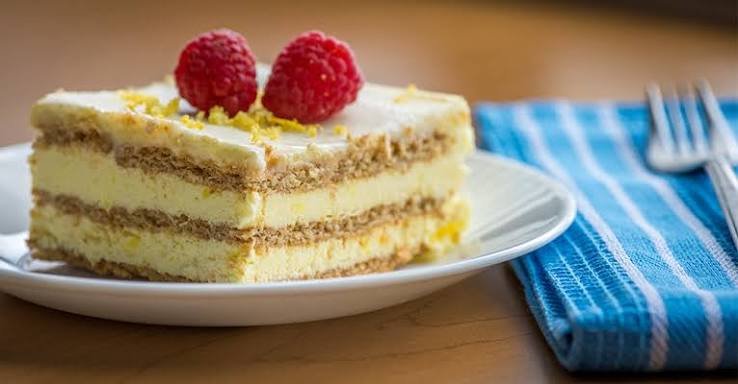
Finish the cake with fresh berries, chocolate shavings, sprinkles, piped buttercream, or any decoration you like.
For the cleanest slices, refrigerate the finished cake briefly before cutting. Let it sit at room temperature for a short time before serving so the cake and frosting become soft and creamy again.
Common Mistakes to Avoid
Using cold ingredients: Cold butter and eggs can prevent the batter from blending properly.
Overmixing the batter: Mix only until the ingredients are combined to keep the cake tender.
Frosting a warm cake: Always cool the layers completely before decorating.
Skipping the crumb coat: A thin first layer of frosting helps create a much cleaner final finish.
Adding too much filling: A thick layer can make the cake unstable and cause the layers to slide.
Cutting uneven layers: Take your time when leveling the cakes. A flat surface makes stacking much easier.
Using too much pressure while stacking: Gently position each layer instead of pressing down forcefully.
Expert Tips
A few simple techniques can make the difference between an average homemade cake and a layer cake that looks neat, slices beautifully, and has a tender texture.
Bring Ingredients to Room Temperature
Room-temperature butter, eggs, and milk blend more smoothly and help create a more even batter. Cold ingredients can cause the butter to firm up and leave the mixture uneven.
Measure Flour Carefully
Too much flour can make cake layers heavy and dry. For the most accurate results, use a kitchen scale. If measuring with cups, spoon the flour into the cup and level it with a straight edge instead of scooping directly from the bag.
Do Not Overmix
Once the flour is added, mix just until you no longer see dry streaks. Excessive mixing develops gluten, which can make the finished cake less tender.
Bake on the Center Rack
Position the cake pans in the center of the oven so the heat can circulate evenly. If your oven has hot spots, rotate the pans carefully near the end of baking, but avoid opening the oven too early.
Cool Before Leveling
A completely cooled cake is much easier to trim. For especially clean cuts, wrap the cooled layers and refrigerate them for a few hours before assembling. Chilled cake is firmer and produces fewer crumbs when sliced.
Use a Crumb Coat
Do not try to create the perfect finish in one layer of frosting. A thin crumb coat seals loose crumbs against the cake. Chilling it briefly gives you a smooth surface for the final coat.
Keep the Filling Even
Spread frosting or filling in an even layer rather than creating a thick mound in the center. An uneven filling can cause the cake layers to tilt or slide.
Chill When Needed
If the buttercream becomes too soft while you are decorating, place the cake or frosting in the refrigerator for a short time. A slightly firmer cake is much easier to handle.
Use a Turntable for Smoother Sides
A cake turntable is optional, but it can make frosting the sides much easier. Keep the spatula steady and slowly rotate the cake rather than moving the spatula rapidly around the cake.
Give the Cake Time to Set
After decorating, let the finished layer cake chill briefly before slicing. This helps the frosting firm up and keeps the layers together when you cut into them.
For Cleaner Slices
Use a sharp knife and wipe the blade clean between cuts. For an especially neat presentation, dip the knife in warm water, dry it thoroughly, then make each slice.
Let It Rest Before Serving
If the cake has been refrigerated, allow it to sit at room temperature for a little while before serving. This brings the buttercream back to a creamy consistency and makes the cake taste softer and more flavorful.
Variations
Once you know how to make a layer cake, it is easy to change the flavors, fillings, and decorations to match any occasion. Here are a few simple ideas to get you started.
Classic Chocolate Layer Cake
Replace part of the flour with unsweetened cocoa powder and pair the cake with chocolate buttercream. Add a thin layer of chocolate ganache between the cakes for a richer dessert.
Fresh Strawberry Layer Cake
Spread strawberry jam between the layers and add thinly sliced fresh strawberries. Pair it with vanilla buttercream or lightly sweetened whipped cream for a fresh, fruity combination.
Lemon Layer Cake
Add fresh lemon zest to the cake batter and replace a small portion of the milk with fresh lemon juice. Lemon buttercream or a thin layer of lemon curd makes a bright filling.
Red Velvet Layer Cake
Turn the basic cake into a red velvet-inspired version with cocoa powder and red food coloring. Cream cheese frosting makes a classic pairing.
Chocolate and Vanilla Marble Cake
Divide the batter into two portions and mix cocoa powder into one portion. Alternate spoonfuls of vanilla and chocolate batter in the pans, then gently swirl them together before baking.
Cookies and Cream Cake
Fold crushed chocolate sandwich cookies into the frosting and sprinkle additional cookie crumbs between the layers. Keep a few larger pieces for decorating the top.
Gluten-Free Layer Cake
Use a quality 1-to-1 gluten-free baking flour designed to replace regular wheat flour. Choose a blend that contains xanthan gum if the product instructions recommend it.
Dairy-Free Layer Cake
Replace the butter with plant-based baking butter and use unsweetened oat, soy, or almond milk. Choose a dairy-free frosting to keep the entire cake suitable for a dairy-free diet.
Lower-Sugar Option
You can reduce the sweetness slightly by using less frosting and choosing naturally sweet fillings such as fresh berries. Avoid making major reductions to the sugar in the cake batter, since sugar also affects moisture and texture.
Seasonal Fruit Cake
Use whatever fruit is freshest and easiest to find. Peaches, raspberries, blueberries, blackberries, cherries, and sliced pears can all make beautiful fillings or toppings.
Birthday Cake Style
Keep the cake simple with vanilla buttercream, colorful sprinkles, and piped frosting around the edges. It is an easy option when you want a festive cake without complicated decorating.
Storage Instructions
Proper storage helps keep your layer cake moist, tender, and fresh while protecting the frosting and decorations.
At Room Temperature
A fully frosted cake can usually sit at room temperature for several hours if the frosting and filling are stable and the room is cool. Keep it covered with a cake dome or airtight container to prevent the cake from drying out.
If your cake contains whipped cream, cream cheese frosting, custard, or fresh dairy-based filling, refrigerate it instead.
Refrigerator Storage
Store leftover layer cake in an airtight container or cover it well to protect it from absorbing refrigerator odors.
It will generally keep well in the refrigerator for about 3 to 4 days. Because refrigeration can make cake firmer, let the slices sit at room temperature for about 20 to 30 minutes before serving.
Freezing Cake Layers
Unfrosted cake layers freeze particularly well. Allow them to cool completely, then wrap each layer tightly in plastic wrap followed by a layer of aluminum foil or place them in a freezer-safe container.
Freeze for up to 2 to 3 months for the best quality.
Freezing a Fully Decorated Cake
A fully frosted cake can also be frozen. Place the uncovered cake in the freezer until the frosting is firm, then wrap it carefully and transfer it to a freezer-safe container.
Thaw the cake in the refrigerator overnight, then allow it to come closer to room temperature before serving.
How to Keep Cake Moist
The biggest enemy of leftover cake is air. Keep exposed cake surfaces covered as tightly as possible. If you have individual slices, place them in airtight containers rather than leaving them uncovered in the refrigerator.
Make-Ahead Tip
For easier cake decorating, bake the layers a day ahead. Cool them completely, wrap them well, and refrigerate them overnight. The chilled layers will be firmer and easier to trim, stack, and frost the next day.
Frequently Asked Questions
How do I keep my layer cake from sliding?
Make sure the cake layers are completely cool before assembling them. Use an even amount of frosting between the layers and avoid adding too much filling. Chilling the assembled cake before applying the final frosting can also help stabilize it.
Should I level cake layers before frosting?
Yes. If the cakes have domed tops, trimming them creates flat surfaces that stack more securely. Use a long serrated knife and make small, controlled cuts.
Can I make a layer cake the day before?
Absolutely. Bake the cake layers ahead of time, cool them completely, wrap them well, and refrigerate them. You can assemble and decorate the cake the following day.
Why is my cake dry?
Dry cake can result from too much flour, overbaking, or measuring ingredients inaccurately. Bake just until a toothpick comes out with a few moist crumbs and avoid adding excess flour.
Why did my cake sink in the middle?
A cake can sink if it is underbaked, the oven temperature is incorrect, or the oven door is opened too early. Make sure the center is properly baked before removing the cake from the oven.
How much frosting should go between cake layers?
For an 8-inch cake, a moderate, even layer of frosting is usually enough. The exact amount depends on how thick you want the filling, but avoid making it so thick that the layers become unstable.
Can I use store-bought frosting?
Yes. Store-bought frosting is a convenient option when you want to save time. Let it soften slightly before spreading, and beat it briefly with a mixer if you want a lighter texture.
How far ahead can I freeze cake layers?
Unfrosted cake layers can generally be frozen for up to 2 to 3 months when wrapped tightly and stored properly. Thaw them before assembling the cake.
What is a crumb coat?
A crumb coat is a thin layer of frosting applied around the assembled cake before the final frosting layer. It traps loose crumbs and helps create a cleaner finish.
How do I get smooth frosting on the sides?
Apply enough frosting to cover the cake, then use an offset spatula or cake scraper while slowly turning the cake. Chilling the crumb-coated cake first makes the process easier.
Can I make this cake gluten-free?
Yes. Replace the all-purpose flour with a quality 1-to-1 gluten-free baking flour intended for cakes. Check the flour’s instructions to determine whether additional binders are needed.
How should I cut a layer cake neatly?
Use a sharp knife and make gentle, steady cuts. Wiping the blade clean between slices helps keep the layers and frosting looking neat.

How To Make A Layer Cake
Ingredients
Method
- Preheat the oven to 350°F. Grease two 8-inch round cake pans and line the bottoms with parchment paper.
- Whisk together the flour, baking powder, and salt in a medium bowl.
- Beat the softened butter and sugar until pale and fluffy, about 3 to 4 minutes.
- Add the eggs one at a time, mixing after each addition. Mix in the vanilla.
- Add the dry ingredients alternately with the milk, beginning and ending with the dry ingredients. Mix only until combined.
- Divide the batter evenly between the prepared pans.
- Bake for 25 to 30 minutes, or until the tops spring back lightly and a toothpick inserted into the centers comes out clean or with a few moist crumbs.
- Cool the cakes in their pans for about 10 minutes, then transfer them to a cooling rack. Let them cool completely
- If necessary, trim the domed tops with a serrated knife to create flat layers.
- For the frosting, beat the butter until creamy. Gradually add the powdered sugar, then mix in the vanilla, salt, and enough cream or milk to reach a smooth spreading consistency.
- Place one cake layer on a cake board or serving plate. Spread an even layer of buttercream over the top. Add fruit jam if desired.
- Place the second cake layer on top and gently press it into position.
- Apply a thin crumb coat around the top and sides. Refrigerate for 15 to 20 minutes.
- Apply the remaining frosting and smooth the top and sides with an offset spatula or cake scraper.
- Decorate with fresh berries, chocolate shavings, sprinkles, or additional buttercream. Chill briefly before slicing if desired.
Video
Notes
- Bring refrigerated ingredients to room temperature before mixing.
- Do not overmix the batter after adding the flour.
- Cool the cake layers completely before frosting.
- Use a kitchen scale to divide the batter evenly if you want uniform layers.
- Chill the cake briefly between the crumb coat and final frosting layer.
- Store the finished cake covered in the refrigerator for 3 to 4 days.
- For the most accurate calorie count, calculate nutrition based on the exact ingredients and brands used.
Final Thoughts
Once you understand the basic process, learning how to make a layer cake becomes much less intimidating. The key is to take your time with the small details: measure carefully, avoid overmixing the batter, let the cake layers cool completely, and build the cake with even layers of frosting.
You also do not need elaborate decorating skills to make a beautiful homemade cake. A smooth layer of buttercream, a handful of fresh berries, or a simple sprinkle of chocolate can be enough to make it feel special.
Whether you are baking your first birthday cake or simply want to practice your cake decorating skills, this method gives you a reliable starting point. Try your favorite cake and frosting combinations, experiment with seasonal fillings, and make the finished cake your own.
The best layer cake is one that is made to be shared. So slice it generously, serve it with your favorite coffee or tea, and enjoy the satisfaction of creating something beautiful from scratch.
One Comment