No Bake Oreo Mousse Cake
If you love Oreos and creamy desserts, this No Bake Oreo Mousse Cake is the kind of treat that deserves a spot in your recipe collection. It combines a crisp, buttery Oreo cookie crust with a light, velvety Oreo mousse and a smooth chocolate topping for a dessert that feels special without requiring an oven.
The best part is how simple this no bake cake is to make. Crushed Oreo cookies create a rich chocolatey base, while whipped cream and Oreo crumbs give the mousse its fluffy texture and familiar cookie flavor. After a little time in the refrigerator, every slice is cool, creamy, and easy to serve.
This Oreo mousse cake is perfect for birthdays, family dinners, holidays, or those times when you want an impressive dessert without spending hours in the kitchen. Since it can be prepared ahead of time, you can let the refrigerator do most of the work while you focus on everything else.
If you enjoy no bake desserts, Oreo cheesecake, or light and creamy chocolate treats, this recipe is a deliciously simple place to start.
Why You’ll Love This Recipe
There is a lot to appreciate about this No Bake Oreo Mousse Cake, especially if you want a dessert that looks elegant but does not require complicated baking skills.
- No oven required: This is a true no bake dessert, so there is no need to preheat the oven or worry about baking times.
- Easy to prepare: The crust, mousse, and topping come together with simple ingredients and straightforward steps.
- Rich Oreo flavor: Crushed Oreo cookies are used throughout the dessert, giving every layer a familiar chocolate cookie taste.
- Light and creamy texture: The mousse is soft, fluffy, and smooth rather than dense like a traditional baked cheesecake.
- Buttery cookie crust: A firm Oreo crust adds a crisp contrast to the creamy mousse.
- Make-ahead friendly: The cake needs time to chill, which makes it convenient to prepare several hours before serving.
- Perfect for celebrations: Its layered appearance makes it a lovely choice for birthdays, holidays, dinner parties, and family gatherings.
- Beginner-friendly: You do not need advanced baking techniques or special decorating skills to make a beautiful dessert.
- Easy to customize: Add extra Oreo crumbs, chocolate shavings, whipped cream, or whole cookies to create your own finishing touch.
The combination of a crunchy cookie base and airy mousse makes each bite satisfying without feeling overly heavy. Once chilled properly, the cake slices neatly while keeping its soft, creamy center.
Ingredients
This No Bake Oreo Mousse Cake uses a short list of easy-to-find ingredients. For the best texture, use full-fat cream cheese and cold heavy whipping cream.
For the Oreo Crust
- 24 Oreo cookies, including the cream filling
- 5 tablespoons unsalted butter, melted
For the Oreo Mousse
- 8 ounces cream cheese, softened to room temperature
- 1/2 cup granulated sugar
- 1 teaspoon pure vanilla extract
- 16 Oreo cookies, finely crushed
- 1 1/2 cups heavy whipping cream, cold
For the Chocolate Topping
- 1/2 cup semisweet chocolate chips
- 1/3 cup heavy whipping cream
For Garnishing
- 6 to 8 Oreo cookies, roughly chopped or halved
- 1/2 cup whipped cream, optional
- 2 tablespoons Oreo crumbs, optional
Ingredient Checklist
Before you begin, make sure the cream cheese has softened while the heavy cream stays cold. This small preparation step makes the mousse easier to mix and helps the whipped cream reach a light, stable consistency.
Use regular Oreo cookies for the classic flavor. If you prefer a different cookie-to-cream ratio, you can experiment with other Oreo varieties, but keep the overall cookie quantity similar so the crust and mousse set properly.
Ingredient Notes & Substitutions
A few small ingredient choices can make a noticeable difference in the texture and flavor of this no bake Oreo mousse cake. Here are some helpful notes before you start.
Oreo Cookies
Regular Oreo cookies work best because the chocolate wafers and sweet cream filling provide the right balance for both the crust and mousse. There is no need to remove the filling before crushing them.
You can use another Oreo variety if you want to change the flavor. Golden Oreos will create a vanilla-style version, while chocolate-filled varieties can make the dessert even richer.
Butter
Unsalted butter is ideal for the crust because it lets you control the sweetness and salt level. If you only have salted butter, it can still be used without making a major difference.
For a firmer crust, make sure the melted butter is evenly mixed with the cookie crumbs before pressing the mixture into the pan.
Cream Cheese
Use full-fat block-style cream cheese for the smoothest mousse. Allow it to soften at room temperature before mixing. Cold cream cheese can leave small lumps in the filling.
Reduced-fat cream cheese can be used, but the mousse may be slightly softer and less rich.
Heavy Whipping Cream
Cold heavy whipping cream is important for creating a fluffy mousse. Keep it refrigerated until you are ready to whip it.
For the best results, use heavy cream with enough fat to whip into firm peaks. Regular milk or half-and-half will not provide the same structure.
Sugar
Granulated sugar adds sweetness to the cream cheese mixture. If you prefer a slightly less sweet dessert, you can reduce the amount a little, especially since the Oreos and chocolate topping already contain sugar.
Powdered sugar can also be used. It dissolves quickly and can give the mousse a particularly smooth texture.
Chocolate Chips
Semisweet chocolate gives the topping a balanced chocolate flavor without making the cake overly sweet. Dark chocolate can be substituted if you prefer a deeper, more intense taste.
Milk chocolate will create a sweeter and softer-tasting topping.
Dairy-Free Option
For a dairy-free version, use dairy-free chocolate sandwich cookies, plant-based cream cheese, dairy-free butter, and a suitable dairy-free whipping cream. Check each package carefully because ingredients and allergen information vary by brand.
Gluten-Free Option
Use certified gluten-free chocolate sandwich cookies and confirm that the remaining ingredients are gluten-free. This is especially important if the dessert is being served to someone with celiac disease or a gluten sensitivity.
Budget-Friendly Tip
If you are making this dessert for a crowd, store-brand chocolate sandwich cookies can work just as well as name-brand cookies. The most important thing is getting the crust properly compacted and allowing the finished cake enough time to chill.
Kitchen Tools Needed
You do not need a long list of equipment to make this easy No Bake Oreo Mousse Cake. A few basic kitchen tools are enough.
9-Inch Springform Pan
A springform pan makes it much easier to remove the chilled cake without damaging the Oreo crust or creamy mousse. A 9-inch pan gives the cake a comfortable height and makes slicing simple.
Food Processor
A food processor is the quickest way to turn the Oreo cookies into fine crumbs for the crust and mousse. If you do not have one, place the cookies in a sealed zip-top bag and crush them with a rolling pin.
Mixing Bowls
You will need a couple of medium or large mixing bowls for preparing the cream cheese mixture and whipping the heavy cream.
Electric Hand Mixer
An electric hand mixer makes whipping the cream much faster and easier. A stand mixer also works well, although it is not necessary for this recipe.
Rubber Spatula
A flexible rubber spatula is useful for gently folding the whipped cream into the Oreo mixture. Folding rather than aggressively stirring helps keep the mousse light and airy.
Measuring Cups and Spoons
Accurate measurements help maintain the right balance between the cookie crust, mousse, and chocolate topping.
Small Saucepan or Microwave-Safe Bowl
You will need one of these for gently warming the heavy cream before combining it with the chocolate chips.
Offset Spatula
An offset spatula is optional but helpful for spreading the mousse evenly across the crust and smoothing the top before chilling.
Helpful Tip
If you want especially clean slices, line the bottom of the springform pan with parchment paper before assembling the cake. It makes serving and transferring the finished dessert much easier.
Step-by-Step Instructions
Making this No Bake Oreo Mousse Cake is mostly about getting the layers to the right consistency and giving the cake enough time to chill. Take your time with each stage, especially when whipping and folding the mousse.
Step 1: Prepare the Pan
Lightly grease the bottom and sides of a 9-inch springform pan. For easier removal, place a round piece of parchment paper on the bottom of the pan.
Set the prepared pan aside while you make the Oreo crust.
Step 2: Make the Oreo Crust
Place 24 Oreo cookies in a food processor and pulse until they become fine, even crumbs.
Pour in the melted butter and pulse again until the mixture resembles damp sand. The crumbs should hold together when gently pressed between your fingers.
Transfer the mixture to the springform pan. Press it firmly and evenly across the bottom using the back of a measuring cup or the bottom of a glass.
A firmly packed crust is important. If the crumbs are too loose, the base may crumble when you cut the cake.
Place the crust in the refrigerator while you prepare the mousse.
Step 3: Prepare the Cream Cheese Mixture
Add the softened cream cheese and granulated sugar to a large mixing bowl.
Beat with an electric mixer until the mixture is smooth and creamy. Scrape down the sides of the bowl as needed so there are no pockets of unmixed cream cheese.
Add the vanilla extract and mix until incorporated.
The mixture should look smooth and slightly fluffy. If you still see small lumps, continue mixing briefly before moving on.
Step 4: Crush the Oreo Cookies
Finely crush 16 Oreo cookies for the mousse. The crumbs should be fairly small, but they do not have to be perfectly powdery.
Set aside a small amount of the crumbs if you want to sprinkle them over the finished cake.
Step 5: Whip the Heavy Cream
Pour the cold heavy whipping cream into a clean mixing bowl.
Using an electric mixer, whip the cream until it forms medium to firm peaks. When you lift the beaters, the cream should hold its shape without looking grainy.
Do not overwhip the cream. Once it becomes thick and fluffy, stop mixing.
Step 6: Combine the Mousse
Add the crushed Oreos to the cream cheese mixture and stir gently until evenly distributed.
Add about one-third of the whipped cream and fold it into the cream cheese mixture to loosen the filling.
Then add the remaining whipped cream and gently fold until the mousse is evenly combined.
Use a spatula and make slow folding motions rather than vigorous stirring. This helps preserve the air in the whipped cream and gives the finished mousse its soft, fluffy texture.
Step 7: Fill the Cake
Remove the Oreo crust from the refrigerator.
Spoon the Oreo mousse over the chilled crust and spread it into an even layer with a spatula.
Gently tap the pan against the counter once or twice to help remove large air pockets. Do not tap it hard, as excessive movement can disturb the crust.
Smooth the surface as evenly as possible.
Step 8: Make the Chocolate Topping
Place the semisweet chocolate chips in a heatproof bowl.
Warm the heavy cream in a small saucepan over low to medium heat until it is hot and just beginning to steam. Do not bring it to a rolling boil.
Pour the warm cream over the chocolate chips. Let the mixture sit for a minute or two, then stir slowly until the chocolate melts into a smooth, glossy sauce.
If a few chocolate pieces remain, continue stirring gently until completely smooth.
Step 9: Add the Chocolate Layer
Allow the chocolate topping to cool slightly so it is warm rather than hot.
Pour it carefully over the mousse and spread it into an even layer. Work gently so the chocolate does not sink into the soft mousse.
Add chopped Oreo cookies or a light sprinkle of Oreo crumbs while the topping is still slightly soft if you want them to stick to the surface.
Step 10: Chill the Cake
Cover the springform pan and refrigerate the cake for at least 6 hours, preferably overnight.
This chilling time allows the mousse to firm up and the crust to become sturdy enough for clean slices.
Do not rush this step. Cutting the cake too early can cause the mousse to lose its shape.
Step 11: Remove From the Pan
Once the cake is fully chilled, carefully run a thin knife around the edge if needed.
Release the springform pan slowly and lift it away from the cake.
If the cake feels very firm, let it sit at room temperature for about 5 to 10 minutes before slicing.
Step 12: Slice and Serve
Use a sharp knife to cut the cake into slices. For cleaner cuts, dip the knife in warm water, wipe it dry, and then slice.
Repeat the process between slices for a neat presentation.
Top each piece with whipped cream, Oreo crumbs, or a small piece of Oreo cookie if desired.
Common Mistakes to Avoid
- Do not use warm cream for whipping. Cold heavy cream whips more easily and holds its shape better.
- Do not leave the cream cheese cold and lumpy. Let it soften before mixing.
- Do not overwhip the heavy cream. Stop as soon as firm peaks form.
- Do not stir the whipped cream aggressively. Gentle folding keeps the mousse light.
- Do not pour very hot chocolate over the mousse. Let the ganache cool slightly first.
- Do not skip the chilling time. The mousse needs several hours to become firm enough to slice cleanly.
- Do not pack the Oreo crust loosely. A well-compressed crust gives the cake a stable base.
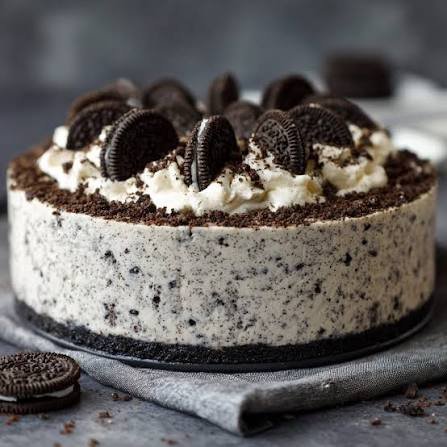
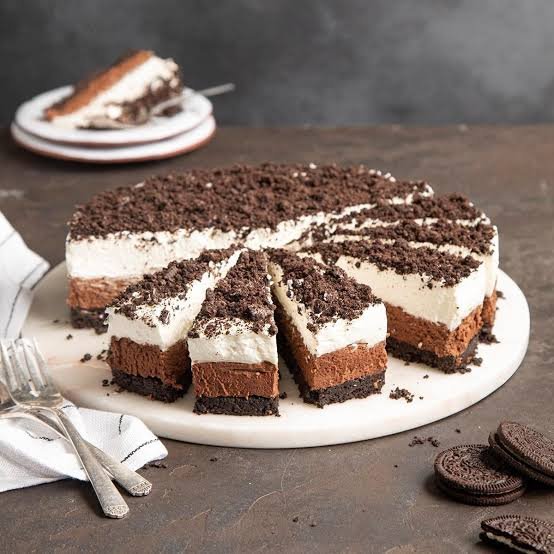
The finished cake should have a firm, buttery Oreo crust, a smooth and airy cookie mousse center, and a glossy chocolate topping that adds a rich finishing touch.
Expert Tips
A few simple techniques can make the difference between a good Oreo mousse cake and one with a smooth, stable texture and clean layers.
Use Room-Temperature Cream Cheese
Softened cream cheese blends much more smoothly with the sugar. If it is still cold, small lumps can remain in the mousse. Set it out about 30 to 45 minutes before you begin.
Keep the Heavy Cream Cold
While the cream cheese should be softened, the heavy whipping cream should stay cold. Cold cream whips faster and creates a stronger mousse structure.
For an extra boost, chill your mixing bowl and beaters for about 10 minutes before whipping the cream.
Crush the Oreos Consistently
Very large cookie pieces can make the mousse harder to spread and may cause uneven slices. Fine crumbs distribute more evenly throughout the filling and create a smoother texture.
For the crust, aim for crumbs that are fine enough to hold together once combined with butter.
Press the Crust Firmly
A loose crust can fall apart when you lift a slice. Use the flat bottom of a glass or measuring cup to press the crumbs into an even, compact layer.
Pay particular attention to the edges and corners.
Fold, Do Not Beat
Once the whipped cream is ready, gently fold it into the cream cheese mixture. Stirring too vigorously can knock out the air that gives the mousse its light texture.
Use a spatula and scoop from the bottom of the bowl upward until everything is evenly combined.
Let the Chocolate Cool Slightly
The chocolate topping should be smooth and pourable, but it should not be hot when added to the mousse. Warm chocolate can soften the filling and make the layers less distinct.
Give the topping a few minutes to cool after mixing if necessary.
Give the Cake Enough Chill Time
For the cleanest slices, refrigerate the cake for at least 6 hours. Overnight chilling is even better if you are preparing it for a special occasion.
The extra time allows the mousse to firm and the Oreo crust to become easier to cut.
Use a Warm Knife for Clean Slices
For bakery-style slices, run a sharp knife under warm water, then wipe it completely dry before cutting. The warm blade moves through the chilled mousse more smoothly.
Clean and warm the knife again between cuts when you want especially neat slices.
Do Not Overload the Toppings
Oreo cookies and chocolate already provide plenty of flavor. A simple topping of crushed cookies and a few small whipped cream swirls can make the cake look polished without overwhelming the mousse.
Make It the Day Before
This dessert is especially convenient for entertaining because it benefits from resting in the refrigerator. Prepare it the night before serving, keep it covered, and add any delicate decorations shortly before bringing it to the table.
Variations
One of the best things about this No Bake Oreo Mousse Cake is how easy it is to customize. Keep the basic crust and mousse method, then adjust the flavors or toppings to suit the occasion.
Chocolate Lover’s Oreo Mousse Cake
For a deeper chocolate flavor, use dark chocolate chips for the topping and add 1 to 2 tablespoons of unsweetened cocoa powder to the cream cheese mixture.
You can also finish the cake with chocolate curls and extra crushed Oreos.
Mint Oreo Mousse Cake
Use mint-flavored Oreo cookies in the crust and mousse for a refreshing twist. A small amount of peppermint extract can also be added to the mousse, but use it sparingly because peppermint flavor can become strong quickly.
Finish with chocolate shavings for a classic chocolate-mint combination.
Peanut Butter Oreo Cake
Add a thin layer of creamy peanut butter between the Oreo crust and mousse. For extra peanut butter flavor, drizzle melted peanut butter over the top before adding the Oreo garnish.
This version works particularly well for anyone who enjoys the combination of chocolate and peanut butter.
Cookies and Cream Cheesecake Style
For a slightly denser dessert, increase the cream cheese and reduce the whipped cream. The result will have more of a cheesecake-like texture while still keeping the easy no bake preparation.
Add plenty of chopped Oreo pieces for extra cookie crunch.
Birthday Oreo Mousse Cake
Turn the cake into a simple celebration dessert by decorating the top with whipped cream swirls, crushed Oreos, and colorful sprinkles.
You can also place halved Oreo cookies around the edge for a more finished presentation.
Extra-Crunch Oreo Cake
If you enjoy texture, reserve some Oreo cookies and roughly chop them instead of crushing everything finely. Fold the larger pieces into the mousse just before assembling the cake.
The result is a softer mousse with little pockets of cookie crunch throughout.
Gluten-Free Oreo Mousse Cake
Use certified gluten-free chocolate sandwich cookies and verify that all other ingredients are gluten-free. This allows you to enjoy the same creamy dessert while accommodating a gluten-free diet.
Dairy-Free Oreo Mousse Cake
Choose dairy-free chocolate sandwich cookies along with dairy-free butter, cream cheese, whipping cream, and chocolate. Make sure the products are suitable for your dietary needs and check labels for cross-contact information.
Mini Oreo Mousse Cakes
Instead of using one large springform pan, divide the crust and mousse among small dessert cups or individual molds.
These individual portions are ideal for parties because each guest gets a ready-to-serve dessert without the need for slicing.
Oreo Mousse Pie
For a simpler presentation, prepare the same Oreo crust and mousse in a 9-inch pie dish. Spread the mousse into the crust, add the chocolate topping, and chill until firm.
This version is especially convenient when you do not have a springform pan.
Storage Instructions
Proper storage helps keep the Oreo crust firm and the mousse smooth and creamy.
Refrigerator Storage
Cover the finished cake tightly with plastic wrap or place it in an airtight cake container. Store it in the refrigerator for up to 4 days.
Keep the cake chilled until you are ready to serve. Because the mousse contains whipped cream and cream cheese, it should not sit at room temperature for extended periods.
For the best texture, remove individual slices from the refrigerator only shortly before serving.
Freezer Storage
You can freeze the assembled cake if you want to prepare it well in advance. Wrap the cake tightly with plastic wrap, followed by a layer of aluminum foil, or place it in a freezer-safe airtight container.
Freeze for up to 1 month for the best quality.
If possible, freeze the cake before adding delicate toppings such as whipped cream or decorative Oreo pieces.
How to Thaw
Move the frozen cake to the refrigerator and let it thaw slowly for several hours or overnight.
Avoid thawing it on the kitchen counter. Slow refrigerator thawing helps the mousse maintain its creamy texture and keeps the dessert properly chilled.
Can You Freeze Individual Slices?
Yes. Slice the fully chilled cake, wrap each piece individually, and place the wrapped slices in a freezer-safe container.
When you want a serving, transfer one slice to the refrigerator and let it thaw gradually. This is a convenient option when you do not want to thaw the entire cake at once.
Reheating Instructions
This is a no bake mousse dessert, so it should not be reheated. Serve it chilled or allow a refrigerated slice to rest at room temperature for about 5 to 10 minutes if you prefer a slightly softer mousse.
Frequently Asked Questions
Can I make No Bake Oreo Mousse Cake ahead of time?
Yes. This cake is ideal for making ahead because it needs several hours to chill. You can prepare it the day before serving and keep it covered in the refrigerator.
How long does Oreo mousse cake need to chill?
For the best texture, refrigerate the cake for at least 6 hours. Overnight chilling gives the mousse even more time to firm up and makes slicing easier.
Can I use a different size pan?
Yes, but the cake height will change. A smaller pan will produce a taller cake, while a larger pan will create a thinner layer of mousse. Adjust the chilling time as needed and avoid overfilling the pan.
Why is my Oreo crust falling apart?
The crust may not have enough butter or may not have been pressed firmly enough. Make sure the cookie crumbs are evenly coated with melted butter and compact the mixture firmly into the pan.
Why is my mousse too soft?
The heavy cream may not have been whipped enough, or the cake may not have chilled for long enough. Make sure the cream reaches medium to firm peaks and give the assembled cake plenty of refrigerator time.
Can I use whipped topping instead of heavy cream?
Yes. A prepared whipped topping can be used as a shortcut, although the texture and flavor may differ slightly from a mousse made with freshly whipped heavy cream.
Do I need to remove the Oreo filling before crushing the cookies?
No. The Oreo filling can remain in the cookies for both the crust and mousse. It contributes sweetness and helps create the classic cookies-and-cream flavor.
Can I make this cake without a springform pan?
Yes. You can use a deep pie dish or prepare the dessert in individual cups. A springform pan simply makes removing and serving the whole cake easier.
Can I use homemade chocolate ganache on top?
Absolutely. A simple mixture of chocolate and warm heavy cream works beautifully as the topping. Let it cool slightly before spreading it over the mousse.
How do I get clean slices?
Make sure the cake is thoroughly chilled. Use a sharp knife warmed under hot water, wipe it dry, and cut straight through the cake. Clean the knife between slices for the neatest results.
Can I use flavored Oreo cookies?
Yes. Mint, vanilla, chocolate, or other seasonal Oreo varieties can be used to create different versions of the dessert. Keep the quantity similar to the original recipe so the texture remains balanced.
How long can the cake stay at room temperature?
Because the mousse contains dairy ingredients, keep the cake refrigerated and avoid leaving it at room temperature for extended periods. Return leftovers to the refrigerator promptly after serving.

No Bake Oreo Mousse Cake
Ingredients
Method
- Prepare the pan: Lightly grease a 9-inch springform pan and line the bottom with parchment paper if desired.
- Make the crust: Crush 24 Oreo cookies into fine crumbs. Mix with the melted butter until evenly combined. Press the mixture firmly into the bottom of the pan. Refrigerate while preparing the mousse
- Mix the cream cheese: Beat the softened cream cheese and sugar until smooth and creamy. Add the vanilla extract and mix until combined.
- Add the Oreos: Stir the finely crushed Oreo cookies into the cream cheese mixture until evenly distributed.
- Whip the cream: Beat the cold heavy whipping cream in a separate bowl until medium to firm peaks form. Be careful not to overwhip.
- Make the mousse: Fold about one-third of the whipped cream into the cream cheese mixture. Gently fold in the remaining whipped cream until smooth and fluffy
- Fill the pan: Spread the Oreo mousse evenly over the chilled crust. Smooth the top with a spatula
- Prepare the chocolate topping: Place the chocolate chips in a heatproof bowl. Warm the heavy cream until steaming but not boiling. Pour it over the chocolate and let it sit for 1 to 2 minutes. Stir until smooth and glossy.
- Top the cake: Allow the chocolate mixture to cool slightly, then spread it gently over the mousse. Add chopped Oreos or Oreo crumbs while the topping is still soft.
- Chill: Cover and refrigerate for at least 6 hours, preferably overnight.
- Serve: Carefully remove the springform pan. Slice with a sharp, warm knife and garnish with whipped cream or additional Oreo pieces if desired.
Video
Final Thoughts
This No Bake Oreo Mousse Cake is a simple dessert with plenty of texture and classic cookies-and-cream flavor. The buttery Oreo crust gives each slice a firm, crunchy base, while the fluffy mousse keeps the center smooth and creamy. A layer of chocolate on top adds a rich finish without making the recipe complicated.
What makes this dessert especially convenient is that most of the work can be done ahead of time. Once assembled, the refrigerator takes care of the final setting, giving you a chilled cake that is easy to slice and serve.
Whether you are making dessert for a family dinner, a birthday celebration, or simply have a craving for Oreos, this recipe is worth keeping close. You can serve it as written or add your own favorite toppings and Oreo variations.
For the best results, remember the key details: soften the cream cheese, keep the whipping cream cold, fold the mousse gently, and give the finished cake plenty of time to chill.
Slice it cold, add a little extra Oreo crumble if you like, and enjoy every creamy, chocolatey bite.