
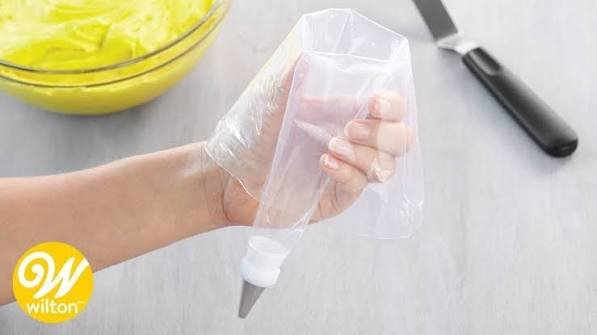
How To Use A Piping Bag
Learning how to use a piping bag can make cake decorating feel much easier, even if you are completely new to it. With the right bag, piping tip, and a little practice, you can create smooth frosting swirls, neat borders, delicate details, and beautiful cupcake decorations without needing professional decorating skills.
The trick is learning how to hold the bag, control the pressure, and work with the frosting instead of fighting it. Once you understand the basics, a piping bag becomes one of the most useful tools in your kitchen. Whether you are decorating a birthday cake, finishing a batch of cupcakes, adding icing to cookies, or filling homemade pastries, the right technique gives you much more control and a cleaner finish.
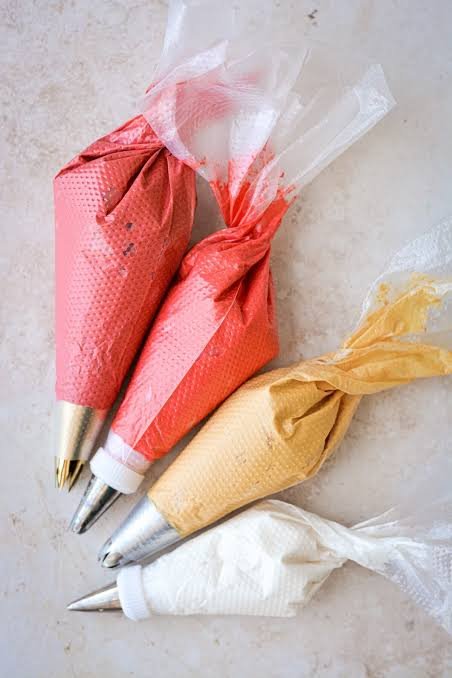
In this easy beginner-friendly guide, you will learn how to fill a piping bag, choose the right piping tip, avoid common mistakes, and pipe frosting with confidence. By the end, those colorful bags and tiny metal tips in your baking drawer will feel much less intimidating.
Why You’ll Love This Guide
- Perfect for beginners: Every step is explained simply, so you can start piping even if you have never used a piping bag before.
- Easy to follow: You will learn the basic technique without complicated decorating terminology or unnecessary equipment.
- Better frosting control: Learn how pressure, hand position, and piping speed affect the shape and texture of your frosting.
- Great for many desserts: Use these techniques for cupcakes, cakes, cookies, cream puffs, meringues, and other baked treats.
- Helps prevent messy piping: Simple filling and handling tips can reduce air pockets, frosting spills, and uneven designs.
- Works with different tips: Learn how to use round, star, open star, and other common piping tips for different decorating styles.
- Useful for any skill level: Beginners can master the basics, while experienced bakers can refine their technique and create cleaner results.
- No fancy setup required: A basic piping bag, decorating tip, and your favorite frosting are enough to get started.
Ingredients
Unlike a traditional recipe, learning how to use a piping bag does not require a long ingredient list. You only need a few simple items to practice and decorate your favorite desserts.
Basic Piping Supplies
- Frosting: About 2 cups of buttercream, cream cheese frosting, whipped frosting, or another thick frosting that holds its shape.
- Piping bag: One disposable or reusable piping bag. A 12 to 16-inch bag is a comfortable size for most beginner decorating projects.
- Piping tip: Choose one decorating tip based on the design you want to make. A large star tip is a great starting point for cupcakes and swirls.
- Coupler: Optional, but useful if you want to change piping tips without replacing the entire bag.
- Food coloring: Optional if you want to tint your frosting before piping.
- Decorating surface: A cooled cake, cupcakes, cookies, or a sheet of parchment paper for practice.
Helpful Practice Setup
If you are learning how to pipe frosting for the first time, start with a small amount of frosting and a simple piping tip. Practicing a few swirls or lines on parchment paper lets you adjust your pressure and technique before decorating a finished cake.
For the smoothest results, make sure your frosting is soft enough to squeeze easily but firm enough to hold its shape. Frosting that is too stiff can make piping difficult, while frosting that is too soft may spread instead of forming clean, defined designs.
Ingredient Notes & Substitutions
The best piping results come from using frosting with the right consistency. You do not need a special recipe, but a few small adjustments can make the frosting much easier to pipe.
Frosting
Buttercream: A classic choice for piping because it is creamy, smooth, and easy to shape. If it feels too stiff, mix in a small amount of milk or cream until it becomes easier to squeeze.
Cream cheese frosting: Works well for simple swirls and borders, but it is usually softer than buttercream. Keep it chilled if it becomes difficult to handle.
Whipped cream: Use stabilized whipped cream when possible. Regular whipped cream can lose its shape quickly, especially in a warm kitchen.
Ganache: Thickened ganache can be piped into decorative swirls, rosettes, and other designs. Allow it to cool until it reaches a soft, spreadable consistency.
Piping Bags
Disposable piping bags: These are convenient for beginners and make cleanup quick. They are also useful when working with several frosting colors.
Reusable piping bags: A washable option that can be used repeatedly. Choose a sturdy bag that feels comfortable in your hand.
No piping bag: In a pinch, a sturdy zip-top food storage bag can work. Fill it with frosting, press out excess air, seal it, and snip a small corner. This is best for simple lines and basic designs.
Piping Tips
You can change the look of your decorations simply by changing the piping tip.
- Round tip: Great for dots, writing, outlines, and simple lines.
- Open star tip: Ideal for classic cupcake swirls and textured borders.
- Closed star tip: Creates deeper ridges and defined rosettes.
- French star tip: Produces detailed, elegant ridges.
- Petal tip: Useful for flowers, ruffles, and delicate decorative details.
- Large round tip: Excellent for filling pastries and creating smooth, rounded frosting shapes.
Dairy-Free Option
If you need a dairy-free frosting, use a dairy-free butter substitute and plant-based milk. Check the labels on your piping decorations and other ingredients as well if you are preparing desserts for someone with a dairy allergy.
Gluten-Free Considerations
The piping technique itself is naturally gluten-free. However, always check the frosting, sprinkles, food coloring, and other decorating ingredients if you need to avoid gluten because packaged products can contain unexpected ingredients or cross-contact warnings.
Food Coloring
Gel food coloring is usually the easiest choice when you want bright frosting colors without adding much liquid. Add it gradually and mix thoroughly before deciding whether you need more.
A Simple Consistency Test
Before filling your piping bag, press a small amount of frosting onto a plate or piece of parchment. It should squeeze out smoothly and hold its shape without spreading immediately. If it feels hard to pipe, soften it slightly. If the shape collapses, the frosting needs to be thickened or chilled.
Kitchen Tools Needed
You do not need a large collection of decorating equipment to learn how to use a piping bag. A few basic tools are enough to get started.
Essential Tools
- Piping bags: Disposable or reusable bags both work well.
- Piping tips: Keep a few different shapes on hand for swirls, lines, borders, and other designs.
- Coupler: Optional, but helpful when you want to switch between tips while using the same bag.
- Tall glass or container: Makes filling a piping bag much easier, especially for beginners.
- Spatula: A small offset spatula or silicone spatula is useful for transferring frosting into the bag.
- Scissors: Helpful for trimming the end of disposable piping bags when needed.
Optional Helpful Tools
- Bench scraper: Useful for smoothing frosting on cakes before adding piped decorations.
- Turntable: Makes cake decorating easier because you can rotate the cake while keeping your piping hand in a comfortable position.
- Parchment paper: Perfect for practicing piping techniques before decorating your dessert.
- Cake decorating brush: Useful for cleaning small amounts of frosting from the outside of your piping tip or work area.
For beginners, start with one piping bag and one large star tip. Once you become comfortable controlling the pressure and movement of the bag, you can add more tips and experiment with different decorating techniques.
Step-by-Step Instructions
Learning how to use a piping bag is mostly about getting comfortable with pressure and movement. Take your time at first. Once your hand learns the rhythm, piping becomes much more natural.
1. Choose Your Piping Tip
Start with a tip that matches the design you want to create. A large open star tip is an excellent choice for beginners because it makes attractive swirls and textured borders with very little effort.
If you are using a coupler, place the coupler inside the piping bag and secure the decorating tip on the outside according to the coupler instructions.
2. Prepare the Piping Bag
If you are using a disposable piping bag, trim the pointed end only as much as necessary. The opening should be large enough for the piping tip to sit securely.
Do not cut too much at once. A hole that is too large can allow the tip to slip through the bag.
3. Place the Bag in a Glass
Set the piping bag inside a tall glass with the opening facing upward. Fold the top of the bag over the rim.
This creates a wide opening and keeps the bag steady while you fill it. It is one of the easiest tricks for avoiding frosting-covered hands and countertops.
4. Fill the Bag With Frosting
Use a spatula to transfer the frosting into the bag. Fill it only about halfway to two-thirds full.
Overfilling makes the bag harder to control and can force frosting out of the top while you pipe. A smaller amount gives you better control, and you can refill the bag whenever necessary.
5. Remove Air Pockets
Press the frosting gently toward the tip while twisting or folding the top of the bag.
Try to remove any large pockets of air trapped inside. Air bubbles can cause the frosting to sputter or create gaps in your piped design.
For an especially smooth result, squeeze the frosting toward the tip before you begin decorating and give the bag a gentle tap against the counter.
6. Twist the Top of the Bag
Twist the open end of the piping bag several times to close it.
Hold the twisted section with your dominant hand. This hand controls the pressure and pushes the frosting downward.
Your other hand should guide the tip and control its direction.
7. Practice Your Pressure
Before decorating your cake or cupcakes, pipe a few lines or swirls onto parchment paper.
Apply steady pressure rather than squeezing and releasing repeatedly. You want the frosting to come out in a smooth, continuous stream.
If the frosting comes out too quickly, reduce the pressure. If it barely moves, check whether the frosting is too firm or whether the piping tip is too small.
8. Hold the Bag at the Right Angle
The angle of the piping bag affects the shape of your decoration.
For simple lines, hold the bag at a low angle and move steadily across the surface.
For stars and rosettes, hold the tip closer to the surface and use controlled pressure.
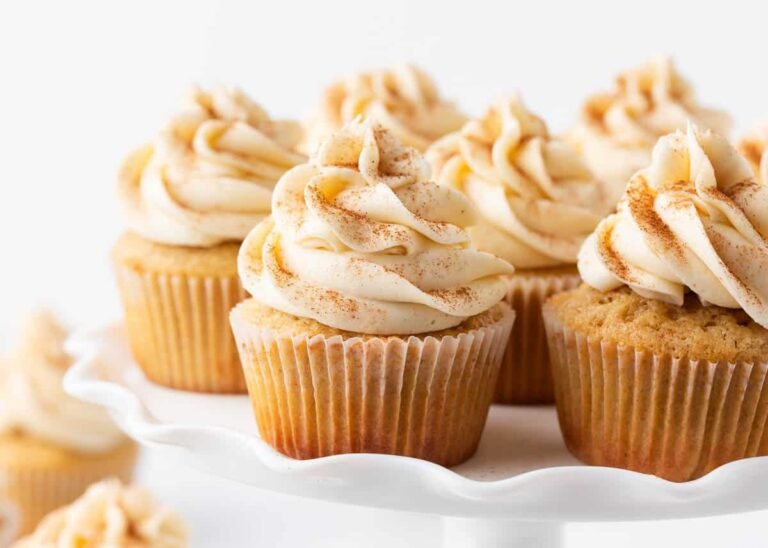
For cupcake swirls, hold the bag mostly upright and guide it in a smooth circular motion.
The exact angle will vary depending on the piping tip and design, so a little practice is normal.
9. Pipe a Basic Swirl
Place the piping tip near the surface of your cupcake. Begin squeezing the bag steadily.
Move the tip in a circular motion while keeping the pressure consistent. Build the swirl from the outside toward the center, then release the pressure before lifting the tip away.
A clean release is important. Stop squeezing first, then lift the tip. This helps prevent a small tail or uneven finish.
10. Pipe a Simple Star
Hold the piping tip just above the surface and squeeze the bag without moving it.
Once enough frosting has formed, stop squeezing and lift the tip straight upward.
This simple technique creates a neat star and is a great way to practice pressure control.
11. Pipe Straight Lines
Hold the piping tip close to the surface and squeeze gently.
Move your hand steadily in the direction you want the line to travel. Keep the pressure consistent from beginning to end.
When you reach the desired length, stop squeezing before lifting the tip.
12. Correct Mistakes as You Go
If a decoration does not look right, do not panic. Buttercream can often be scraped away carefully and piped again.
For cupcakes, you can remove an uneven swirl with a spatula and start over. When working on a cake, small mistakes can often be covered with another border, sprinkle, or decorative detail.
Common Mistakes to Avoid
Using frosting that is too stiff: If you have to squeeze extremely hard, the frosting may need a little softening.
Using frosting that is too soft: Decorations may spread, lose their ridges, or collapse after piping.
Overfilling the bag: A full bag is harder to grip and control.
Leaving air pockets: Air trapped in the frosting can interrupt the flow and create uneven decorations.
Changing pressure too often: Uneven squeezing creates inconsistent shapes.
Moving too quickly: Slow, controlled movements usually produce cleaner results.
Lifting before releasing pressure: Always stop squeezing before moving the tip away from the surface.
Holding the bag too tightly: A relaxed grip gives you better control and reduces hand fatigue.
The goal is not to pipe perfectly on the first attempt. Focus on steady pressure, smooth movement, and a consistent rhythm. With a few practice swirls, your piping technique will become much more comfortable.
Expert Tips for Using a Piping Bag
A few small technique changes can make a noticeable difference when you are decorating cakes and cupcakes. These tips will help you pipe more smoothly and get cleaner, more consistent shapes.
Use the Right Frosting Consistency
The frosting should be soft enough to squeeze through the piping tip without a struggle, but firm enough to hold its shape.
If your buttercream feels stiff, mix in a small amount of milk or cream. Add it gradually because a little can make a big difference. If the frosting becomes too soft, refrigerate it briefly or mix in a little more powdered sugar, depending on the recipe.
Do Not Overfill the Bag
A smaller amount of frosting is easier to control. Filling the bag halfway to two-thirds full gives your hand more room to grip and twist the top.
If you are decorating a large cake, refill the bag as needed instead of trying to work with one oversized, heavy bag.
Keep Steady Pressure
Consistent pressure is one of the most important parts of successful piping. Squeezing harder will make the frosting come out faster, while relaxing your grip slows the flow.
Try to maintain an even pressure from the beginning of each design to the end.
Twist the Bag as You Work
Keep twisting the top of the piping bag as the frosting moves toward the tip. This keeps the pressure steady and prevents frosting from working its way back toward your hand.
When the bag starts to feel loose, twist it again rather than squeezing the middle.
Warm Your Hands Carefully
If you are working with buttercream in a cool kitchen, the frosting can become firm and difficult to pipe. Holding the filled bag in your hands for a short time can gently warm it.
Avoid excessive warmth. Buttercream that becomes too soft will lose its definition and make detailed piping difficult.
Practice Before Decorating
If you are new to piping, practice on parchment paper before working on your final dessert.
Pipe a few stars, shells, lines, and swirls. Once you are happy with the pressure and movement, scrape the frosting back into the bowl and use it again.
Keep the Piping Tip Clean
Frosting buildup around the opening can affect the shape of your decorations. If the tip becomes messy, wipe it carefully with a clean, slightly damp cloth or paper towel.
This is especially helpful when working with detailed tips.
Chill the Dessert When Needed
A chilled cake or cupcake can provide a firmer surface for delicate decorations. If your frosting is becoming soft while you work, placing the dessert in the refrigerator for a short time can help it firm up.
Avoid decorating a warm cake. Heat can soften buttercream and make clean piping much more difficult.
Match the Tip to the Design
You do not need dozens of piping tips to create beautiful decorations. A few basic shapes can cover most beginner projects.
A round tip is useful for writing and lines, while star tips are excellent for swirls, shells, borders, and textured designs. Larger tips generally work better with thick buttercream because the frosting can pass through more easily.
Stop Squeezing Before You Lift
This simple habit can make your piping look much cleaner.
When finishing a swirl, star, or line, stop applying pressure first. Then lift or move the piping tip away. If you lift while still squeezing, you may create an unwanted peak, tail, or blob.
Keep Your Movement Smooth
Let your hand guide the piping tip at a steady pace. Avoid sudden stops and jerky movements.
For repeated decorations, try to keep the same speed, pressure, and angle each time. Consistency is what makes a row of shells or a set of cupcake swirls look polished and professional.
Work in a Comfortable Position
When decorating a cake, keep your shoulders relaxed and position the dessert at a comfortable height. A cake turntable can make this much easier because you can rotate the cake instead of twisting your wrist.
The more comfortable your position, the easier it is to maintain steady pressure and controlled movement.
Variations and Decorating Ideas
Once you are comfortable using a piping bag, you can experiment with different frostings, colors, piping tips, and decorating styles. The same basic technique can create a wide range of looks.
Two-Tone Frosting
For a beautiful two-color effect, place two different frostings side by side inside a piping bag fitted with a large star tip.
As you pipe, both colors come through the tip together, creating a striped or marbled appearance.
For a simpler method, spread one color of frosting along one side of the bag and another color along the opposite side.
Ombre Frosting
Create several shades of the same color, from light to dark. Pipe each shade in separate sections or use different bags to create an ombre effect across a cake or cupcake collection.
This works especially well with simple rosettes and swirls.
Chocolate Buttercream
Add cocoa powder or melted chocolate to your favorite buttercream for a rich chocolate version. Make sure the frosting remains soft enough to pass easily through the piping tip.
Chocolate frosting pairs especially well with vanilla cupcakes, chocolate cake, and sandwich cookies.
Dairy-Free Frosting
Use dairy-free butter and plant-based milk to prepare a frosting suitable for dairy-free desserts. Coconut-based frosting can also add a subtle flavor, although it may have a softer consistency depending on the recipe.
Vegan Piping Frosting
A plant-based buttercream made with dairy-free butter and powdered sugar can usually be piped in the same way as traditional buttercream.
Choose a frosting that becomes firm enough to hold its shape, especially if you are making detailed decorations.
Gluten-Free Decorating
The piping technique itself does not require gluten. If you are preparing a completely gluten-free dessert, check packaged ingredients such as sprinkles, food coloring, extracts, and prepared frosting for gluten-related labeling.
Mini Cupcake Decorations
Use a smaller piping tip to create petite swirls on mini cupcakes. Keep the pressure gentle and use a shorter piping motion because the smaller surface gives you less room to work.
Simple Cake Borders
A piping bag is an easy way to finish the edge of a frosted cake. Use a star tip for shells or a round tip for dots and beads.
For an elegant finish, pipe a consistent border around the top and bottom edges of the cake.
Piped Flowers
Petal tips can be used to create roses, ruffles, and other floral designs. These techniques take more practice, but they are a fun next step once you have mastered basic swirls and stars.
For detailed flowers, use a firmer buttercream that can hold sharp edges.
Cookie Decorating
A piping bag fitted with a small round tip works well for outlining and decorating sugar cookies. Use a thinner icing for fine lines and a slightly thicker icing for borders and details.
Filled Desserts
Piping bags are not only for decoration. Use them to fill cream puffs, éclairs, doughnuts, cupcakes, and sandwich cookies.
For filling pastries, a round piping tip is usually the easiest option. Insert the tip into the pastry and gently squeeze until the filling reaches the desired amount.
Seasonal Colors and Designs
Change the frosting colors and piping shapes to match holidays, birthdays, showers, or other celebrations.
You can keep the technique simple while changing the color palette and finishing touches. Sprinkles, chopped nuts, chocolate shavings, and edible decorations can add variety without requiring advanced piping skills.
Storage Instructions
Piping bags and frosting need slightly different storage depending on what you are working with. Proper storage helps maintain the frosting’s texture and makes cleanup easier.
Storing Leftover Frosting
If you have leftover buttercream, transfer it to an airtight container and refrigerate it for up to about one week, depending on the frosting recipe and ingredients.
Before using refrigerated frosting again, let it soften at room temperature. Then mix it until smooth and creamy. If it seems too firm for piping, add a very small amount of milk or cream and mix again.
Cream cheese frosting should remain refrigerated and should be stored according to the recipe used.
Freezing Frosting
Many buttercream frostings can be frozen for longer storage. Place the frosting in an airtight, freezer-safe container and freeze for up to about three months.
Thaw it in the refrigerator, then bring it toward room temperature before mixing until smooth. Avoid piping the frosting while it is still cold and firm because it can be difficult to squeeze through the tip.
Storing a Filled Piping Bag
If you have already filled a piping bag and need to pause, twist the top securely and place the bag in the refrigerator if the frosting requires refrigeration.
For short breaks, keep the bag covered so the frosting does not dry around the piping tip.
Before continuing, allow refrigerated frosting to soften enough to pipe smoothly. Give the bag a gentle squeeze first to check the consistency.
Storing Piped Decorations
Finished buttercream decorations can usually be kept on the decorated dessert according to the storage needs of the frosting and cake.
If you are making decorations separately on parchment paper, chill them until firm. Once set, carefully transfer them to an airtight container and keep them refrigerated or frozen until needed.
Cleaning Reusable Piping Bags
Reusable piping bags should be washed thoroughly after each use. Rinse away as much frosting as possible, then wash the bag with warm water and dish soap.
Pay special attention to the seam and tip area where frosting can collect.
Wash metal piping tips separately and allow everything to dry completely before storing.
What About Disposable Piping Bags?
Disposable piping bags should generally be discarded after use, especially if they have come into contact with food that requires refrigeration.
If you are using a disposable bag only for dry decorating work, follow the manufacturer’s instructions for reuse rather than assuming it is designed for repeated use.
Frequently Asked Questions
How do you use a piping bag for the first time?
Fit the piping tip, fill the bag halfway to two-thirds full, twist the top, and gently squeeze the bag while guiding the tip with your other hand. Start by practicing simple lines, dots, and swirls on parchment paper.
Which piping tip is best for beginners?
A large open star tip is one of the easiest options for beginners. It works well for cupcake swirls, borders, stars, and other simple decorations.
How full should a piping bag be?
Fill the bag about halfway to two-thirds full. This leaves enough room to twist the top and gives you better control while piping.
Why is my frosting hard to pipe?
Your frosting may be too cold or too thick. Let it soften slightly and mix it until smooth. If necessary, add a small amount of milk or cream to loosen it.
Why does my frosting lose its shape?
The frosting may be too warm or too soft. Chill it briefly and check the consistency before continuing. Warm conditions can also cause buttercream decorations to soften.
How do you stop air bubbles in a piping bag?
Press the frosting firmly toward the piping tip before you begin. Twist the top of the bag and gently squeeze out any trapped air before starting your decoration.
Do you need a coupler with a piping bag?
No. A coupler is optional. It is mainly useful when you want to change piping tips without changing the entire piping bag.
Can you use a zip-top bag instead of a piping bag?
Yes. A sturdy zip-top bag can work for simple piping. Fill it with frosting, seal it, push the frosting toward one corner, and snip a small opening.
How do you hold a piping bag correctly?
Use your dominant hand to hold and squeeze the twisted top of the bag. Use your other hand to guide the piping tip. Keep your grip relaxed and maintain steady pressure.
Why does my piping look uneven?
Uneven pressure, inconsistent movement, or frosting with the wrong consistency can cause irregular shapes. Practice keeping the same pressure, speed, and angle throughout each decoration.
Can you pipe frosting ahead of time?
Yes. Frosting can often be prepared ahead and stored in the refrigerator or freezer, depending on the recipe. Let refrigerated frosting soften and mix it until smooth before piping.
Can you reuse leftover buttercream?
Yes. If it has been stored safely, leftover buttercream can usually be mixed again before use. Check the specific frosting recipe for its recommended storage time.
How do you clean a reusable piping bag?
Remove as much frosting as possible, then wash the bag thoroughly with warm water and dish soap. Rinse well and allow it to dry completely before storing.
What is the easiest thing to pipe?
Simple dots, stars, lines, shells, and cupcake swirls are excellent beginner-friendly designs. They help you practice pressure control without requiring complicated movements.
Ingredients
Method
- Choose a piping tip that matches your desired design and fit it into the piping bag.
- Place the piping bag inside a tall glass and fold the top over the rim.
- Add frosting until the bag is about half to two-thirds full.
- Press the frosting toward the piping tip to remove large air pockets.
- Twist the top of the bag to keep the frosting contained.
- Hold the twisted section with your dominant hand and use your other hand to guide the tip.
- Practice piping simple lines, stars, dots, or swirls onto parchment paper.
- Maintain steady pressure as you decorate your cake, cupcakes, cookies, or pastries.
- Stop squeezing before lifting the piping tip away from the surface.
- Refill the bag as needed rather than overfilling it.
Video
Final Thoughts
Learning how to use a piping bag is one of those baking skills that becomes much easier once you understand the basics. Start with a simple piping tip, use frosting with the right consistency, and focus on keeping your pressure steady.
Do not worry if your first few swirls or borders are not perfect. A little practice on parchment paper can quickly help you become more comfortable with the bag. Once you have mastered basic lines, stars, and swirls, you can move on to rosettes, flowers, detailed borders, and other cake decorating techniques.
The beauty of piping is that a few simple tools can completely change the look of a homemade dessert. Whether you are finishing everyday cupcakes or decorating a special celebration cake, good piping technique can give your baked creations a polished, personal touch.
Now that you know how to fill, hold, and control a piping bag, grab your favorite frosting and start practicing. The more you pipe, the more natural the movement will feel.

One Comment