
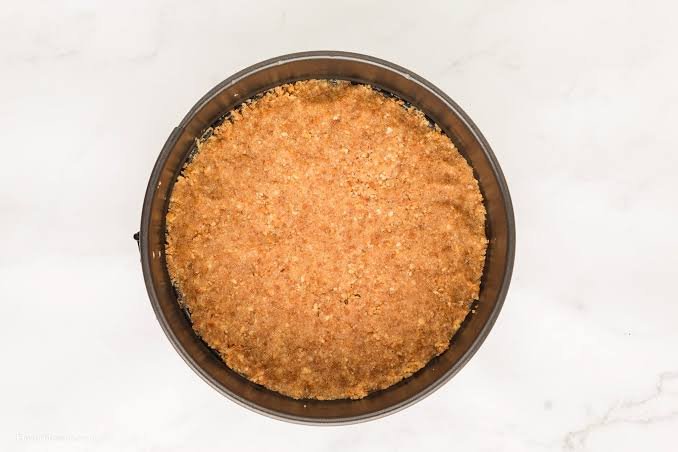
Make No Bake Crust Springform Pan
A good dessert starts with a crust that holds together beautifully, and learning how to Make No Bake Crust Springform Pan style makes homemade cheesecakes, cream pies, and chilled desserts much easier. With a few simple ingredients, you can create a buttery, crisp crust that presses neatly into the pan and slices cleanly once chilled.
The best part is that there is no oven required. Finely crushed cookies or graham crackers combine with melted butter to create a rich, tender base with just the right amount of crunch. Once pressed firmly into a springform pan, the crust becomes a dependable foundation for creamy cheesecake fillings, silky mousse, pudding, or your favorite no-bake dessert.
Whether you are new to springform pans or simply want a more reliable no-bake crust, this easy method takes the guesswork out of getting the texture right. You will also learn how to line the pan, press the crust evenly, prevent crumbling, and chill it so your finished dessert is easier to slice and serve.
Why You’ll Love This Recipe
This no-bake crust is one of those simple kitchen basics that can make an entire dessert feel easier. Once you know how to prepare it in a springform pan, you can use the same method for many chilled desserts.
- No oven needed: The crust comes together without baking, making it ideal for warm days or quick desserts.
- Simple ingredients: You only need a few everyday ingredients to create a buttery, flavorful base.
- Easy to customize: Use graham crackers, chocolate cookies, vanilla wafers, or another favorite crisp cookie.
- Firm but tender texture: The right balance of crumbs and melted butter creates a crust that holds together without becoming hard.
- Perfect for springform pans: The removable sides make it easier to release a delicate no-bake dessert without damaging the crust.
- Great for make-ahead desserts: Once chilled, the crust is ready for cheesecake, mousse, pudding, ice cream cakes, and other creamy fillings.
- Beginner-friendly: There is no complicated technique. The key is crushing the crumbs finely and pressing them evenly into the pan.
- Easy to adjust: You can make a thicker crust for a rich cheesecake or a thinner layer when you want the filling to take center stage.
The result is a crisp, buttery foundation that adds texture and flavor while giving your favorite no-bake desserts a polished homemade finish.
Ingredients
You only need a handful of simple ingredients to make a sturdy, flavorful no-bake crust in a springform pan.
- Graham cracker crumbs: These form the main base of the crust. Use finely crushed crumbs for the smoothest texture and easiest pressing.
- Unsalted butter: Melted butter binds the crumbs together and adds a rich, buttery flavor. Unsalted butter also gives you better control over the sweetness and saltiness.
- Granulated sugar: A small amount of sugar adds sweetness and helps create a more balanced crust. You can adjust it depending on how sweet your cookies or crackers are.
- Salt: Just a pinch enhances the buttery flavor and keeps the crust from tasting flat.
- Optional vanilla extract: A little vanilla adds a soft, warm flavor that works especially well with cheesecake and creamy dessert fillings.
For a standard 9-inch springform pan, a good starting ratio is:
- 1 1/2 cups finely crushed graham cracker crumbs
- 6 tablespoons unsalted butter, melted
- 2 tablespoons granulated sugar
- Pinch of salt
- 1/2 teaspoon vanilla extract, optional
The exact amount of crumbs may vary slightly depending on how finely they are crushed. The finished mixture should resemble damp sand and hold together when firmly pressed between your fingers.
Ingredient Notes & Substitutions
A few small ingredient choices can make a noticeable difference in the texture and flavor of your no-bake crust. Here is how to adjust the recipe based on what you have in your pantry.
Graham Cracker Crumbs
Fine crumbs work best because they pack together more evenly and create a smoother crust. You can crush whole graham crackers in a food processor or place them in a sealed bag and roll over them with a rolling pin.
If you do not have graham crackers, try finely crushed vanilla wafers, digestive biscuits, shortbread cookies, or chocolate sandwich cookies. Keep in mind that sweeter cookies may not need the added sugar.
Butter
Unsalted butter is ideal because it lets you control the overall flavor. Salted butter also works well, but you can skip the added pinch of salt.
For a dairy-free option, use a plant-based butter that is firm when chilled. Avoid very soft spreads because they may not give the crust enough structure.
Sugar
Granulated sugar provides straightforward sweetness, but you can replace it with light brown sugar for a slightly deeper, caramel-like flavor.
If your cookies are already quite sweet, reduce the added sugar or leave it out altogether.
Salt
Salt is optional, but a small pinch helps bring out the buttery and cookie flavors. If you are using salted butter, taste the crumb mixture before adding more.
Vanilla Extract
Vanilla is completely optional. It adds a subtle bakery-style flavor, especially when the crust is paired with plain cheesecake, vanilla mousse, or creamy pudding.
Gluten-Free Option
For a gluten-free crust, use certified gluten-free graham crackers or gluten-free cookies. Check the package carefully if the finished dessert needs to be completely gluten-free.
Allergy-Friendly Tips
For dairy-free desserts, choose dairy-free butter or another suitable solid fat. For nut-free desserts, check packaged cookies and graham crackers carefully because some brands may be produced in facilities that also handle nuts.
The most important thing is consistency. No matter which crumbs you choose, the mixture should feel moist enough to hold together when pressed but not greasy or wet.
Kitchen Tools Needed
You do not need a large collection of equipment to make a no-bake crust in a springform pan. A few basic kitchen tools are enough.
- 9-inch springform pan: The removable sides make it much easier to release a chilled cheesecake or other no-bake dessert.
- Food processor: The quickest way to turn graham crackers or cookies into fine, even crumbs.
- Mixing bowl: Use a medium bowl to combine the crumbs with the melted butter and other ingredients.
- Measuring cups and spoons: Accurate measurements help you get the right crumb-to-butter ratio.
- Rubber spatula or spoon: Useful for mixing the ingredients and scraping the bowl clean.
- Flat-bottomed measuring cup: An easy tool for pressing the crust firmly and evenly into the bottom of the pan.
- Parchment paper, optional: A piece on the bottom of the springform pan can make transferring or serving the finished dessert easier.
Helpful Tip for Beginners
If you do not have a food processor, place the cookies or graham crackers in a sturdy zip-top bag and crush them with a rolling pin. Take your time and aim for fine crumbs rather than large pieces. Large chunks can make the crust uneven and more likely to crumble when sliced.
Step-by-Step Instructions
Making a no-bake crust in a springform pan is simple, but a few details matter if you want a crust that stays together and slices neatly.
1. Prepare the Springform Pan
Set a 9-inch springform pan on a flat work surface. Make sure the base is locked securely into the ring.
For easier release, place a round piece of parchment paper on the bottom of the pan before attaching the ring. Lightly press it flat so it does not wrinkle under the crust.
2. Crush the Graham Crackers
Add the graham crackers or cookies to a food processor and pulse until you have fine, even crumbs.
If crushing them by hand, place them in a sealed bag and roll over them with a rolling pin. Check for larger pieces and crush them again.
The crumbs should look similar to coarse sand. Very large pieces can prevent the crust from pressing together properly.
3. Mix the Dry Ingredients
Transfer the crumbs to a medium mixing bowl. Add the sugar and a small pinch of salt.
Stir everything together until the dry ingredients are evenly distributed.
If you are using sweet cookies instead of graham crackers, taste the crumbs first and reduce or skip the added sugar if needed.
4. Add the Melted Butter
Pour the melted butter over the crumb mixture. Add the vanilla extract if using.
Stir thoroughly with a rubber spatula or spoon until every crumb looks lightly coated.
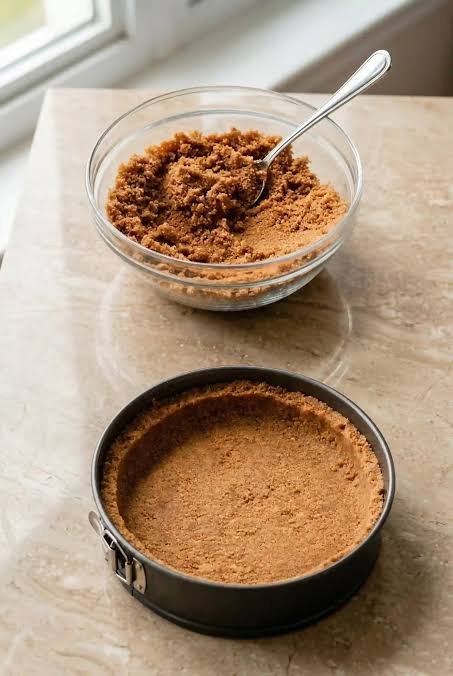
The mixture should resemble damp sand. When you squeeze a small amount in your hand, it should hold its shape without feeling greasy.
If the mixture seems unusually dry and falls apart immediately, add a small amount of melted butter, about 1 teaspoon at a time.
5. Transfer the Mixture to the Pan
Pour the crumb mixture into the prepared springform pan.
Spread it across the bottom with your fingers or the back of a spoon. Try to distribute it as evenly as possible before pressing.
6. Press the Crust Firmly
Use the flat bottom of a measuring cup, glass, or sturdy spoon to press the crumbs firmly into the pan.
Start in the center and work toward the edges. Pay special attention to the outer edge because loose crumbs around the sides can cause the crust to crumble when the springform ring is removed.
For a dessert with a thicker crust, gently press some of the mixture slightly up the sides of the pan.
7. Check the Thickness
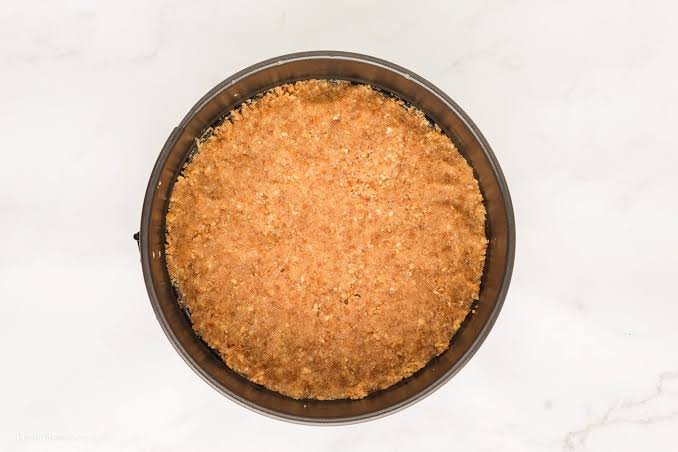
Look across the surface before chilling. The crust should have an even thickness without thin spots or loose areas.
If one section looks noticeably thinner, add a few crumbs from another area and press again.
Avoid pressing so aggressively that the crust becomes rock hard. Firm, even pressure is enough.
8. Chill Until Firm
Place the springform pan in the refrigerator and chill the crust for at least 30 minutes before adding a filling.
For an especially firm base, chill it for about 1 hour.
The butter will solidify as the crust chills, helping hold the crumbs together.
9. Add Your Filling
Once the crust feels firm to the touch, it is ready for your chosen no-bake filling.
Pour the filling gently over the crust so you do not disturb the surface. Smooth the top with a spatula, then continue chilling according to your dessert recipe.
Common Mistakes to Avoid
Using coarse crumbs: Large pieces do not bind as well as fine crumbs and can create weak spots.
Adding too much butter: An overly buttery mixture can become greasy and soft instead of firm.
Not pressing the edges: The outer edge needs enough pressure to stay intact when the springform ring is removed.
Skipping the chill time: A freshly mixed crust may seem firm, but it needs time in the refrigerator for the butter to set.
Adding filling too soon: Make sure the crust has had enough time to firm up before adding a soft or heavy filling.
Expert Tips for the Best No Bake Crust
A few simple techniques can make your springform pan crust sturdier, cleaner, and easier to slice.
Crush the Cookies Finely
Fine crumbs create a more compact crust because there are fewer gaps between the pieces. If you see large chunks after crushing, keep processing or rolling until the texture is mostly even.
Measure After Crushing
For the most consistent results, measure your graham cracker crumbs or cookie crumbs after crushing them. Whole crackers and finely ground crumbs take up different amounts of space.
Use Melted Butter That Is Warm, Not Hot
Let the melted butter cool for a few minutes before mixing it with the crumbs. Very hot butter can make the mixture overly soft and can affect delicate cookie crumbs.
Test the Mixture Before Pressing
Take a small handful of the crumb mixture and squeeze it. It should compact easily and stay together. If it falls apart immediately, it needs a little more moisture.
Add extra butter gradually rather than pouring in a large amount at once.
Press From the Center Outward
Start pressing the crumbs in the middle of the pan, then work toward the edges. This helps create an even layer and reduces the chance of thin spots.
Give the Edges Extra Attention
The edges are often the first part to crumble when the springform ring is removed. Use your fingertips or a flat measuring cup to compact the outer edge firmly.
Chill Before Adding a Heavy Filling
A properly chilled crust has better structure and is less likely to shift when you add cheesecake batter, mousse, pudding, or another soft filling.
Use a Springform Pan With a Tight Seal
Before adding the crust, check that the base is properly secured. If the pan does not close tightly, crumbs can work their way underneath the removable base.
Make a Cleaner Slice
For neat dessert slices, use a sharp knife and wipe the blade clean between cuts. This is especially helpful when the crust is paired with a creamy filling.
Do Not Overpack the Crust
The crust should be firmly pressed, but avoid crushing it until it becomes extremely dense. A little pressure is enough to create a stable base while keeping a pleasant crisp texture.
Variations
One of the best things about a no-bake springform crust is how easily you can change the flavor. Keep the basic crumb-to-butter ratio, then switch up the cookies or add a few simple ingredients to match your dessert.
Chocolate Cookie Crust
Replace the graham crackers with finely crushed chocolate sandwich cookies or chocolate wafer cookies. This creates a dark, rich base that pairs beautifully with chocolate cheesecake, peanut butter fillings, coffee mousse, or vanilla cream.
If the cookies already contain a sweet cream filling, you may need less butter because the filling adds moisture.
Vanilla Wafer Crust
Use crushed vanilla wafers for a delicate, buttery crust with a mild vanilla flavor. This option works particularly well with banana cream, strawberry cheesecake, lemon mousse, and other fruit-based desserts.
Shortbread Crust
Finely crushed shortbread cookies create a rich and tender crust with plenty of buttery flavor. Because shortbread is already rich, you can reduce the added butter slightly if the mixture feels greasy.
Cinnamon Graham Cracker Crust
Add about 1/2 teaspoon of ground cinnamon to the basic graham cracker mixture. The warm spice is especially good with pumpkin, apple, caramel, cheesecake, and creamy fall-inspired desserts.
Chocolate Graham Cracker Crust
Chocolate graham crackers offer an easy way to create a chocolate-flavored crust without using sandwich cookies. Add a small amount of unsweetened cocoa powder for a deeper chocolate taste.
Gluten-Free Crust
Choose certified gluten-free graham crackers, cookies, or digestive-style biscuits. Follow the same basic method, but check the crumb mixture carefully because different gluten-free cookies can absorb butter differently.
Dairy-Free Crust
Use a dairy-free butter alternative that becomes firm when refrigerated. Mix it with your chosen crumbs and chill the crust thoroughly before adding the filling.
Lower-Sugar Version
Choose lightly sweetened crackers or cookies and reduce the added sugar. This works especially well when the filling itself is rich or very sweet.
Nutty Variation
For extra texture, replace a small portion of the cookie crumbs with finely ground almonds, pecans, or walnuts. Make sure the nuts are ground finely enough to keep the crust compact.
Coconut Crust
Add a few tablespoons of finely shredded unsweetened coconut to the graham cracker mixture. This gives the crust a subtle tropical flavor that works nicely with coconut cream, pineapple, mango, or lime desserts.
Mini Dessert Version
Instead of using one large springform pan, divide the crust mixture among small individual dessert pans or rings. Press the crumbs firmly into each base and chill until set.
This makes the crust easy to portion for individual cheesecakes, mousse desserts, or chilled pudding cups.
Storage Instructions
A no-bake crust is easy to prepare ahead, which makes it especially useful when you are planning a cheesecake or another chilled dessert.
Refrigerator Storage
If the crust is prepared but you are not ready to add the filling, cover the springform pan tightly with plastic wrap or foil and refrigerate it for up to 3 days.
Once the crust has been filled, follow the storage instructions for the complete dessert. Most no-bake cheesecakes and similar desserts should remain refrigerated until serving.
Keep the dessert covered to prevent the crust from absorbing moisture and becoming soft.
Freezer Storage
The crust can also be frozen before adding the filling. Wrap the springform pan securely with plastic wrap, followed by a layer of foil to help prevent freezer odors and moisture from getting in.
Freeze the crust for up to 1 month for the best texture.
When ready to use it, place the covered pan in the refrigerator and allow the crust to thaw gradually. Once chilled and firm, add your filling.
Freezing a Finished Dessert
Whether a finished dessert freezes well depends on the filling. Many cheesecakes and ice cream-based desserts freeze successfully, while fillings containing fresh fruit, whipped cream, or delicate custards may change texture after thawing.
If freezing the complete dessert, wrap it well and thaw it slowly in the refrigerator rather than at room temperature.
Reheating Instructions
There is no reheating needed for a no-bake crust. It is designed to be served chilled or at refrigerator temperature.
For the cleanest slices, keep the finished dessert refrigerated until shortly before serving.
Frequently Asked Questions
Can I make a no-bake crust directly in a springform pan?
Yes. A springform pan is an excellent choice because the removable sides make it easier to release a chilled dessert without damaging the crust.
How do I keep a no-bake crust from falling apart?
Use finely crushed crumbs, enough melted butter to bind them, and firm, even pressure when pressing the mixture into the pan. Chilling the crust thoroughly also helps it hold together.
Why is my no-bake crust too crumbly?
The mixture may not have enough butter, or the crumbs may be too coarse. Add melted butter gradually, about 1 teaspoon at a time, until the crumbs hold together when squeezed.
Can I use cookies instead of graham crackers?
Absolutely. Vanilla wafers, chocolate cookies, shortbread, digestive biscuits, and other crisp cookies can work well. Adjust the sugar and butter depending on how sweet and moist the cookies are.
Should I grease the springform pan?
Usually, greasing is not necessary because the butter in the crust provides enough fat. However, parchment paper on the bottom can make removing and serving the finished dessert easier.
How long should I chill a no-bake crust?
Chill the crust for at least 30 minutes before adding the filling. For a firmer base, refrigerate it for about 1 hour.
Can I make the crust ahead of time?
Yes. You can prepare the crust up to 3 days ahead and keep it tightly covered in the refrigerator until you are ready to use it.
Can I freeze a no-bake crust?
Yes. Wrap the crust well and freeze it for up to 1 month for the best quality. Thaw it in the refrigerator before adding the filling.
Can I press the crust up the sides of the springform pan?
Yes. You can create a bottom-only crust or press some of the mixture partially up the sides. Make sure the sides are firmly compacted so they stay intact when the pan is opened.
What size springform pan should I use?
A 9-inch springform pan is a convenient standard size for this amount of crust. If you use a smaller or larger pan, adjust the quantity to maintain an even thickness.

Make No Bake Crust Springform Pan
Ingredients
Method
- Prepare a 9-inch springform pan by placing parchment paper on the bottom if desired
- Crush the graham crackers into fine, even crumbs using a food processor or rolling pin.
- Add the crumbs, sugar, and salt to a mixing bowl. Stir until combined
- Pour in the melted butter and vanilla extract, if using. Mix until the crumbs are evenly moistened and resemble damp sand
- Transfer the mixture to the springform pan and spread it evenly across the bottom
- Press the crumbs firmly into the pan using the bottom of a measuring cup or glass. Pay extra attention to the edge
- Refrigerate the crust for at least 30 minutes, or until firm
- Add your preferred no-bake filling and continue with the dessert recipe.
Video
Notes
- Measure the crumbs after crushing them for more accurate results.
- If the mixture does not hold together when squeezed, add melted butter 1 teaspoon at a time.
- Avoid adding too much butter, as an overly wet crust can become greasy and soft.
- For a chocolate crust, replace the graham crackers with finely crushed chocolate cookies.
- If using sweet cookies with a cream filling, reduce the amount of added sugar and butter as needed.
- For gluten-free desserts, use certified gluten-free graham crackers or cookies.
- Keep the finished dessert refrigerated until serving
Final Thoughts
A homemade no-bake crust is a simple skill that can make chilled desserts much easier to prepare. With finely crushed crumbs, melted butter, and a little chilling time, you can create a sturdy, buttery base without turning on the oven.
Using a springform pan makes the process even more convenient, especially for cheesecakes and other desserts that need a clean release. Once you have the basic method down, it is easy to switch between graham crackers, chocolate cookies, vanilla wafers, or shortbread to create a crust that suits your filling.
The key is to keep the crumbs fine, use just enough butter to bind them, press the mixture evenly, and give it enough time to firm up in the refrigerator.
Try this Make No Bake Crust Springform Pan method the next time you prepare a chilled dessert, then experiment with different cookie flavors and fillings. A few small changes can give you an entirely new dessert while keeping the same easy technique.
If you try this crust, share what filling you paired it with and which cookie base you used. Your combination might become a new favorite in someone else’s kitchen.
7 Comments