
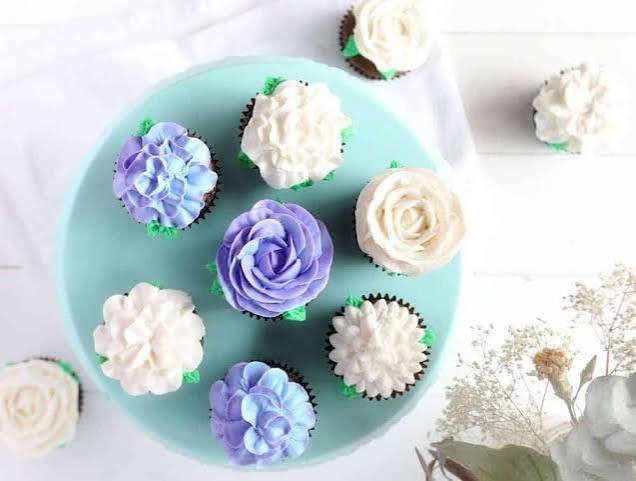
How To Color Buttercream Frosting
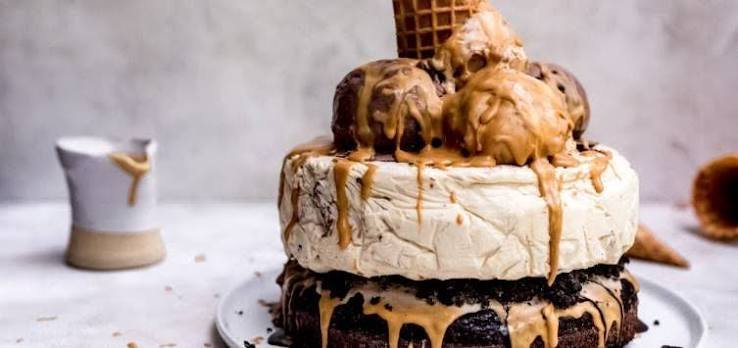
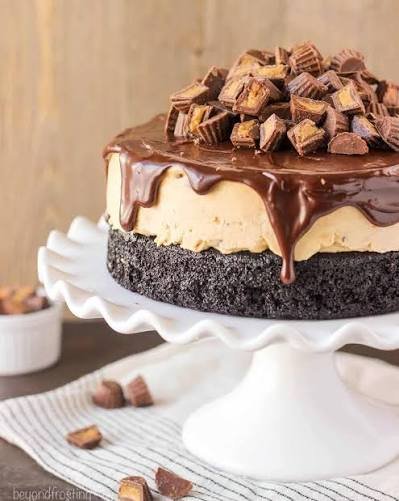
There is something especially satisfying about the combination of rich chocolate, creamy peanut butter, and cold, velvety ice cream. This Peanut Butter Cup Ice Cream Cake brings all three together in one irresistible dessert, with layers of tender chocolate cake, creamy peanut butter ice cream, and plenty of chocolate and peanut butter cup pieces in every bite.
Best of all, this homemade ice cream cake looks impressive without requiring complicated decorating skills. The chocolate cake gives it a soft, fudgy base, while the frozen peanut butter layer adds a cool, creamy contrast and little pockets of chocolatey crunch. Finished with a smooth chocolate topping and chopped peanut butter cups, it is the kind of dessert that feels right at a birthday party, summer gathering, or special family dinner.
The recipe does require some freezer time, but most of the work is simple and straightforward. Once the layers are assembled, the freezer does the heavy lifting. With a few helpful preparation tips, even a beginner can create a beautiful Peanut Butter Cup Ice Cream Cake that slices cleanly and tastes wonderfully rich without being difficult to make.
Why You’ll Love This Recipe
- Easy to assemble: The layers come together with simple ingredients and straightforward steps, making this a great frozen dessert for beginners.
- Rich chocolate and peanut butter flavor: Chocolate cake, creamy peanut butter ice cream, and chocolate peanut butter cups create a classic combination in every slice.
- Creamy and crunchy texture: Each bite has a smooth, cold ice cream layer with little pieces of peanut butter cups for added texture.
- Perfect make-ahead dessert: Since the cake needs time to freeze, you can prepare it well before serving and keep it ready for your guests.
- No complicated decorating: A simple chocolate topping and chopped peanut butter cups give the cake a finished, bakery-style appearance without requiring special piping skills.
- Great for celebrations: This frozen cake is an excellent choice for birthdays, summer parties, family gatherings, and casual weekend desserts.
- Easy to customize: You can switch up the ice cream, add extra chocolate sauce, or use different candy toppings to make the cake your own.
Ingredients
For the chocolate cake base:
- 1 cup all-purpose flour
- 1/2 cup unsweetened cocoa powder
- 3/4 cup granulated sugar
- 1/2 teaspoon baking soda
- 1/4 teaspoon baking powder
- 1/4 teaspoon salt
- 2 large eggs
- 1/2 cup buttermilk
- 1/3 cup vegetable oil
- 1 teaspoon vanilla extract
- 1/2 cup hot water
For the peanut butter ice cream layer:
- 1 1/2 quarts creamy peanut butter ice cream, slightly softened
- 1 cup chopped peanut butter cups
- 1/3 cup creamy peanut butter
For the chocolate topping:
- 1 cup semi-sweet chocolate chips
- 1/2 cup heavy cream
- 1 tablespoon creamy peanut butter
For decorating:
- 1/2 cup chopped peanut butter cups
- 2 tablespoons melted peanut butter, optional
- Extra chocolate sauce, optional
Helpful Ingredient Notes
Use full-fat peanut butter ice cream for the creamiest texture and easiest slicing. Let it soften just enough to spread smoothly, but avoid letting it become completely melted.
For the cake, unsweetened cocoa powder gives the base a deep chocolate flavor without making it overly sweet. Buttermilk helps keep the cake tender and moist, while hot water helps bring out the cocoa’s rich flavor.
If you prefer a stronger peanut butter flavor, use extra chopped peanut butter cups between the layers or drizzle a little melted peanut butter over the finished cake before serving.
Ingredient Notes & Substitutions
A few simple ingredient choices can make a big difference in the texture and flavor of this Peanut Butter Cup Ice Cream Cake. Here are some easy ways to adjust the recipe based on what you have available.
Chocolate Cake
- All-purpose flour: Regular all-purpose flour works best for a tender cake base. Avoid substituting with bread flour, which can make the cake chewier.
- Cocoa powder: Unsweetened cocoa powder provides a balanced chocolate flavor. Dutch-process cocoa can also work, although the flavor and color may vary slightly.
- Buttermilk: If you do not have buttermilk, combine 1/2 cup milk with 1 1/2 teaspoons lemon juice or white vinegar. Let it stand for about 5 minutes before using.
- Vegetable oil: Canola oil or another mild-flavored oil works well. Oil helps keep the chocolate cake soft even after freezing.
- Hot water: Freshly boiled water helps intensify the cocoa flavor. Coffee can also be used for an even deeper chocolate taste without making the cake taste strongly like coffee.
Peanut Butter Ice Cream
Choose a creamy, full-fat peanut butter ice cream for the smoothest layer. If you cannot find peanut butter ice cream, vanilla ice cream mixed with a few spoonfuls of creamy peanut butter makes an easy substitute.
Allow the ice cream to soften slightly before spreading it over the cake. It should be firm enough to hold its shape but soft enough to spread without tearing the cake underneath.
Peanut Butter
Creamy peanut butter is easiest to spread and creates a smooth finish. Natural peanut butter can work, but stir it thoroughly before using because the oil tends to separate.
For a stronger peanut butter flavor, add a little extra peanut butter between the ice cream and chocolate layers.
Peanut Butter Cups
Mini or regular peanut butter cups both work. Chop them into small pieces so they are easy to cut through when the cake is frozen.
If peanut butter cups are not available, chopped chocolate peanut butter candy or chocolate-covered peanut butter pieces can be used instead.
Dairy-Free Option
For a dairy-free version, use dairy-free chocolate cake ingredients, plant-based peanut butter ice cream, dairy-free chocolate chips, and a dairy-free cream alternative. Check each package carefully to make sure the products meet your dietary needs.
Gluten-Free Option
Use a reliable one-to-one gluten-free baking flour in place of all-purpose flour. Also check the labels on the ice cream, chocolate, and peanut butter cups, since ingredients and manufacturing practices can vary between brands.
Kitchen Tools Needed
You do not need a long list of specialty equipment to make this Peanut Butter Cup Ice Cream Cake. A few basic kitchen tools are enough.
- 9-inch round cake pan: Use a standard round pan for baking the chocolate cake base.
- Parchment paper: Helps prevent the cake from sticking and makes removal easier.
- Mixing bowls: You will need a few bowls for the cake batter and chocolate topping.
- Electric hand mixer: Makes mixing the cake batter quick and easy, although a sturdy whisk can also work.
- Rubber spatula: Useful for folding ingredients and spreading the softened ice cream into an even layer.
- Offset spatula: Optional, but helpful for smoothing the ice cream and chocolate topping.
- Sharp knife: A large, sharp knife makes it easier to chop the peanut butter cups and slice the frozen cake.
- Small saucepan or microwave-safe bowl: Use either for preparing the chocolate topping.
- Wire cooling rack: Helps the baked cake cool completely before you add the frozen layers.
- Plastic wrap: Important for covering the assembled cake while it freezes and protecting it from freezer odors.
Optional Helpful Tool
A springform pan can make assembly and removal even easier. If you use one, line the bottom with parchment paper and make sure the sides are firmly secured before adding the layers.
Step-by-Step Instructions
1. Prepare the Chocolate Cake
Preheat your oven to 350°F. Grease a 9-inch round cake pan and line the bottom with parchment paper.
In a medium bowl, whisk together the flour, cocoa powder, sugar, baking soda, baking powder, and salt.
In a separate bowl, whisk the eggs, buttermilk, vegetable oil, and vanilla until smooth. Pour the wet ingredients into the dry ingredients and mix just until combined.
Slowly add the hot water while whisking. The batter will look fairly thin, which is normal. Do not add extra flour.
Pour the batter into the prepared pan and bake for about 25 to 30 minutes, or until a toothpick inserted into the center comes out with a few moist crumbs.
Let the cake cool in the pan for about 10 minutes, then transfer it to a wire rack. Allow it to cool completely before adding the ice cream layer.
2. Prepare the Ice Cream Layer
While the cake cools, remove the peanut butter ice cream from the freezer and let it soften slightly.
The ideal texture is thick and spreadable. If the ice cream becomes runny, return it to the freezer for a few minutes before assembling the cake.
Stir the chopped peanut butter cups into the softened ice cream, reserving some pieces for decorating the top.
3. Assemble the Cake
Once the chocolate cake is completely cool, place it back into a clean cake pan or springform pan.
Spread the softened peanut butter ice cream evenly over the top of the cake. Use a rubber spatula or offset spatula to gently smooth the surface.
Work fairly quickly during this step. You want the ice cream to remain soft enough to spread while still being cold and firm.
Drizzle the creamy peanut butter over the ice cream layer. If your peanut butter is too thick to drizzle, warm it very briefly until it reaches a pourable consistency.
Sprinkle some of the reserved chopped peanut butter cups over the surface.
4. Freeze Until Firm
Cover the cake tightly with plastic wrap and place it in the freezer.
Freeze for at least 4 to 6 hours, preferably overnight. The center should feel completely firm when gently pressed.
Do not rush this step. A properly frozen cake is much easier to slice and will hold its layers together when served.
5. Make the Chocolate Topping
Place the chocolate chips and heavy cream in a microwave-safe bowl. Heat in short intervals, stirring between each one, until the chocolate is smooth and glossy.
Stir in the peanut butter until fully incorporated.
Let the topping cool for a few minutes. It should be thick enough to coat the cake but still easy to spread.
6. Finish the Ice Cream Cake
Remove the frozen cake from the pan. If it sticks, carefully run a warm knife around the edge of the pan to loosen it.
Spread the chocolate topping over the chilled cake, allowing a little to drip naturally down the sides.
Scatter the remaining chopped peanut butter cups over the top. For extra peanut butter flavor, drizzle with a small amount of melted peanut butter.
Return the cake to the freezer for about 20 to 30 minutes so the topping can firm up.
7. Slice and Serve
When ready to serve, remove the cake from the freezer and let it sit at room temperature for about 5 to 10 minutes.
Dip a sharp knife in hot water, wipe it dry, and carefully slice the cake. Repeat the process between slices for cleaner cuts.
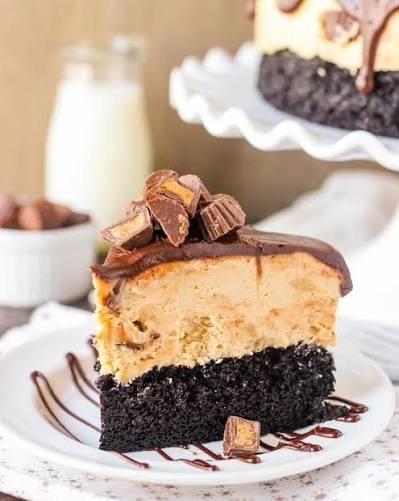
The finished cake should have a firm chocolate base, a creamy peanut butter ice cream center, and a smooth chocolate topping with crunchy peanut butter cup pieces throughout.
Common Mistakes to Avoid
- Adding ice cream to a warm cake: Heat will melt the ice cream and create a messy layer. Make sure the cake is completely cool.
- Over-softening the ice cream: Melted ice cream can freeze unevenly and make the cake difficult to slice.
- Skipping the freezer time: The layers need several hours to become firm enough for clean slices.
- Making the chocolate topping too hot: Allow it to cool slightly before spreading it over the frozen cake.
- Cutting immediately from the freezer: A short rest at room temperature makes slicing much easier and gives the ice cream a creamy texture.
Expert Tips
A few small techniques can make this Peanut Butter Cup Ice Cream Cake easier to assemble and even better to serve.
Chill Every Layer Before Assembling
The chocolate cake must be completely cool before the ice cream goes on top. For an even easier assembly, you can bake the cake a day ahead and keep it covered until you are ready to build the dessert.
Do Not Completely Melt the Ice Cream
Softened ice cream should be easy to spread but still thick enough to hold its shape. If it becomes liquid, the finished cake can develop an icy texture and the layers may slide apart.
Use a Firm Cake Base
Avoid overbaking the chocolate cake. A slightly moist cake provides a tender contrast to the frozen ice cream without becoming hard or crumbly after freezing.
Chop the Peanut Butter Cups Small
Small pieces distribute more evenly throughout the ice cream and make the cake easier to slice. Larger chunks can make clean cuts difficult, especially when the cake is fully frozen.
Smooth the Ice Cream Quickly
Once the ice cream is softened, spread it over the cake without spending too much time working it. A chilled pan and a flexible spatula can help you create an even layer before the ice cream begins to melt.
Give the Cake Enough Freezer Time
For the cleanest layers, freeze the assembled cake until it is completely firm. Overnight freezing is especially convenient if you are preparing the dessert for a party or special occasion.
Warm Your Knife for Cleaner Slices
Dip a sharp knife into hot water, dry it thoroughly, and then slice. The warm blade moves through the frozen layers more easily. Clean and rewarm the knife between cuts when you want especially neat slices.
Let the Chocolate Topping Cool Slightly
The topping should be smooth and pourable, but not hot. If it is too warm, it can soften the ice cream and create an uneven finish.
Add the Toppings Just Before the Final Freeze
For a polished appearance, sprinkle the chopped peanut butter cups over the chocolate topping before returning the cake to the freezer. They will set in place while keeping their pleasant crunch.
Plan Ahead for Serving
If you are making the cake for guests, prepare it the day before. This gives the ice cream layer plenty of time to firm up and leaves only slicing and serving to handle on the day of your gathering.
Variations
This Peanut Butter Cup Ice Cream Cake is easy to customize, so you can adjust the flavors and ingredients to suit different tastes or dietary needs.
Extra Chocolate Peanut Butter Cake
For a more chocolate-forward dessert, add an extra drizzle of chocolate sauce between the cake and ice cream layers. You can also mix a handful of mini chocolate chips into the peanut butter ice cream for small pockets of chocolate throughout.
Peanut Butter Lover’s Version
Increase the peanut butter flavor by swirling additional creamy peanut butter into the softened ice cream before spreading it over the cake. Finish the cake with extra peanut butter cup pieces and a generous peanut butter drizzle.
Oreo Peanut Butter Ice Cream Cake
Replace some of the chopped peanut butter cups with crushed chocolate sandwich cookies. Sprinkle the cookie crumbs over the ice cream layer or use them as a crunchy topping with the peanut butter cups.
Brownie Base
For an especially fudgy dessert, replace the chocolate cake with a thin homemade brownie layer. The dense brownie texture pairs beautifully with the cold, creamy ice cream.
Vanilla Ice Cream Version
If peanut butter ice cream is difficult to find, use good-quality vanilla ice cream and swirl creamy peanut butter through it. Add chopped peanut butter cups for the signature flavor.
Gluten-Free Version
Prepare the chocolate cake using a one-to-one gluten-free flour blend. Check the labels on the ice cream, chocolate, peanut butter cups, and other packaged ingredients to ensure they are gluten-free.
Dairy-Free Version
Use dairy-free chocolate cake ingredients along with dairy-free ice cream, plant-based cream, and dairy-free chocolate. Choose a peanut butter candy alternative that fits your dietary needs.
Salted Peanut Butter Version
Add a small pinch of flaky sea salt over the chocolate topping before the final freeze. The salty contrast helps balance the sweetness of the chocolate and peanut butter.
Birthday Party Version
Decorate the top with colorful sprinkles, mini peanut butter cups, chocolate curls, or simple piped whipped cream. This version works especially well when you want the cake to feel festive without complicated decorating.
Mini Ice Cream Cakes
Instead of making one large cake, assemble individual portions in small ramekins or dessert molds. Use small pieces of chocolate cake as the base, then layer in the softened ice cream and toppings. Freeze until firm and serve individually.
Storage Instructions
Because this is a frozen dessert, proper storage helps keep the cake creamy, firm, and protected from freezer odors.
Freezer Storage
Keep the assembled Peanut Butter Cup Ice Cream Cake tightly covered with plastic wrap, followed by a layer of aluminum foil if you plan to store it for more than a day or two. An airtight freezer-safe container can provide additional protection.
For the best texture and flavor, enjoy the cake within 1 to 2 weeks. It can remain frozen longer, but the ice cream and cake may gradually develop freezer burn or lose some of their fresh texture.
Storing Individual Slices
After slicing the cake, wrap each piece individually in plastic wrap and place the slices in an airtight freezer-safe container or resealable freezer bag. This makes it easy to take out only what you need.
Place parchment paper between slices if you are stacking them to prevent the chocolate topping from sticking together.
Before Serving
Take the desired portion from the freezer and let it rest at room temperature for about 5 to 10 minutes. This short resting time softens the ice cream slightly and makes the cake easier to cut and enjoy.
For very firm slices, run a sharp knife under warm water, dry it, and use the warmed blade to cut through the cake.
Can You Refrigerate It?
The cake should remain in the freezer rather than the refrigerator. Refrigerating it for an extended period will cause the ice cream to soften and can make the layers unstable.
If the cake has been sitting at room temperature long enough for the ice cream to become fully soft or melted, it is better not to refreeze it.
Frequently Asked Questions
Can I make Peanut Butter Cup Ice Cream Cake ahead of time?
Yes. This cake is ideal for making ahead. Assemble it and freeze it until completely firm, preferably overnight. Keep it tightly covered until you are ready to serve.
How long should an ice cream cake freeze?
For the best results, freeze the assembled cake for at least 4 to 6 hours. Overnight freezing gives the layers plenty of time to become firm and makes slicing easier.
Can I use store-bought chocolate cake?
Absolutely. A thin store-bought chocolate cake can save time. Choose a cake that is sturdy enough to support the ice cream layer without being overly thick.
Can I use a different flavor of ice cream?
Yes. Vanilla, chocolate, chocolate peanut butter, or even coffee ice cream can work well. Choose a flavor that complements the chocolate cake and peanut butter cups.
How do I keep the ice cream cake from melting while assembling it?
Work with chilled ingredients and soften the ice cream only until it is spreadable. Assemble the cake quickly, then return it to the freezer as soon as possible.
Why is my ice cream layer difficult to spread?
The ice cream probably needs a few more minutes to soften. Let it sit at room temperature briefly, then stir it gently before spreading. Avoid letting it become runny.
Can I use natural peanut butter?
Yes, but stir natural peanut butter thoroughly before using it. Because the oil can separate, well-mixed peanut butter will give you a smoother drizzle and more consistent flavor.
How do I get clean slices?
Let the frozen cake rest for 5 to 10 minutes, then use a sharp knife warmed under hot water and dried completely. Clean and rewarm the knife between slices for the neatest results.
Can I make this cake without a springform pan?
Yes. A regular round cake pan can work well. Lining the pan with parchment paper makes the finished cake easier to remove.
Can I use homemade ice cream?
Yes. Homemade peanut butter ice cream works beautifully as long as it freezes firmly enough to hold the cake layers together.
How long can I keep the cake in the freezer?
For the best quality, enjoy it within 1 to 2 weeks. Keep it tightly wrapped or stored in an airtight container to reduce the risk of freezer burn.

Peanut Butter Cup Ice Cream Cake
Ingredients
Method
- Preheat the oven to 350°F. Grease a 9-inch round cake pan and line the bottom with parchment paper.
- Whisk together the flour, cocoa powder, sugar, baking soda, baking powder, and salt.
- In another bowl, whisk the eggs, buttermilk, oil, and vanilla. Add the wet ingredients to the dry ingredients and mix until combined
- Slowly whisk in the hot water. The batter will be thin.
- Pour the batter into the prepared pan and bake for 25 to 30 minutes, or until a toothpick inserted into the center comes out with a few moist crumbs.
- Cool the cake completely before assembling the ice cream layer.
- Let the peanut butter ice cream soften until it is thick and spreadable. Stir in 1 cup of chopped peanut butter cups.
- Place the cooled cake in a clean cake pan or springform pan. Spread the softened ice cream evenly over the cake.
- Drizzle 1/3 cup peanut butter over the ice cream layer. Sprinkle with some additional chopped peanut butter cups.
- Cover tightly and freeze for at least 4 to 6 hours, preferably overnight.
- To make the topping, gently heat the chocolate chips and heavy cream until smooth. Stir in the peanut butter.
- Top with the remaining chopped peanut butter cups and an optional peanut butter drizzle.
- Freeze for another 20 to 30 minutes, then let the cake rest at room temperature for 5 to 10 minutes before slicing.
- Let the chocolate mixture cool slightly, then spread it over the frozen cake.
- Use a sharp knife warmed under hot water and dried completely to cut clean slices.
Video
Notes
- Make sure the chocolate cake is completely cool before adding the ice cream.
- Do not completely melt the ice cream. It should only be soft enough to spread.
- Freeze the assembled cake until completely firm before adding the final decorations.
- For the cleanest slices, warm and dry the knife between cuts.
- Full-fat ice cream generally gives the creamiest texture.
- The cake can be prepared a day ahead and kept tightly covered in the freezer.
Final Thoughts
This Peanut Butter Cup Ice Cream Cake brings together everything that makes a homemade frozen dessert special: a tender chocolate cake base, creamy peanut butter ice cream, crunchy candy pieces, and a smooth chocolate topping. Each layer adds a different texture, so every slice feels satisfying from the first bite to the last.
It is also a wonderfully practical dessert for entertaining. Make it ahead, keep it frozen, and simply let it rest for a few minutes before slicing when you are ready to serve. With its familiar chocolate and peanut butter combination, it is easy to see why this cake fits so naturally into birthdays, summer gatherings, holidays, and relaxed family dinners.
If you make this recipe, try adding your own favorite toppings or ice cream flavor to make it uniquely yours. Then slice, serve, and enjoy a rich homemade dessert that looks special without requiring complicated decorating skills.
2 Comments