How To Make A Lattice Pie Crust
A golden lattice pie crust makes a homemade pie feel extra special. Those buttery strips of pastry weave together into a beautiful pattern while leaving little windows for the bubbling fruit filling to peek through. If you have ever wondered how to make a lattice pie crust, the good news is that the technique is much easier than it looks.
With chilled pie dough, a sharp cutter, and a simple over-and-under weaving method, you can create a flaky, crisp crust with that classic bakery-style finish right in your own kitchen. The key is working with cold dough and taking your time as you arrange each strip. Once you understand the basic pattern, you can use it on apple, cherry, blueberry, peach, or almost any double-crust pie.
This easy lattice pie crust tutorial walks you through the process from rolling the dough to creating an even weave, sealing the edges, and getting that beautiful golden-brown finish in the oven. It is a simple baking skill that can make any homemade pie look polished and inviting.
Why You’ll Love This Recipe
Making a lattice pie crust at home is one of those baking techniques that looks complicated but becomes surprisingly simple once you know the pattern. Here are a few reasons to keep this method handy:
- Beginner-friendly technique: The weaving process is straightforward, even if you have never made a lattice crust before.
- Beautiful homemade finish: The woven strips create an attractive top crust that makes any pie look special.
- Flaky and buttery: Using properly chilled pie dough helps create crisp, tender layers as the crust bakes.
- Works with many pies: Use this lattice topping for classic apple pie, cherry pie, blueberry pie, peach pie, and other fruit-filled desserts.
- Easy to customize: You can make wide or narrow strips, create a loose or tight weave, and adjust the design to suit your pie.
- Helpful for beginners: The step-by-step method includes simple visual cues so you can tell when the dough is ready and how each strip should be positioned.
- Perfect for make-ahead baking: The dough can be prepared in advance, making the final pie assembly much easier when you are ready to bake.
Ingredients
You only need a few simple ingredients to make a beautiful lattice pie crust. The most important part is using a good, chilled pie dough that is easy to roll and sturdy enough to weave without tearing.
For the Pie Crust
- 2 pie crusts: One for the bottom of the pie and one for the lattice topping. You can use homemade pie dough or your favorite refrigerated pie crust.
- All-purpose flour: A light dusting keeps the dough from sticking while you roll and cut it.
- Cold water: Use only as much as needed if making homemade dough. Cold water helps keep the butter firm.
- Unsalted butter: For homemade dough, cold butter creates flaky layers and a rich, buttery flavor.
- Granulated sugar: Optional for homemade dough, depending on whether you prefer a lightly sweet crust.
- Salt: Enhances the flavor of the pastry and balances the sweetness of the filling.
For Finishing
- 1 large egg: Used to make an egg wash that helps the lattice crust turn beautifully golden.
- 1 tablespoon water or milk: Mixed with the egg to create a smooth egg wash.
- Coarse sugar: Optional, but a light sprinkle adds a delicate crunch and an attractive finish.
For the easiest approach, start with two prepared pie crusts. If you prefer making your pastry from scratch, use a reliable double-crust pie dough recipe and keep the dough thoroughly chilled throughout the process.
Ingredient Notes & Substitutions
A lattice pie crust is wonderfully flexible, so you can adjust the ingredients and dough based on what you have available. A few small choices can also make the pastry easier to handle.
Pie Dough
Homemade pie dough gives you the most control over flavor and texture, especially when made with cold butter. For convenience, refrigerated or frozen pie crust dough works well too. If using frozen dough, thaw it according to the package directions before rolling.
All-Purpose Flour
All-purpose flour is the easiest choice for a sturdy pie crust. Use only a light dusting when rolling the dough. Too much flour can make the pastry dry and tough.
For a gluten-free option, use a gluten-free pie dough formulated for a double-crust pie. Gluten-free dough can be more delicate, so chill it well before cutting and weaving.
Butter
Unsalted butter provides a rich flavor and flaky texture. Keep it cold until you are ready to use it.
If necessary, a high-quality plant-based butter designed for baking can be used for a dairy-free crust. Choose one that is firm when chilled for the best results.
Egg Wash
An egg wash gives the lattice a glossy, golden-brown appearance. For a slightly lighter finish, brush the crust with milk or cream instead.
For an egg-free option, use dairy-free milk or a little plant-based cream before baking. The crust may not become quite as deeply golden, but it will still bake nicely.
Sugar
A sprinkle of coarse sugar on top is completely optional. It works especially well with fruit pies and adds a subtle crunch to the finished crust.
If your pie filling is already quite sweet, simply leave it off.
A Helpful Dough Tip
Whatever dough you choose, temperature matters more than almost anything else. If the pastry becomes soft or sticky while you are cutting the strips, place it in the refrigerator for a few minutes before continuing. Cold dough is easier to handle and helps the lattice keep its shape during baking.
Kitchen Tools Needed
You do not need any special baking equipment to make a lattice pie crust. A few basic kitchen tools will make the process easier and help you create neat, even strips.
- Rolling pin: For rolling the pie dough into an even sheet.
- 9-inch pie dish: A standard pie plate works well for most double-crust pies.
- Sharp knife or pastry wheel: Use either to cut clean, even strips of dough.
- Ruler: Optional, but useful if you want your lattice strips to be the same width.
- Bench scraper: Helpful for lifting delicate strips from the work surface without stretching them.
- Pastry brush: Makes it easy to apply an even layer of egg wash.
- Small bowl: For mixing the egg wash.
- Baking sheet: Place it underneath the pie dish to catch any bubbling filling that may spill over during baking.
- Refrigerator: Chilling the dough at different stages helps keep the pastry firm and easy to work with.
Optional Helpful Tool
A pizza cutter can also be used to cut straight lattice strips quickly. For a more decorative crust, small cookie cutters can be used to create extra pastry shapes from leftover dough.
Step-by-Step Instructions
Making a lattice pie crust is mostly about keeping the dough cold and working in a simple pattern. Take your time with the weaving, and do not worry if the first few strips are not perfectly even. The baked crust will still look beautifully homemade.
1. Prepare the Pie Dough
Divide your chilled double-crust dough into two portions. Use one portion for the bottom crust and keep the other portion for the lattice topping.
If the dough is very firm, let it sit at room temperature for a few minutes so it becomes flexible enough to roll without cracking.
2. Roll Out the Bottom Crust
Lightly flour your work surface and rolling pin. Roll one portion of dough into a circle about 12 inches wide, turning it occasionally as you work.
The dough should be fairly even in thickness. Avoid adding too much flour, as excess flour can make the crust less tender.
Carefully transfer the dough to your pie dish and gently press it into the bottom and sides without stretching it.
3. Add Your Pie Filling
Fill the prepared crust with your cooled or prepared pie filling, leaving the amount of space recommended by your recipe.
Smooth the filling gently so the surface is reasonably even. If the filling is very juicy, avoid overfilling the pie because bubbling juices can make the lattice difficult to handle.
4. Roll Out the Top Dough
Roll the second portion of dough into a similar-sized circle. Aim for an even thickness so the lattice strips bake at the same rate.
If the dough starts feeling soft or sticky, place it in the refrigerator for about 10 to 15 minutes before cutting.
5. Cut the Lattice Strips
Using a sharp knife, pastry wheel, or pizza cutter, cut the dough into strips about 1 to 1 1/2 inches wide.
For a classic lattice pie, aim for 8 to 10 strips. The exact number depends on the size of your pie dish and how wide you want the gaps between the strips.
Try to keep the strips as even as possible, but do not worry about making them perfectly identical.
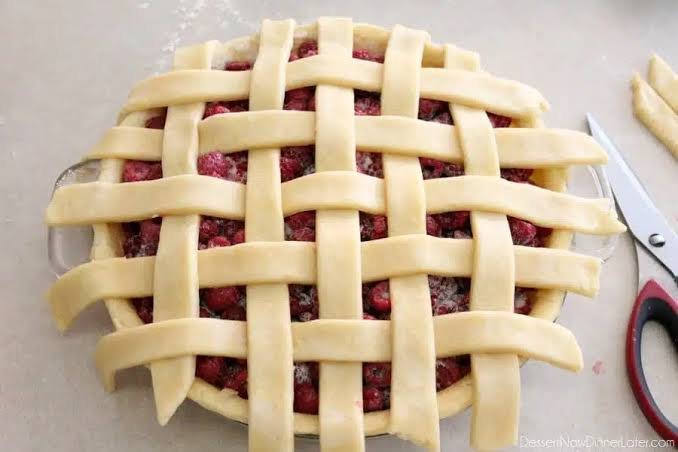
6. Lay the First Strips Across the Pie
Place half of the strips across the filled pie, leaving a little space between each one.
Start with the longer strips toward the center and use shorter pieces as you move toward the edges. This creates a more balanced lattice pattern.
7. Begin the Weaving Pattern
Fold every other strip back toward the center of the pie. Place one remaining dough strip across the pie in the opposite direction.
Return the folded strips to their original position.
Now fold back the strips that were left flat and place another strip across the pie. Continue alternating until you have created a simple over-and-under pattern.
This is the heart of the lattice technique. Work slowly and gently, especially if the dough is soft.
8. Trim the Edges
Once the lattice is complete, use a sharp knife to trim away excess dough around the rim of the pie.
Leave enough pastry to tuck or press into the bottom crust. This helps create a secure edge and keeps the lattice attached during baking.
9. Seal and Crimp the Crust
Press the lattice strips and bottom crust together around the edge of the pie.
You can crimp the edges with your fingers or use the tines of a fork for a simple finish. Make sure the crust is sealed well so the filling stays inside as it bubbles.
10. Chill the Assembled Pie
Place the finished pie in the refrigerator for about 15 to 30 minutes before baking.
This short chill helps firm the butter and dough, which can improve the crust’s shape and texture in the oven.
11. Brush With Egg Wash
Whisk the egg with a tablespoon of water or milk. Lightly brush the mixture over the exposed lattice strips and crust edge.
Avoid letting large amounts of egg wash collect in the gaps because it can create uneven browning.
If desired, sprinkle a little coarse sugar over the top.
12. Bake According to Your Pie Recipe
Place the chilled pie on a baking sheet and bake according to the recipe for your chosen filling.
The crust should become deeply golden, crisp, and flaky, while the filling should be bubbling according to the specific pie recipe.
If the edges begin browning too quickly, loosely cover them with strips of aluminum foil or a pie shield.
Common Mistakes to Avoid
Using warm dough: Soft pastry can stretch, tear, and lose its shape. Chill it whenever it becomes difficult to handle.
Overworking the dough: Too much handling can make the crust tough. Work gently and efficiently.
Making strips too thin: Very narrow strips are more likely to break while weaving. Aim for sturdy strips that can be lifted easily.
Stretching the strips: Lay each piece gently rather than pulling it across the pie. Stretched dough can shrink during baking.
Skipping the final chill: A short refrigeration period helps the lattice hold its shape and encourages a flaky crust.
Overfilling the pie: Leave enough room for the filling to bubble without spilling excessively through the lattice or over the edges.
Expert Tips
A beautiful lattice pie crust comes down to a few simple details. These small tricks can make the dough easier to handle and help you get a flaky, evenly browned finish.
Keep the Dough Cold
Cold dough is easier to cut, lift, and weave. If the strips begin sticking to your counter or feel floppy, refrigerate them for 10 to 15 minutes before continuing.
Roll on a Lightly Floured Surface
Use just enough flour to prevent sticking. Too much flour can be absorbed into the dough and leave the crust dry instead of tender.
Cut Clean, Even Strips
A sharp knife or pastry wheel gives you cleaner edges. Strips around 1 to 1 1/2 inches wide are sturdy enough for beginners and create a classic lattice appearance.
Work From the Center Out
When arranging the strips, start near the center of the pie and work toward the edges. This makes it easier to keep the pattern balanced.
Do Not Stretch the Dough
Lift each strip gently and lay it in place. Stretching the pastry can cause it to shrink in the oven, leaving gaps around the edges.
Chill Before Baking
Once the lattice is assembled, refrigerate the whole pie before it goes into the oven. This helps the butter stay firm and gives the crust a better chance of holding its shape.
Use an Egg Wash for Golden Color
A thin coating of egg wash helps the exposed pastry develop a glossy, golden-brown surface. Brush lightly rather than soaking the dough.
Protect the Edges
The outer edge of a pie can brown faster than the center. If it starts getting too dark before the filling is finished, cover the rim with a pie shield or narrow strips of foil.
Let the Pie Cool Before Slicing
Freshly baked fruit filling is extremely hot and often loose. Give the pie enough time to cool so the filling can thicken and each slice holds together more neatly.
Variations
Once you know the basic lattice technique, it is easy to change the look and style of your pie crust. These variations let you adapt the pastry to different fillings, dietary needs, and occasions.
Classic Wide-Strip Lattice
Use wider strips, about 1 1/2 inches each, for a simple and rustic appearance. This style is especially nice for apple and peach pies because plenty of the filling remains visible between the pastry.
Narrow Lattice
Cut the dough into thinner strips for a more delicate, detailed pattern. This creates a decorative finish that works beautifully for cherry, blueberry, and mixed berry pies.
Cinnamon Sugar Lattice
For a sweeter crust, lightly brush the lattice with egg wash and sprinkle it with cinnamon sugar before baking. The sugar caramelizes slightly in the oven and adds a crisp, fragrant finish.
Decorative Lattice
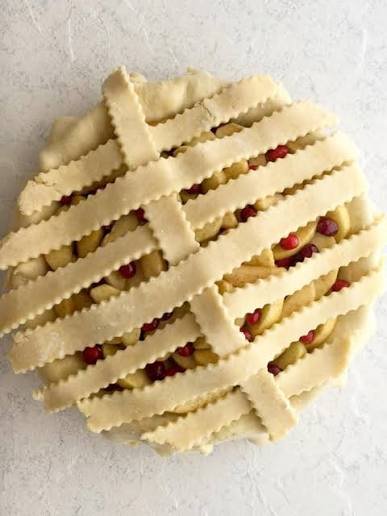
Instead of cutting straight strips, use a fluted pastry wheel for gently scalloped edges. You can also combine different strip widths to create a more artistic pattern.
Fruit Pie Combinations
The same lattice crust works with many fruit fillings. Try it with:
- Classic apple
- Sour cherry
- Blueberry
- Peach
- Strawberry rhubarb
- Blackberry
- Pear
- Mixed berries
Choose a filling with enough structure to hold beneath the lattice without becoming excessively watery.
Gluten-Free Lattice Crust
Use a gluten-free pie dough designed for a double-crust pie. Chill the dough thoroughly and handle the strips gently because gluten-free pastry can be more fragile.
Dairy-Free Lattice Crust
Replace traditional butter with a firm plant-based baking butter. Keep it cold and choose a product intended for pastry to help maintain a flaky texture.
Egg-Free Finish
If you need an egg-free pie, brush the lattice lightly with milk, cream, or a suitable plant-based milk before baking. It will still brown, although the finish may be slightly lighter than one made with egg wash.
Rustic Free-Form Lattice
For a relaxed homemade look, do not worry about making every strip perfectly straight. Slight variations in width and spacing can give the finished pie a charming, handcrafted appearance.
Storage Instructions
A lattice-topped pie is best enjoyed fresh, but proper storage helps preserve the crust and filling for several days.
At Room Temperature
If the finished pie contains a fruit filling and your specific recipe allows room-temperature storage, keep it covered loosely at room temperature for up to 2 days. Avoid sealing it tightly while the crust is still warm, as trapped moisture can soften the pastry.
In the Refrigerator
For longer storage, cover the cooled pie loosely with foil or plastic wrap and refrigerate it for up to 4 days.
The crust may lose some of its crispness in the refrigerator, but reheating can help bring back some of its texture.
Reheating
For the best crust, reheat individual slices or the whole pie in a 325°F oven until warmed through. This usually takes about 10 to 20 minutes for individual slices and longer for a whole pie.
Avoid relying on the microwave if you want a crisp crust, since microwave heat can make pastry soft.
Freezing a Baked Pie
A fully baked fruit pie can usually be frozen once it has cooled completely. Wrap it securely in plastic wrap followed by aluminum foil, then freeze for up to about 3 months.
Thaw it in the refrigerator before reheating in the oven.
Freezing Unbaked Lattice Pie
You can also assemble the pie, including the lattice crust, and freeze it before baking. Freeze the unbaked pie until firm, then wrap it well to prevent freezer burn.
When ready to bake, follow your pie recipe’s instructions for baking from frozen and allow additional baking time as needed.
Storing Leftover Pie Dough
If you have extra dough or pastry scraps, wrap them tightly and refrigerate them for a few days or freeze them for longer storage. Scraps can later be used for small decorative shapes, cinnamon pastry bites, or simple pie toppers.
Frequently Asked Questions
What is the easiest way to make a lattice pie crust?
The easiest method is to roll the dough into an even circle, cut it into strips, and weave the strips over the pie using a simple over-and-under pattern. Keeping the dough cold makes the process much easier.
How wide should lattice pie crust strips be?
For a classic lattice, strips about 1 to 1 1/2 inches wide are a good choice. Wider strips are easier for beginners to handle, while narrower strips create a more delicate pattern.
Why does my lattice pie crust break when I weave it?
The dough may be too cold, too dry, or rolled too thin. Let very cold dough rest for a few minutes before handling it, and avoid making the strips excessively thin.
Why is my pie crust shrinking?
Shrinking can happen when the dough is stretched during rolling or weaving, or when it has been overworked. Handle the pastry gently and chill the assembled pie before baking.
Should I chill lattice pie crust before baking?
Yes. Chilling the assembled pie for about 15 to 30 minutes helps firm the butter and dough. This can improve the crust’s shape and contribute to a flakier texture.
Can I make a lattice crust with store-bought pie dough?
Absolutely. Refrigerated or prepared pie dough is a convenient option, especially for beginners. Choose a dough that is suitable for a double-crust pie and keep it chilled until you are ready to work with it.
How do I keep the lattice crust from burning?
Watch the pie as it bakes. If the lattice or outer edge becomes dark before the filling is finished, loosely cover the browned areas with foil or use a pie shield.
Can I make lattice pie crust ahead of time?
Yes. You can prepare the dough ahead and refrigerate it until needed. You can also assemble the entire unbaked pie and chill or freeze it, depending on your pie recipe.
Why does my lattice crust look uneven?
Uneven strips are usually caused by inconsistent rolling or cutting. A ruler can help you measure the strips, but slight differences are perfectly fine and often give a homemade pie its character.
Do I have to use an egg wash?
No. Egg wash is optional, but it gives the pastry a glossy, golden-brown appearance. Milk, cream, or a plant-based milk can be used instead.

How To Make A Lattice Pie Crust
Ingredients
Method
- Prepare and chill your double-crust pie dough.
- Roll one portion into a circle and place it in a 9-inch pie dish.
- Add your prepared pie filling, leaving appropriate room for bubbling.
- Roll the second portion of dough into an even circle.
- Cut the dough into 8 to 10 strips about 1 to 1 1/2 inches wide.
- Arrange half of the strips across the filled pie
- Weave the remaining strips over and under the first set to create the lattice pattern
- Trim the excess dough around the edges
- Press and crimp the edges to seal the crust.
- Refrigerate the assembled pie for 15 to 30 minutes.
- Whisk the egg with water or milk and lightly brush it over the lattice.
- Sprinkle with coarse sugar if desired.
- Bake according to the instructions for your chosen pie filling, covering the edges with foil if they brown too quickly
- Allow the finished pie to cool before slicing.
Video
Notes
Final Thoughts
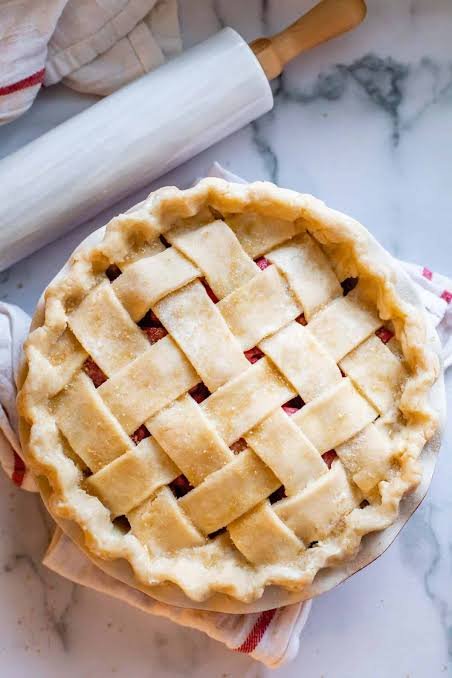
Learning how to make a lattice pie crust is a simple baking skill that can instantly make a homemade pie look more inviting. The technique may seem a little intimidating at first, but once you understand the basic over-and-under pattern, the process becomes much easier.
The biggest secrets are keeping the dough cold, cutting sturdy strips, and handling the pastry gently. Perfectly straight lines are not required. A few natural variations can give your pie that charming homemade appearance.
Whether you are baking a classic apple pie, a juicy berry pie, or a sweet peach filling, a golden lattice crust adds a beautiful finishing touch along with plenty of buttery, flaky texture.
So roll out your dough, take your time with the weave, and enjoy the satisfaction of creating a pie that looks as wonderful as it tastes. Once you have mastered this method, you will have a reliable technique you can return to whenever a double-crust pie is on the menu.