
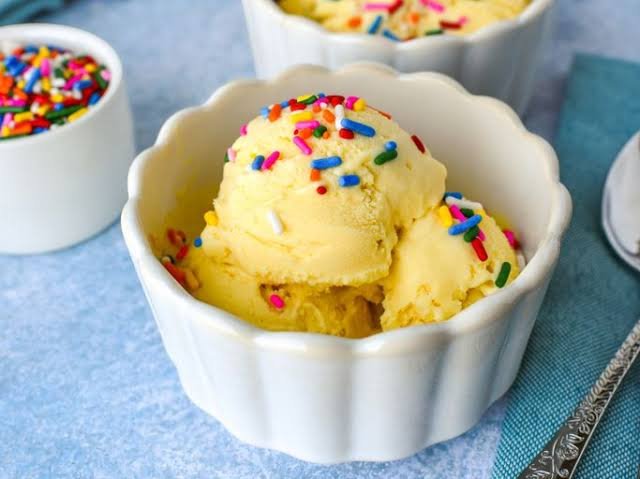
Cake Batter Ice Cream Ninja Creami Recipe
If you love the nostalgic taste of cake batter, this Cake Batter Ice Cream Ninja Creami Recipe turns that familiar flavor into a creamy, scoopable dessert with surprisingly little effort. The finished ice cream is smooth and velvety, with sweet vanilla notes and that unmistakable birthday-cake taste in every spoonful.
What makes this recipe especially appealing is how easily the Ninja Creami transforms a simple frozen base into a rich, soft texture. You do not need an ice cream maker with complicated settings or a long list of ingredients. With a few pantry staples, a little patience while the mixture freezes, and your Ninja Creami, you can make a homemade dessert that tastes like cake and ice cream rolled into one.
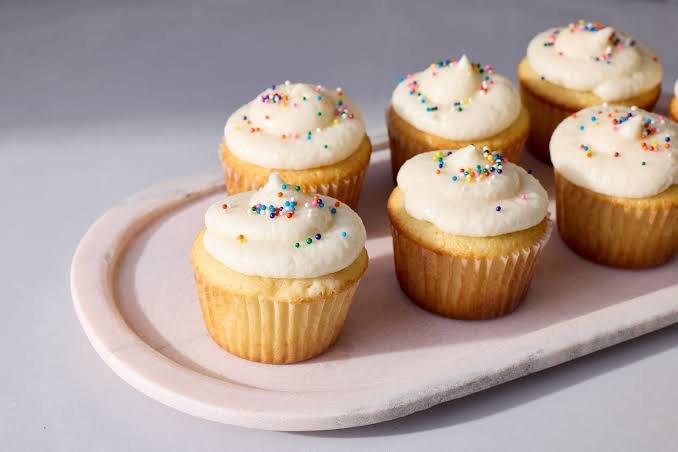
Add colorful sprinkles for a fun finishing touch, or enjoy it plain when you want the creamy cake batter flavor to take center stage. Whether you are making a birthday dessert, satisfying a late-night sweet craving, or simply trying a new Ninja Creami recipe, this one is easy enough for beginners and special enough to share.
Why You’ll Love This Recipe
There is something wonderfully nostalgic about cake batter ice cream. This Ninja Creame version keeps that classic flavor while making the process simple and approachable.
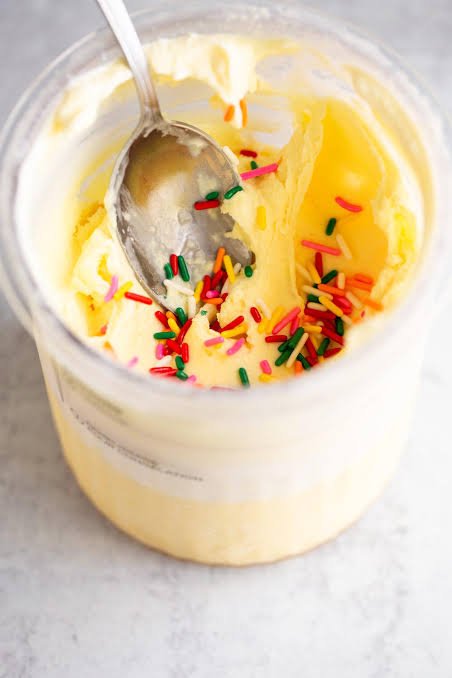
- Easy to make: The ingredients are simple, and the Ninja Creami handles the final churning for you.
- Creamy texture: The frozen base spins into a smooth, velvety consistency that feels rich without being complicated.
- Classic cake batter flavor: Vanilla, sweetness, and cake-inspired notes come together in every spoonful.
- Perfect for celebrations: Add colorful sprinkles to make it feel right at home at birthdays, parties, and family gatherings.
- Beginner-friendly: You do not need special ice cream-making skills to get a creamy homemade dessert.
- Easy to customize: Mix in sprinkles, chocolate chips, cookie pieces, or other favorite toppings.
- Make-ahead friendly: Prepare the base ahead of time, freeze it, and process it whenever you are ready for dessert.
- Better than store-bought: Freshly processed ice cream gives you control over the sweetness, mix-ins, and overall texture.
Ingredients
You only need a handful of ingredients to make this creamy Cake Batter Ice Cream Ninja Creami Recipe. Each one helps create the sweet, smooth texture and familiar cake batter flavor.
- Heavy cream: Adds richness and helps create a creamy, smooth consistency.
- Whole milk: Lightens the mixture while keeping the ice cream soft and scoopable.
- Granulated sugar: Provides the sweetness needed for a classic cake batter flavor.
- Vanilla extract: Brings out the sweet, bakery-style vanilla notes.
- Cake mix: The key ingredient for that unmistakable cake batter taste. Use a dry cake mix that you enjoy, such as vanilla or yellow cake.
- Cream cheese: Adds a subtle tang and extra richness while helping create a luscious texture.
- Rainbow sprinkles: Optional, but perfect for adding color and a fun birthday-cake finish.
Ingredient Amounts
For one Ninja Creami pint, you will need approximately:
- 1 cup heavy cream
- 1/2 cup whole milk
- 1/4 cup granulated sugar
- 2 tablespoons cream cheese, softened
- 1/2 teaspoon vanilla extract
- 1/3 cup dry vanilla or yellow cake mix
- 2 tablespoons rainbow sprinkles, plus more for serving if desired
For the best results, use full-fat dairy when possible. It gives the frozen base enough richness to process into a creamy texture rather than an icy one.
Ingredient Notes & Substitutions
A few small ingredient choices can make a noticeable difference in the final texture and flavor of your Cake Batter Ice Cream Ninja Creami Recipe. Here are some easy ways to adjust the base to suit what you have at home.
Heavy Cream
Heavy cream gives the ice cream its rich, silky texture. For the creamiest result, use regular heavy whipping cream rather than a lower-fat substitute.
If you want a lighter version, you can replace part of the heavy cream with additional whole milk. The finished ice cream will be less rich and may have a slightly icier texture.
Whole Milk
Whole milk helps balance the richness of the cream while keeping the frozen base smooth. Reduced-fat milk can work, but the texture may not be quite as creamy.
For a dairy-free option, use an unsweetened plant-based milk and a dairy-free whipping cream that freezes well.
Granulated Sugar
Regular white sugar works well because it dissolves easily into the liquid base and provides a clean sweetness.
You can adjust the amount slightly depending on how sweet your cake mix is. Avoid cutting the sugar too much, since sugar also affects the texture of frozen desserts.
Cream Cheese
Softened cream cheese adds a gentle tang that balances the sweetness and gives the ice cream a fuller texture.
For a dairy-free version, use a dairy-free cream cheese alternative. Choose one with a smooth texture for the best results.
Cake Mix
Vanilla, yellow, or white cake mix all work nicely. Choose a dry cake mix with a flavor you enjoy.
If you prefer a stronger cake flavor, add a little more cake mix, but avoid adding too much because it can make the mixture thick or powdery.
Vanilla Extract
Pure vanilla extract gives the ice cream a warm bakery-style flavor. Vanilla bean paste can also be used if you want a more pronounced vanilla taste.
Rainbow Sprinkles
Sprinkles are optional, but they add the classic birthday-cake look and a little texture.
For the best appearance, stir them in after processing rather than freezing them directly into the base. This helps prevent the colors from bleeding into the ice cream.
Allergy-Friendly Options
For gluten-free cake batter ice cream, choose a certified gluten-free cake mix and check the labels of all other ingredients.
For a dairy-free version, use dairy-free cream, milk, and cream cheese alternatives. Since different brands behave differently when frozen, the texture may vary slightly.
Kitchen Tools Needed
You do not need a complicated collection of equipment for this Cake Batter Ice Cream Ninja Creami Recipe. A few basic kitchen tools are enough to prepare the base and get it ready for the freezer.
- Ninja Creami: The main appliance used to process the frozen mixture into creamy ice cream.
- Ninja Creami pint container: Use the container designed for your specific Ninja Creami model.
- Mixing bowl: Helpful for combining the dairy, sugar, cream cheese, and cake mix smoothly.
- Whisk: A small whisk helps dissolve the sugar and break up any lumps from the cake mix.
- Measuring cups and spoons: Accurate measurements help keep the frozen base balanced.
- Rubber spatula: Useful for scraping the sides of the bowl and mixing in sprinkles.
- Airtight container: Optional if you plan to transfer leftovers after processing.
Helpful Tip
Make sure the mixture is well combined before freezing. Small lumps can become more noticeable after freezing, so take an extra moment to whisk the base until it looks smooth and uniform.
Step-by-Step Instructions
Making this Cake Batter Ice Cream Ninja Creami Recipe is mostly about preparing a smooth base, freezing it properly, and letting the Ninja Creami create the final texture. Follow these steps for the best results.
1. Soften the Cream Cheese
Place the cream cheese in a mixing bowl and let it soften at room temperature for a few minutes. Soft cream cheese blends much more easily and helps prevent small lumps in the finished base.
2. Combine the Cream Cheese and Sugar
Add the granulated sugar to the softened cream cheese. Whisk until the mixture looks smooth and creamy.
Do not rush this step. Breaking down the cream cheese now makes it easier to create a smooth frozen base later.
3. Add the Liquid Ingredients
Pour in the heavy cream, whole milk, and vanilla extract. Whisk everything together until the mixture is evenly combined.
The base should look creamy and uniform, without visible pieces of cream cheese.
4. Add the Cake Mix
Sprinkle the dry cake mix into the bowl gradually while whisking. Continue mixing until the cake mix is fully incorporated.
Check the bottom and sides of the bowl for any dry pockets. The mixture should have a smooth, cake-batter-like consistency.
5. Fill the Ninja Creami Pint
Pour the mixture into the Ninja Creami pint container. Do not fill beyond the maximum fill line.
If there are bubbles on the surface, gently tap the container on the counter a few times to help release them.
6. Freeze Until Solid
Place the pint container on a level surface in the freezer and freeze it until completely solid.
For the best results, allow it to freeze for about 24 hours. Keeping the container level helps the mixture freeze evenly, which is important for smooth processing.
7. Process the Ice Cream
Remove the frozen pint from the freezer and place it into the outer bowl according to your Ninja Creami model’s instructions.
Select the Ice Cream setting and let the machine process the frozen base.
When finished, check the texture. It should look creamy and soft rather than powdery.
8. Use Re-Spin if Needed
If the ice cream looks crumbly or dry after the first spin, do not worry. This can happen with homemade frozen bases.
Use the Re-Spin function according to your machine’s instructions. The mixture should become noticeably smoother and creamier.
If it still looks too dry, a small splash of milk can help bring the texture together before another re-spin.
9. Add the Sprinkles
Once the ice cream has reached a creamy consistency, create a small well in the center if your Ninja Creami model calls for one and add the rainbow sprinkles.
Use the appropriate Mix-In setting to distribute them throughout the ice cream.
Adding the sprinkles at this stage keeps their colors brighter and gives you more distinct pieces throughout the dessert.
10. Serve Immediately
Spoon the finished cake batter ice cream into bowls or cones and add extra sprinkles on top if desired.
For the softest, creamiest texture, enjoy it soon after processing. If you prefer firmer ice cream, return it to the freezer briefly before serving.
Common Mistakes to Avoid
Do not freeze an uneven pint. A level freezer surface helps the base freeze consistently.
Do not skip the full freeze. The mixture needs to be completely solid before processing.
Do not add too many sprinkles before freezing. Their colors can bleed into the base and create streaks.
Do not assume a crumbly first spin means the recipe failed. Homemade Ninja Creami bases often need a re-spin to reach the right texture.
Do not overfill the container. Stay below the maximum fill line to allow the machine to process the mixture properly.
Expert Tips for the Best Cake Batter Ice Cream
A few simple techniques can make a big difference in the texture and flavor of your Cake Batter Ice Cream Ninja Creami Recipe. These tips help you get a smoother, richer result every time.
Freeze the Pint on a Level Surface
Place the Ninja Creami container on a flat freezer shelf. If the mixture freezes at an angle, the frozen surface can become uneven, which may make processing less consistent.
Give the Base a Thorough Mix
Whisk the cream cheese, sugar, milk, cream, vanilla, and cake mix until completely smooth. Any lumps that remain before freezing will be much harder to remove afterward.
Use Full-Fat Ingredients for a Richer Texture
Heavy cream and whole milk provide the fat needed for a creamy mouthfeel. Lower-fat ingredients can work, but they may produce a slightly icier consistency.
Let the Ninja Creami Do the Work
Avoid judging the texture too quickly after the first spin. If the ice cream looks dry or crumbly, use the re-spin function rather than adding a large amount of liquid.
Add a Small Splash of Milk When Needed
If a re-spin still leaves the ice cream looking powdery, add a small amount of milk and process it again. Start with just a little because too much liquid can make the texture loose.
Keep Sprinkles for the End
For colorful, distinct sprinkles, add them after the ice cream has been processed. The mix-in setting distributes them without giving the colors as much time to bleed.
Chill Your Serving Bowls
For an extra-frosty serving experience, place your bowls in the freezer for a few minutes before serving. The cold bowls help the creamy ice cream stay firm a little longer.
Taste the Base Before Freezing
If your cake mix is especially sweet, you can slightly adjust the sugar before freezing. Remember that frozen desserts taste less sweet when cold, so the unfrozen mixture should taste pleasantly sweet rather than bland.
Cake Batter Ice Cream Variations
Once you have the basic recipe down, there are plenty of simple ways to customize your Ninja Creami ice cream. Start with the same creamy base, then change the flavors or mix-ins to create a version that suits the occasion.
Chocolate Cake Batter Ice Cream
Use chocolate cake mix instead of vanilla or yellow cake mix. Add a small amount of mini chocolate chips after processing for extra chocolate flavor and texture.
Birthday Cake Ice Cream
Keep the vanilla cake mix and add extra rainbow sprinkles. A few crushed pieces of vanilla sandwich cookies can also give the ice cream a fun birthday-cake twist.
Chocolate Chip Cake Batter Ice Cream
Process the ice cream until creamy, then add mini chocolate chips using the mix-in setting. Smaller chips distribute more evenly throughout the pint.
Strawberry Cake Batter Ice Cream
Add a little strawberry flavor to the vanilla cake batter base with finely chopped freeze-dried strawberries or a small amount of strawberry puree. If using puree, keep the amount modest so the base does not become too watery.
Cookie Cake Batter Ice Cream
Fold in crushed chocolate sandwich cookies, vanilla cookies, or shortbread pieces after processing. For the best texture, use small pieces rather than large chunks.
Dairy-Free Cake Batter Ice Cream
Use dairy-free heavy cream, unsweetened plant-based milk, and dairy-free cream cheese. Choose a dairy-free cake mix as well, and check every ingredient label if you need to avoid milk completely.
Gluten-Free Cake Batter Ice Cream
Choose a certified gluten-free cake mix and verify that the sprinkles and other ingredients are also gluten-free if cross-contact is a concern.
Lower-Sugar Option
For a less sweet version, use a reduced-sugar cake mix and slightly decrease the added sugar. Keep in mind that changing the sugar level can affect the softness and texture after freezing.
Fun Topping Ideas
Once your cake batter ice cream is processed, you can finish it with:
- Rainbow sprinkles
- Mini chocolate chips
- Crushed cookies
- White chocolate pieces
- Chopped nuts
- Whipped cream
- A light drizzle of chocolate or caramel sauce
For the best texture, add crunchy toppings just before serving rather than mixing them into the base before freezing.
Storage Instructions
This Cake Batter Ice Cream Ninja Creami Recipe is best enjoyed soon after processing, when it has that soft, creamy texture straight from the machine. If you have leftovers, you can still store them for later.
Freezer Storage
Keep leftover ice cream in the Ninja Creami pint with the lid securely attached, or transfer it to a freezer-safe airtight container.
For the best texture and flavor, enjoy it within about 1 to 2 weeks. Homemade ice cream can gradually become harder and develop ice crystals the longer it stays frozen.
How to Re-Serve Frozen Ice Cream
If the ice cream has become firm in the freezer, let it sit for a few minutes before processing it again.
Place the pint back into the Ninja Creami according to your model’s instructions and use the appropriate setting or re-spin function to restore a softer, creamier consistency.
If the ice cream remains crumbly, a small splash of milk can help bring the texture back together before another re-spin.
Can You Store It in the Refrigerator?
It is not recommended to keep finished ice cream in the refrigerator for extended storage. The frozen texture will melt, and the ice cream will not return to its original consistency after being refrigerated and refrozen.
For the best results, keep the prepared ice cream frozen until you are ready to serve it.
Make-Ahead Tip
The unfrozen base can be prepared ahead of time and placed directly into the Ninja Creami container. Freeze it until completely solid, then process it when you are ready for dessert.
This makes the recipe especially convenient for birthdays, gatherings, or weekends when you want a homemade frozen treat without preparing everything at the last minute.
Frequently Asked Questions
Can I make cake batter ice cream in the Ninja Creami?
Yes. The Ninja Creami is well suited for making homemade cake batter ice cream. Prepare and freeze the base until solid, then process it using the appropriate ice cream setting.
Why is my Ninja Creami ice cream crumbly?
A crumbly texture after the first spin is fairly common with homemade frozen bases. Try using the re-spin function. If it is still too dry, add a small splash of milk and process it again.
Can I use a different flavor of cake mix?
Absolutely. Vanilla, yellow, white, or chocolate cake mix can all work. Choose a cake mix that matches the flavor you want.
Do I have to use cream cheese?
No, but cream cheese adds richness and a subtle tang to the recipe. If you prefer to leave it out, you can make the base without it, although the final texture and flavor will be slightly different.
Can I make this recipe dairy-free?
Yes. Use dairy-free heavy cream, plant-based milk, and dairy-free cream cheese. Make sure your cake mix is also free from dairy ingredients.
Can I make gluten-free cake batter ice cream?
Yes. Choose a certified gluten-free cake mix and check the labels on the remaining ingredients, including sprinkles and toppings.
When should I add the sprinkles?
Add sprinkles after the ice cream has been processed. Using the Ninja Creami’s mix-in function helps distribute them while keeping their colors more distinct.
How long should I freeze the Ninja Creami pint?
For the most reliable results, freeze the prepared base for about 24 hours or until it is completely solid.
Can I use milk instead of heavy cream?
You can, but the ice cream will generally be less rich and creamy. Heavy cream provides the fat that helps create a smoother frozen texture.
How long does homemade cake batter ice cream last?
For the best quality, enjoy it within about 1 to 2 weeks. Keep it tightly covered in the freezer to help reduce ice crystals and freezer odors.
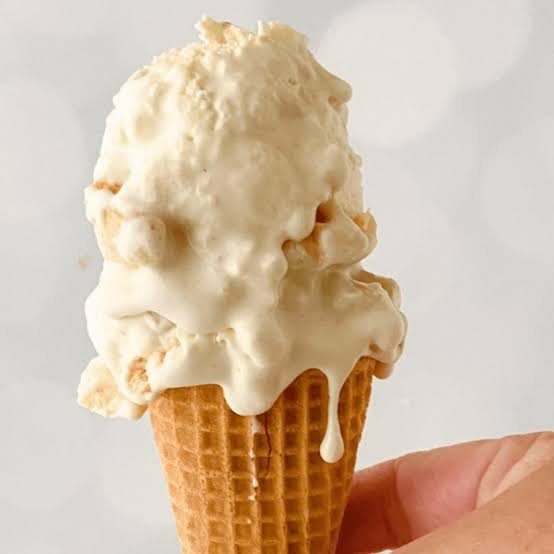

Cake Batter Ice Cream Ninja Creami Recipe
Ingredients
Method
- Add the softened cream cheese and granulated sugar to a mixing bowl. Whisk until smooth.
- Pour in the heavy cream, whole milk, and vanilla extract. Mix until evenly combined.
- Gradually whisk in the dry cake mix until the base is smooth and free of dry pockets
- Pour the mixture into a Ninja Creami pint container without exceeding the maximum fill line
- Freeze the pint on a level surface for about 24 hours, or until completely solid
- Place the frozen pint into the Ninja Creami outer bowl according to your machine's instructions
- Select the Ice Cream setting and process until creamy
- If the texture looks crumbly, use the Re-Spin function. Add a small splash of milk first if the mixture still looks too dry.
- Add the rainbow sprinkles and use the appropriate Mix-In setting to distribute them
- Serve immediately with additional sprinkles if desired.
Video
Notes
- Use full-fat dairy for the creamiest texture.
- Make sure the frozen base is completely solid before processing.
- A crumbly first spin does not necessarily mean something went wrong. Re-spinning usually helps create a smoother texture.
- Add sprinkles after processing to help prevent color bleeding.
- For gluten-free ice cream, use a certified gluten-free cake mix.
- For dairy-free ice cream, use suitable dairy-free cream, milk, and cream cheese alternatives.
Final Thoughts
This Cake Batter Ice Cream Ninja Creami Recipe is a simple way to turn a few everyday ingredients into a creamy homemade dessert with classic cake batter flavor. The combination of rich dairy, vanilla, cake mix, and colorful sprinkles makes each spoonful feel nostalgic without requiring complicated ice cream-making techniques.
The Ninja Creami does most of the work once the base is frozen, and a quick re-spin can help you achieve that smooth, velvety texture homemade ice cream is known for. You can also make the recipe your own with chocolate chips, cookie pieces, different cake mix flavors, or your favorite toppings.
Prepare a pint ahead of time, keep it frozen, and you will have an easy dessert ready whenever a sweet craving hits. If you make this recipe, try your favorite mix-ins and enjoy experimenting with different versions of this creamy cake-inspired treat.
4 Comments