
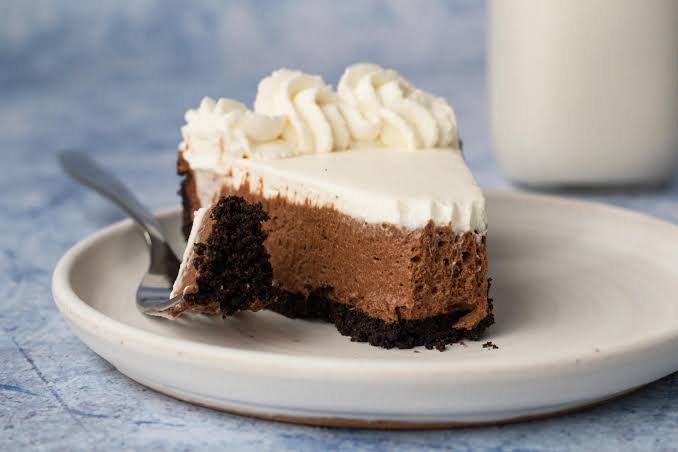
No Bake Oreo Chocolate Mousse Pie
If you love the combination of crunchy Oreos and rich chocolate, this No Bake Oreo Chocolate Mousse Pie is the kind of dessert that deserves a spot in your recipe collection. It has a crisp, buttery Oreo crust, a silky chocolate mousse filling, and a light, creamy finish that makes every bite feel wonderfully indulgent without requiring the oven.
The best part is how simple the process can be. The crust comes together with crushed Oreo cookies and melted butter, while the chocolate mousse creates a smooth, airy center with deep cocoa flavor. Once everything is layered into the pie, a little time in the refrigerator does the rest. The result is a chilled chocolate dessert with contrasting textures, from the crumbly cookie base to the soft, velvety mousse.
This no-bake Oreo pie is especially handy when you want an impressive dessert without spending hours baking. It works beautifully for birthdays, family gatherings, holidays, potlucks, or those warm days when turning on the oven is the last thing you want to do. Serve each slice cold with a little whipped cream and extra Oreo crumbs for a dessert that looks just as inviting as it tastes.
Why You’ll Love This Recipe
- No oven required: This is an easy no-bake dessert that sets in the refrigerator, making it ideal for warm days or busy schedules.
- Rich Oreo flavor: The chocolate cookie crust and Oreo pieces throughout the dessert give every bite a familiar cookies-and-cream taste.
- Light and creamy texture: The mousse filling is smooth, airy, and soft enough to contrast beautifully with the crisp cookie crust.
- Simple ingredients: You only need a handful of easy-to-find ingredients, with no complicated baking techniques.
- Make-ahead friendly: The pie needs time to chill, so you can prepare it several hours before serving.
- Perfect for chocolate lovers: Chocolate and Oreo cookies create a rich dessert that feels special without being difficult to make.
- Easy to customize: Add chocolate shavings, extra cookie crumbs, whipped cream, or chopped Oreos to make each slice your own.
- Great for gatherings: The pie slices neatly once chilled and makes an attractive dessert for parties, holidays, and family dinners.
Ingredients
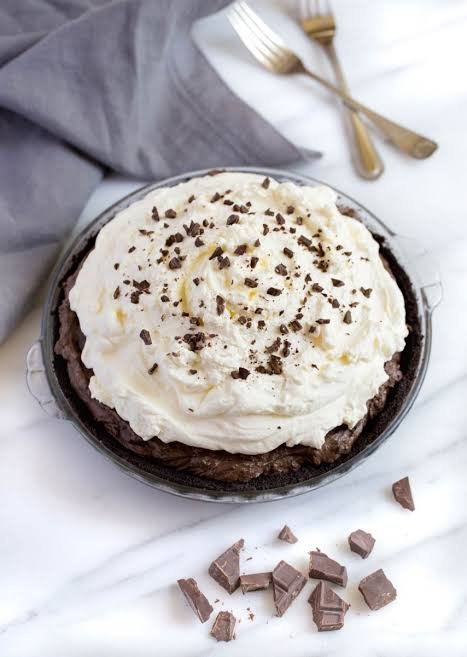
For the Oreo Crust
- 24 Oreo cookies, including the cream filling
- 5 tablespoons unsalted butter, melted
For the Chocolate Mousse Filling
- 6 ounces semisweet chocolate, finely chopped
- 2 tablespoons unsalted butter
- 2 tablespoons water
- 1 teaspoon pure vanilla extract
- 1 1/2 cups cold heavy whipping cream
- 1/4 cup powdered sugar
For the Topping
- 1/2 cup cold heavy whipping cream
- 2 tablespoons powdered sugar
- 1/2 teaspoon pure vanilla extract
- 4 to 6 Oreo cookies, crushed or roughly chopped
- Chocolate shavings, optional
Ingredient Overview
The Oreo cookies create a crisp, chocolatey base while the melted butter helps the crust hold together once chilled. Semisweet chocolate gives the mousse a deep chocolate flavor without making the pie overly sweet. Cold heavy cream is whipped into a fluffy consistency to give the filling its signature light texture.
For the best results, use real butter and good-quality chocolate. Since this is a no-bake chocolate pie, the flavor of each ingredient comes through clearly.
Ingredient Notes & Substitutions
A few small ingredient choices can make a noticeable difference in the texture and flavor of this no-bake Oreo dessert. Here are some easy substitutions and helpful tips.
Oreo Cookies
Regular Oreo cookies work perfectly for the crust and filling. You do not need to remove the cream centers before crushing them. The filling helps add sweetness and moisture to the crust.
You can also use chocolate sandwich cookies from another brand if that is what you have available.
Butter
Unsalted butter gives you better control over the overall sweetness and salt level. Salted butter can also be used, but you may want to avoid adding any additional salt elsewhere in the recipe.
For a dairy-free version, use a dairy-free butter alternative that melts and firms up when chilled.
Semisweet Chocolate
Semisweet chocolate creates a balanced mousse with a rich chocolate flavor. If you prefer a deeper, less sweet chocolate taste, dark chocolate works well.
Milk chocolate can be used for a sweeter, softer chocolate flavor, but the finished mousse will be noticeably sweeter.
Heavy Whipping Cream
Use cold heavy whipping cream with enough fat to whip into firm peaks. Keep it refrigerated until you are ready to use it. A lower-fat cream may not provide the same fluffy structure.
For a dairy-free pie, use a reliable dairy-free whipping cream designed for whipping and chilling desserts.
Powdered Sugar
Powdered sugar dissolves easily into whipped cream and helps keep the mousse smooth. If you do not have powdered sugar, finely blended granulated sugar can work, although the texture may be slightly different.
Gluten-Free Option
To make this pie gluten-free, use certified gluten-free chocolate sandwich cookies and check the labels on your chocolate and other packaged ingredients.
Chocolate Topping
Chocolate shavings are optional, but they add a polished finish and a little extra chocolate flavor. You can also use crushed Oreo cookies, mini chocolate chips, or a light dusting of cocoa powder.
A Helpful Ingredient Tip
Measure the ingredients before you begin and keep the cream cold until whipping. The mousse depends on properly whipped cream for its light, airy texture, so preparation makes the process much easier.
Kitchen Tools Needed
You do not need a lot of special equipment to make this easy no-bake Oreo pie. A few basic kitchen tools will make the process smooth and simple.
- 9-inch pie dish: Use a standard pie plate with enough depth to hold the Oreo crust and mousse filling.
- Food processor: The quickest way to turn Oreo cookies into fine crumbs. A resealable bag and rolling pin also work.
- Mixing bowls: You will need a few bowls for preparing the crust, melting the chocolate, and whipping the cream.
- Electric hand mixer: Makes whipping the cream much faster. A stand mixer can also be used.
- Rubber spatula: Useful for gently folding the whipped cream into the chocolate mixture without losing too much air.
- Measuring cups and spoons: Accurate measurements help keep the mousse texture consistent.
- Microwave-safe bowl: Helpful for gently melting the chocolate and butter.
- Flat-bottomed measuring cup: Great for pressing the Oreo crumbs firmly and evenly into the pie dish.
- Sharp knife: Use a clean, sharp knife to cut neat slices once the pie has fully chilled.
Optional Helpful Tools
A piping bag can make the whipped cream topping look more polished, while a vegetable peeler can create simple chocolate curls for decoration. Neither is necessary, but both are useful if you want a bakery-style presentation.
Step-by-Step Instructions
1. Make the Oreo Crust
Place the Oreo cookies in a food processor and pulse until they become fine, even crumbs. Pour in the melted butter and pulse again until the mixture resembles damp sand.
If you do not have a food processor, place the cookies in a sealed bag and crush them with a rolling pin. Make sure there are no large cookie pieces left, as they can make the crust difficult to press together.
2. Press the Crust Into the Pie Dish
Transfer the Oreo crumb mixture to a 9-inch pie dish. Use the bottom of a measuring cup or glass to press the crumbs firmly across the bottom and slightly up the sides.
Take a little extra time to compact the crust. A loose crust can crumble when you cut the finished pie.
Place the crust in the refrigerator while you prepare the mousse.
3. Melt the Chocolate
Add the chopped semisweet chocolate, butter, and water to a microwave-safe bowl.
Heat in short intervals, stirring well between each one, until the chocolate is mostly melted and smooth. Continue stirring until the remaining pieces melt from the residual heat.
Do not overheat the chocolate. It should be glossy and completely smooth, not hot or scorched.
Stir in the vanilla extract, then allow the chocolate mixture to cool slightly.
4. Whip the Cream
Pour the cold heavy whipping cream into a large mixing bowl. Add the powdered sugar and beat with an electric mixer until soft to medium peaks form.
The cream should look fluffy and hold its shape when the beaters are lifted. Avoid whipping it too far, or the cream can become grainy and begin turning toward butter.
5. Fold the Whipped Cream Into the Chocolate
Once the melted chocolate has cooled enough that it is warm rather than hot, add about one-third of the whipped cream to the chocolate mixture.
Gently fold with a rubber spatula to lighten the chocolate.
Add the remaining whipped cream in two additions, folding carefully after each addition. Use slow, sweeping motions rather than vigorous stirring.
The finished mousse should look smooth, creamy, and airy.
6. Fill the Oreo Crust
Remove the chilled crust from the refrigerator. Spoon the chocolate mousse into the crust and gently spread the top with a spatula.
Try not to press down too firmly because you want to keep the mousse light.
7. Chill the Pie
Cover the pie and refrigerate for at least 4 hours, or until the mousse is firm enough to slice cleanly.
For the best texture, chilling it overnight works especially well. The longer resting time also allows the Oreo crust to firm up properly.
8. Prepare the Whipped Cream Topping
Just before serving, beat the cold heavy whipping cream with powdered sugar and vanilla until firm peaks form.
Spread or pipe the whipped cream over the chilled pie.
9. Add the Oreo Finish
Crush a few Oreo cookies and sprinkle them over the whipped cream. Add chocolate shavings if desired.
For cleaner slices, use a sharp knife and wipe the blade between cuts.
Common Mistakes to Avoid
- Using warm whipped cream: Cold cream whips more easily and gives the mousse better structure.
- Adding hot chocolate to the cream: Very warm chocolate can melt the whipped cream and make the mousse too loose.
- Overmixing: Fold gently to preserve the air in the whipped cream.
- Skipping the chill time: The pie needs enough refrigerator time to firm up before slicing.
- Under-pressing the crust: Compact the Oreo crumbs firmly so the base stays together when served.
Expert Tips
A few simple techniques can make your Oreo chocolate mousse pie even smoother, sturdier, and easier to serve.
Use Cold Cream
Keep the heavy whipping cream refrigerated until you are ready to whip it. Cold cream traps air more effectively, helping create a fluffy mousse with enough structure to hold its shape.
For an extra-helpful trick, chill your mixing bowl and beaters for about 10 minutes before whipping the cream.
Let the Chocolate Cool Properly
The melted chocolate should be smooth and slightly warm, not hot, before it meets the whipped cream. If the chocolate is too warm, it can deflate the cream and leave you with a loose mousse.
On the other hand, do not let the chocolate cool until it becomes thick and stiff. It should still be fluid enough to fold easily.
Fold, Do Not Stir
Gentle folding is one of the most important steps. Use a rubber spatula and scoop from the bottom of the bowl upward, turning the mixture as you go.
This preserves the tiny air bubbles created when the cream was whipped, giving the mousse its soft, airy texture.
Make the Oreo Crust Firm
Press the cookie crumbs firmly into the pie dish, especially around the edges. A flat-bottomed glass or measuring cup makes this easy.
If the crust feels loose while you are pressing it, add a little more pressure rather than adding extra butter. Too much butter can make the crust greasy.
Give the Pie Enough Time to Chill
Do not rush the refrigeration step. At least 4 hours gives the mousse time to set, while an overnight chill usually produces an even cleaner slice.
Keep the pie refrigerated until shortly before serving.
Use Quality Chocolate
Because chocolate is a major part of the mousse, a good-quality semisweet or dark chocolate can make the finished dessert taste richer and more balanced.
Choose chocolate that you enjoy eating on its own.
Slice It Cleanly
For neat slices, dip a sharp knife in hot water, wipe it dry, and then cut the pie. Repeat between slices when necessary.
This simple trick helps the knife glide through the creamy mousse and keeps the Oreo crust from breaking apart.
Add Toppings Just Before Serving
For the freshest appearance, add whipped cream, crushed Oreos, and chocolate shavings shortly before serving. This keeps the toppings looking crisp and prevents excess moisture from softening the cookie pieces.
Variations
This Oreo chocolate mousse pie is easy to customize, so you can adjust the flavors and ingredients to suit different tastes or dietary needs.
Peanut Butter Oreo Mousse Pie
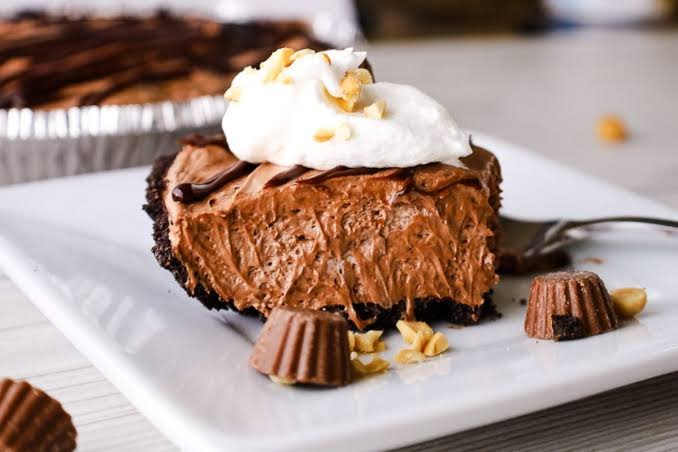
Add a few tablespoons of creamy peanut butter to the chocolate mixture for a classic chocolate and peanut butter combination. Top the finished pie with crushed Oreos and a light drizzle of melted peanut butter.
Mint Chocolate Oreo Pie
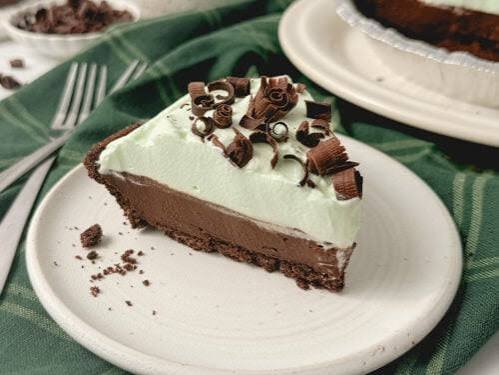
Add a small amount of peppermint extract to the mousse for a cool mint flavor. Start with a little and adjust carefully because peppermint extract can be quite strong.
You can also use mint-flavored chocolate sandwich cookies for extra flavor.
Dark Chocolate Oreo Pie
Replace the semisweet chocolate with good-quality dark chocolate. This creates a deeper chocolate flavor with less sweetness, which pairs nicely with the sweet Oreo crust.
White Chocolate Oreo Pie
For a sweeter variation, use white chocolate in place of semisweet chocolate. The finished mousse will have a creamy, mellow flavor that works beautifully with crushed chocolate cookies.
Gluten-Free Oreo Pie
Use certified gluten-free chocolate sandwich cookies for both the crust and topping. Also check the labels on your chocolate and other packaged ingredients to make sure they are suitable for a gluten-free diet.
Dairy-Free Version
Use dairy-free butter, dairy-free chocolate, and a plant-based whipping cream that is designed to whip and hold its shape when chilled.
Since different dairy-free products behave differently, choose ingredients that are specifically suitable for desserts and whipped fillings.
Extra Cookies and Cream
Fold a small handful of roughly chopped Oreo cookies into the mousse before spreading it over the crust. This adds little pockets of cookie texture throughout the creamy filling.
Chocolate Lovers’ Version
Finish the pie with chocolate curls, chocolate shavings, mini chocolate chips, and a drizzle of chocolate sauce. Keep the toppings light enough that the mousse remains the star of each slice.
Make It Mini
Instead of one large pie, divide the Oreo crust and mousse among small dessert cups or individual ramekins. Chill them until firm and top each serving with whipped cream and crushed Oreos.
This version is especially convenient for parties because everyone gets an individual portion.
Storage Instructions
Proper storage helps keep the Oreo crust crisp and the chocolate mousse smooth and creamy.
Refrigerator Storage
Cover the pie tightly with plastic wrap or place it in an airtight pie container. Keep it refrigerated at all times.
For the best texture and flavor, enjoy the pie within 3 to 4 days. The Oreo crust may gradually soften as it sits, but the chilled mousse should remain creamy and sliceable.
If possible, add decorative toppings such as crushed Oreos and chocolate shavings shortly before serving rather than several days in advance.
Freezer Storage
You can freeze the mousse pie if you want to prepare it ahead of time. Place the uncovered pie in the freezer until firm, then wrap it well with plastic wrap followed by a layer of aluminum foil.
For the best quality, use it within 1 month.
How to Thaw
Move the frozen pie to the refrigerator and let it thaw slowly for several hours or overnight. Avoid thawing it at room temperature, as the mousse and whipped cream topping can soften unevenly.
Once thawed, keep the pie refrigerated and serve it cold.
Can You Freeze Individual Slices?
Yes. Cut the fully chilled pie into individual portions and freeze the slices on a parchment-lined tray until firm. Wrap each slice well and store them in a freezer-safe container.
This makes it easy to take out only the amount you need.
Reheating Instructions
This is a chilled no-bake dessert, so do not reheat it. Serve the pie cold or slightly softened after a short time in the refrigerator.
Frequently Asked Questions
Can I make No Bake Oreo Chocolate Mousse Pie ahead of time?
Yes. This pie is ideal for making ahead. Prepare it the day before serving and keep it covered in the refrigerator. The extra chilling time helps the mousse become firm and makes slicing easier.
How long does the Oreo mousse pie need to chill?
Plan for at least 4 hours in the refrigerator. For the firmest texture and cleanest slices, chilling overnight is even better.
Can I use a different type of chocolate?
Yes. Semisweet chocolate gives the mousse a balanced chocolate flavor, but dark chocolate can be used for a richer, less sweet result. Milk chocolate will create a sweeter mousse.
Why is my chocolate mousse too soft?
The chocolate may have been too warm when combined with the whipped cream, or the cream may not have been whipped enough. Make sure the chocolate cools to a warm, fluid consistency and whip the cream until it reaches soft to medium peaks.
Why did my mousse become dense?
Overmixing can knock the air out of the whipped cream. Fold the cream gently into the chocolate mixture instead of stirring vigorously.
Can I make this pie without a food processor?
Absolutely. Place the Oreo cookies in a sturdy resealable bag and crush them with a rolling pin until they become fine crumbs.
Should I remove the cream from the Oreos?
No. The Oreo filling can stay in the cookies when making the crust. It contributes sweetness and helps create a cohesive cookie base.
Can I use a store-bought Oreo crust?
Yes. A prepared chocolate cookie crust is a convenient shortcut. Use a 9-inch crust and make sure it is sturdy enough to hold the mousse filling.
Can I freeze this Oreo chocolate pie?
Yes. Wrap the pie well and freeze it for up to about 1 month for the best quality. Thaw it slowly in the refrigerator before serving.
How do I get clean slices?
Make sure the pie is thoroughly chilled. Then use a sharp knife warmed briefly under hot water and wiped dry before cutting. Clean and rewarm the knife between slices if needed.
Can I make this dessert gluten-free?
Yes. Use certified gluten-free chocolate sandwich cookies and verify that the chocolate and other packaged ingredients are also gluten-free.
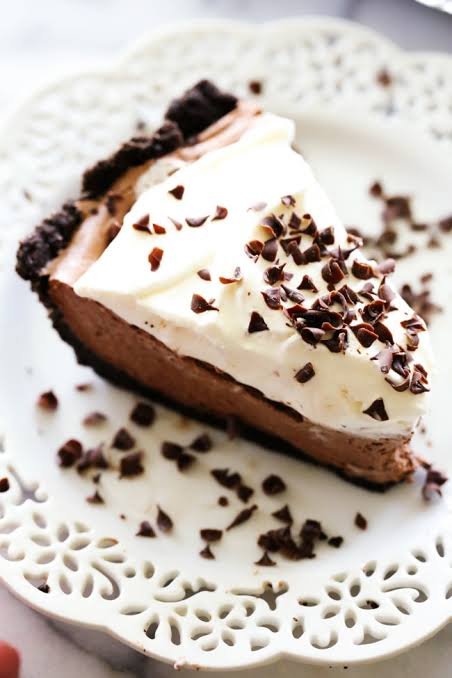

No Bake Oreo Chocolate Mousse Pie
Ingredients
Method
- Crush the Oreo cookies into fine crumbs using a food processor or resealable bag and rolling pin
- Mix the crumbs with melted butter until evenly combined.
- Press the mixture firmly into a 9-inch pie dish, covering the bottom and slightly up the sides. Refrigerate while preparing the filling.
- Place the chopped chocolate, butter, and water in a microwave-safe bowl. Heat in short intervals, stirring between each one, until smooth.
- Stir in the vanilla and let the chocolate cool until slightly warm.
- Beat the cold heavy cream with powdered sugar until soft to medium peaks form
- Gently fold about one-third of the whipped cream into the cooled chocolate mixture
- Fold in the remaining whipped cream in two additions, using gentle movements to preserve the mousse's airy texture
- Spoon the chocolate mousse into the chilled Oreo crust and smooth the top
- Cover and refrigerate for at least 4 hours, preferably overnight.
- Before serving, whip the remaining heavy cream with powdered sugar and vanilla until firm peaks form
- Spread or pipe the whipped cream over the chilled pie
- Finish with crushed Oreos and chocolate shavings, if desired
- Slice with a sharp knife and serve cold.
Video
Notes
- Keep the heavy cream cold until you are ready to whip it.
- Let the melted chocolate cool before folding in the whipped cream.
- Do not overmix the mousse, as this can make it dense.
- Press the Oreo crust firmly so it holds together when sliced.
- For the cleanest slices, chill the pie overnight.
- Store leftovers covered in the refrigerator for up to 3 to 4 days.
- The pie can be frozen for up to 1 month when wrapped well.
Final Thoughts
This No Bake Oreo Chocolate Mousse Pie is proof that an impressive dessert does not have to involve complicated baking. With a crisp Oreo cookie crust, silky chocolate mousse, and a cloud of whipped cream on top, it brings together simple ingredients in a dessert that feels special enough for any occasion.
The recipe is also wonderfully flexible. Make it ahead for a gathering, add extra Oreo pieces for more cookie crunch, or switch up the chocolate to create your own favorite version. Once you have the basic method down, there are plenty of ways to make this chilled chocolate pie your own.
For the best results, give the pie plenty of time to chill and fold the whipped cream gently into the chocolate. Those two steps make all the difference when you want a mousse that is light, creamy, and easy to slice.
If you make this Oreo chocolate mousse pie, serve it cold with your favorite toppings and enjoy every creamy, chocolatey bite. It is a simple dessert to keep in your recipe rotation whenever you need something sweet without turning on the oven.


2 Comments