
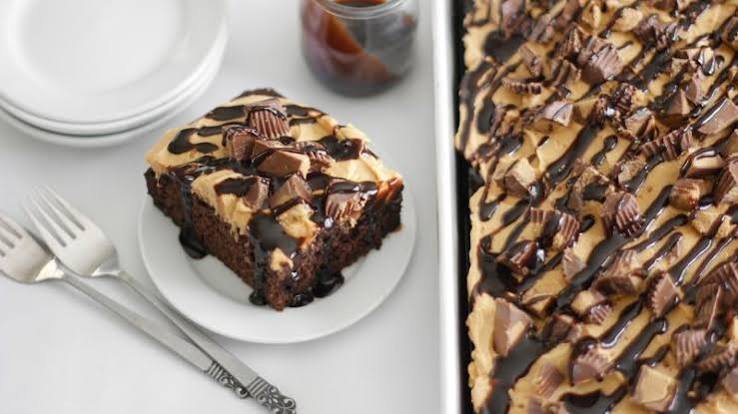
Peanut Butter Chocolate Poke Cake
If chocolate cake and creamy peanut butter are two of your favorite dessert flavors, this Peanut Butter Chocolate Poke Cake deserves a place on your baking list. It starts with a soft, rich chocolate cake, then gets filled with a smooth chocolate layer that settles into every little hole. A fluffy peanut butter topping finishes each slice with the perfect balance of creamy sweetness and deep chocolate flavor.
What makes this poke cake especially appealing is how simple it is to assemble. You do not need complicated decorating skills or layers of perfectly stacked cake. The poke cake method does the work for you, creating a moist texture and plenty of room for delicious fillings and toppings. Add a silky peanut butter drizzle and a little extra chocolate on top, and every bite has a satisfying mix of soft cake, creamy filling, and rich peanut butter flavor.
It is an easy dessert for birthdays, potlucks, family dinners, holidays, or any weekend when a regular chocolate cake feels a little too ordinary. Best of all, you can prepare it ahead of time and let the flavors settle together in the refrigerator before serving.
Why You’ll Love This Recipe
- Easy to make: The poke cake method is simple and forgiving, making this a great dessert for beginner bakers.
- Rich chocolate flavor: A tender chocolate cake forms the base, giving every bite a deep cocoa taste that pairs beautifully with peanut butter.
- Creamy peanut butter topping: Smooth peanut butter adds a sweet, nutty layer that makes the cake taste indulgent without requiring complicated frosting techniques.
- Extra-moist texture: The filling sinks into the holes throughout the cake, keeping it soft and moist instead of dry.
- Perfect make-ahead dessert: You can prepare the cake several hours before serving and chill it until you are ready to slice and serve.
- Great for gatherings: This easy chocolate poke cake makes plenty of servings, so it works well for birthdays, potlucks, family celebrations, and holiday dessert tables.
- Simple pantry ingredients: Most of the ingredients are easy to find, and you can use convenient shortcuts such as a boxed chocolate cake mix when you want to save time.
- A classic flavor combination: Chocolate and peanut butter bring together rich cocoa, creamy sweetness, and a lightly salty nutty flavor in every forkful.
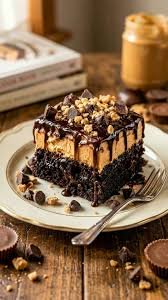
Ingredients
This Peanut Butter Chocolate Poke Cake uses simple ingredients that come together into a rich, moist dessert with creamy peanut butter and chocolate in every bite.
For the Chocolate Cake
- 1 box chocolate cake mix, plus the ingredients called for on the package
- 1 teaspoon vanilla extract, if not already included in the cake mix
You can also use your favorite homemade chocolate cake batter if you prefer to bake completely from scratch.
For the Chocolate Filling
- 1 cup chocolate fudge sauce or chocolate syrup
- 1/2 cup sweetened condensed milk
The combination creates a smooth, rich filling that seeps into the holes and keeps the cake wonderfully moist.
For the Peanut Butter Topping
- 1 cup creamy peanut butter
- 1 cup powdered sugar
- 1 teaspoon vanilla extract
- 1 1/2 cups heavy whipping cream, cold
For the Chocolate-Peanut Butter Topping
- 1/2 cup chocolate chips
- 2 tablespoons creamy peanut butter
- 1 tablespoon heavy cream
Optional Garnishes
- Chopped roasted peanuts
- Mini chocolate chips
- Chocolate shavings
- Peanut butter cups, chopped into small pieces
For the best texture, use creamy peanut butter rather than natural peanut butter that separates easily. Full-fat dairy also gives the topping a smoother, richer consistency.
Ingredient Notes & Substitutions
A few simple ingredient choices can make a noticeable difference in the texture and flavor of this chocolate peanut butter poke cake. Here are some helpful options if you need to adjust the recipe.
Chocolate Cake Mix
A boxed chocolate cake mix keeps this recipe quick and convenient. Choose a chocolate, devil’s food, or fudge cake mix for a richer cocoa flavor.
If you prefer homemade cake, use your favorite 9 x 13-inch chocolate cake recipe. Let the cake cool slightly before adding the filling.
Chocolate Fudge Sauce
Chocolate fudge sauce gives the cake a rich, silky center. Regular chocolate syrup can be used if that is what you have available, although fudge sauce will give you a thicker and more decadent filling.
For an even stronger chocolate flavor, use a dark chocolate fudge sauce.
Sweetened Condensed Milk
Sweetened condensed milk adds sweetness and a creamy consistency to the chocolate filling. Avoid substituting it with evaporated milk because the two ingredients behave very differently in this recipe.
Peanut Butter
Creamy conventional peanut butter works best because it blends smoothly into the topping. Avoid very runny natural peanut butter unless you stir it thoroughly and make sure it has a consistent texture.
Crunchy peanut butter can be used if you enjoy small pieces of peanuts throughout the topping.
Heavy Whipping Cream
Cold heavy whipping cream creates a light, creamy peanut butter topping. For the best results, chill the cream before whipping it.
If needed, a prepared whipped topping can be used as a shortcut. The texture may be slightly different, but it can save time.
Powdered Sugar
Powdered sugar dissolves easily into the peanut butter mixture and helps create a smooth topping. Regular granulated sugar is not recommended because it can leave the topping slightly grainy.
Chocolate Chips
Semi-sweet chocolate chips provide a balanced chocolate flavor without making the cake overly sweet. Milk chocolate chips can be used for a sweeter finish, while dark chocolate chips create a more intense contrast with the peanut butter.
Peanut Allergy Alternative
If you need a peanut-free version, replace the peanut butter with sunflower seed butter or another suitable nut-free spread. Check all packaged ingredients carefully for possible cross-contact if the dessert is being served to someone with a serious allergy.
Gluten-Free Option
For a gluten-free cake, use a certified gluten-free chocolate cake mix and verify that the chocolate sauce, peanut butter, and other packaged ingredients are also labeled gluten-free.
Dairy-Free Option
A dairy-free version may be possible with a dairy-free chocolate cake mix, dairy-free chocolate sauce, plant-based condensed milk, and a suitable dairy-free whipping alternative. Always check the labels to make sure each product fits your dietary needs.
Kitchen Tools Needed
You do not need a long list of specialty equipment to make this easy chocolate poke cake. A few basic kitchen tools are enough.
- 9 x 13-inch baking pan: The standard size works well for this recipe and gives you enough surface area for the filling and topping.
- Large mixing bowl: Use this for preparing the cake batter if you are making the cake from scratch or using a boxed mix.
- Electric hand mixer or stand mixer: Helpful for whipping the peanut butter topping until light and creamy.
- Wooden spoon or large round spatula handle: Use the rounded end to make evenly spaced holes throughout the cooled cake.
- Measuring cups and spoons: Accurate measurements help keep the cake and toppings consistent.
- Rubber spatula: Useful for scraping the bowl and spreading the peanut butter topping evenly over the cake.
- Small microwave-safe bowl: Handy for warming the chocolate and peanut butter topping.
- Whisk: Helps combine the chocolate topping until it becomes smooth and glossy.
- Cooling rack: Allows the baked cake to cool evenly before you add the filling.
- Refrigerator-safe cover or plastic wrap: Useful for covering the finished cake while it chills.
Optional Helpful Tools
A piping bag can be useful if you want to decorate the top with extra peanut butter or whipped cream. A sharp knife also makes cleaner slices when the chilled cake is ready to serve.
Step-by-Step Instructions
Making this Peanut Butter Chocolate Poke Cake is straightforward, but a few small details will help you get the best texture. Follow the steps in order and give the cake enough time to cool and chill before serving.
1. Bake the Chocolate Cake
Preheat your oven according to the temperature listed on the chocolate cake mix package. Grease a 9 x 13-inch baking pan, then prepare the cake batter according to the package directions.
Pour the batter into the prepared pan and spread it evenly. Bake until the center is set and a toothpick inserted into the middle comes out with only a few moist crumbs.
Do not overbake the cake. A slightly moist chocolate cake works especially well for a poke cake because it stays tender after the filling is added.
Place the pan on a cooling rack and let the cake cool for about 15 to 20 minutes.
2. Make the Holes
Once the cake is warm but no longer hot, use the rounded end of a wooden spoon or another similar utensil to poke holes across the entire surface.
Space the holes about 1 inch apart. Try to make them deep enough to reach well into the cake without breaking through the bottom.
The holes give the chocolate filling a path into the cake, so make sure they are distributed evenly rather than concentrated in just one area.
3. Add the Chocolate Filling
Combine the chocolate fudge sauce and sweetened condensed milk in a bowl. Stir until the mixture is smooth and evenly blended.
Slowly spoon the chocolate mixture over the cake, paying particular attention to the holes. Use a spatula to gently spread any remaining filling across the surface.
Give the pan a gentle shake or tap against the counter to help the filling settle into the holes.
Do not rush this step. Allowing the filling to work its way into the cake is what gives a poke cake its signature moist, creamy center.
4. Let the Cake Cool Completely
Allow the filled cake to cool completely before adding the peanut butter topping.
Adding whipped topping while the cake is still warm can cause it to soften or lose its light texture.
For a more convenient option, place the cake in the refrigerator for about 30 minutes once it has stopped steaming.
5. Prepare the Peanut Butter Topping
Place the creamy peanut butter, powdered sugar, and vanilla extract in a mixing bowl. Beat until smooth and creamy.
In a separate chilled bowl, whip the cold heavy cream until it begins to thicken and forms soft peaks.
Gently fold the whipped cream into the peanut butter mixture in batches. Use a rubber spatula and fold rather than vigorously stirring. This helps keep the topping light and fluffy.
The finished mixture should be smooth, creamy, and thick enough to spread without running.
6. Spread the Peanut Butter Layer
Spoon the peanut butter topping over the completely cooled cake.
Use an offset spatula or rubber spatula to spread it into an even layer from edge to edge.
Take your time around the edges so the topping reaches every corner. A smooth layer also makes the finished cake easier to decorate.
7. Make the Chocolate-Peanut Butter Drizzle
Place the chocolate chips, peanut butter, and heavy cream in a microwave-safe bowl.
Heat in short intervals, stirring between each one, until the chocolate is almost completely melted. Continue stirring until the mixture becomes smooth and glossy.
If the mixture seems too thick to drizzle, add a tiny amount of additional cream and stir again.
Let the topping cool for a few minutes before drizzling it over the peanut butter layer. It should be warm enough to flow but not hot enough to melt the topping underneath.
8. Decorate the Cake
Drizzle the chocolate-peanut butter mixture over the top of the cake.
For extra texture, sprinkle chopped roasted peanuts, mini chocolate chips, or chocolate shavings over the drizzle. Chopped peanut butter cups also make a fun finishing touch.
Keep the decoration simple if you want a clean, bakery-style appearance.
9. Chill Before Serving
Cover the cake and refrigerate it for at least 2 hours before serving.
This chilling time allows the filling to settle, helps the topping firm up, and makes the slices easier to cut.
For the best texture, you can prepare the cake several hours ahead or let it chill overnight.
10. Slice and Serve
Use a sharp knife to cut the chilled cake into squares. Wipe the knife between cuts if you want especially clean slices.
Serve the cake cold or let individual pieces sit at room temperature for about 10 minutes before serving.
You should see the soft chocolate cake, creamy filling, and peanut butter topping in each slice.
Common Mistakes to Avoid
Do not poke holes while the cake is piping hot. The cake can tear easily and the filling may become difficult to control.
Do not make the holes too large. Oversized holes can cause the filling to pool instead of distributing throughout the cake.
Do not overbake the cake. Dry cake will not absorb the filling as nicely.
Do not add the topping to a warm cake. Heat can soften the peanut butter topping and make it difficult to spread.
Do not pour hot chocolate drizzle over the topping. Let it cool slightly first so it stays on the surface rather than melting into the peanut butter layer.
Do not skip the chilling time. The cake needs time for the filling and topping to set properly.
Expert Tips
A few simple techniques can make this Peanut Butter Chocolate Poke Cake even easier to prepare and help you get a soft cake, creamy filling, and perfectly smooth topping.
Use the Right Cake Texture
The cake should be tender but sturdy enough to hold the filling. Keep a close eye on the baking time and remove it as soon as a toothpick comes out with a few moist crumbs.
Overbaking can leave the cake too firm and dry, which makes it harder for the chocolate filling to soak in evenly.
Poke the Cake Evenly
For consistent flavor in every slice, distribute the holes across the entire cake. Keep them roughly the same size and depth.
A wooden spoon with a rounded handle works especially well because it creates holes that are wide enough to hold the filling without weakening the cake.
Warm the Filling Slightly
If your chocolate fudge sauce is thick, warm it gently before pouring it over the cake. A slightly thinner consistency makes it easier for the filling to travel into the holes.
The filling should be warm and pourable, not hot.
Give the Filling Time to Settle
After adding the chocolate mixture, let the cake rest for several minutes before spreading on the topping. This gives the filling more time to move through the holes.
For an especially moist texture, refrigerate the filled cake before adding the peanut butter topping.
Keep the Whipping Cream Cold
Cold heavy cream whips more quickly and creates a lighter, more stable topping. For an extra helpful trick, chill the mixing bowl and beaters for about 10 minutes before whipping.
Stop whipping as soon as soft or medium peaks form. Overwhipping can make the cream grainy and heavy.
Use Creamy Peanut Butter
Regular creamy peanut butter gives the topping a smooth consistency that spreads easily across the cake. If using natural peanut butter, stir it thoroughly before measuring so the oil and solids are evenly combined.
Do Not Overmix the Topping
When combining whipped cream with the peanut butter mixture, fold gently with a spatula. Mixing too aggressively can remove the air that gives the topping its soft, fluffy texture.
Let the Chocolate Drizzle Cool
The chocolate-peanut butter drizzle should be warm enough to flow but cool enough that it does not melt the peanut butter topping.
Test a small amount on one corner of the cake first. If it stays on the surface, it is ready to drizzle.
Chill Before Cutting
Refrigerating the finished cake for at least 2 hours helps the layers firm up and makes slicing much cleaner.
For the neatest presentation, use a sharp knife and wipe it clean between slices.
Make It Ahead
This cake is an excellent make-ahead dessert. Preparing it several hours before serving gives the chocolate filling plenty of time to soak into the cake and allows the peanut butter topping to become nicely chilled.
For the best presentation, add delicate garnishes such as chopped peanuts or chocolate pieces shortly before serving.
Variations
One of the best things about this Peanut Butter Chocolate Poke Cake is how easy it is to customize. Keep the classic chocolate and peanut butter combination, or make a few simple changes to suit your taste, dietary needs, or the occasion.
Peanut Butter Cup Poke Cake
Turn this dessert into a peanut butter cup inspired cake by adding chopped peanut butter cups over the finished topping. Sprinkle a few mini chocolate chips over the top for extra chocolate texture.
Extra Chocolate Version
For serious chocolate lovers, use a chocolate fudge cake mix, dark chocolate fudge sauce, and dark chocolate chips for the drizzle. You can also add chocolate shavings before serving.
Crunchy Peanut Butter Version
Swap creamy peanut butter for crunchy peanut butter in the topping. The small pieces of roasted peanuts add a pleasant contrast to the soft chocolate cake and creamy filling.
Chocolate Cookie Topping
Crush chocolate sandwich cookies and sprinkle them over the peanut butter layer. The cookies add a light crunch and make the cake especially fun for birthdays and casual gatherings.
Gluten-Free Version
Use a certified gluten-free chocolate cake mix and check every packaged ingredient, including the chocolate sauce and toppings, to make sure they are gluten-free.
Dairy-Free Version
Use dairy-free chocolate cake ingredients, dairy-free chocolate sauce, plant-based condensed milk, and a dairy-free whipping alternative. Choose products that match your dietary requirements and check labels carefully.
Nut-Free Version
For a peanut-free dessert, replace the peanut butter with sunflower seed butter or another suitable seed-based spread. Be sure all other ingredients are produced in a facility that meets your allergy requirements if cross-contact is a concern.
Lighter Version
For a slightly lighter dessert, use a reduced-fat chocolate cake mix and a lighter whipped topping. Keep the peanut butter portion moderate and use a thinner layer of chocolate drizzle.
The finished cake will have a somewhat different texture, but it can still satisfy a chocolate and peanut butter craving.
Holiday Version
Decorate the chilled cake according to the occasion. Add festive sprinkles, themed chocolate candies, or finely chopped nuts for birthdays, holidays, and family celebrations.
Mini Poke Cakes
Instead of baking one large cake, divide the prepared batter among individual oven-safe baking dishes or suitable cupcake-style portions. Once cooled, add the filling and topping to each serving.
This variation is useful when you want individual desserts for a dinner party or special event.
Salted Chocolate Peanut Butter Cake
Add a very small sprinkle of flaky salt over the chocolate drizzle just before serving. The salt enhances the cocoa and peanut butter flavors while balancing the sweetness.
Use only a light amount because the peanut butter and other ingredients already contain some salt.
Storage Instructions
Because this Peanut Butter Chocolate Poke Cake contains a creamy peanut butter topping, it should be kept refrigerated. Proper storage helps maintain the soft cake, creamy topping, and fresh chocolate flavor.
Refrigerator Storage
Cover the cake tightly with plastic wrap or place it in an airtight cake container. Refrigerate for up to 4 days.
For the best texture, keep the cake chilled until you are ready to serve it. The cold temperature also helps the peanut butter topping stay firm and makes the cake easier to slice.
If possible, store the cake in a container with enough height so the lid does not press against the topping.
Can You Make It Ahead?
Yes. This is a great make-ahead dessert. You can prepare the entire cake several hours before serving and keep it refrigerated.
Making it the day before can actually be helpful because the chocolate filling has more time to settle into the cake, creating a softer and more flavorful texture.
For the freshest appearance, add delicate garnishes such as chopped peanuts or cookie crumbs shortly before serving.
Freezer Storage
You can freeze the cake, although the texture of the creamy peanut butter topping may change slightly after thawing.
For best results, freeze individual slices rather than the entire cake. Place each slice in a freezer-safe airtight container or wrap it carefully with plastic wrap followed by aluminum foil.
Freeze for up to 1 month for the best quality.
How to Thaw
Transfer frozen cake slices to the refrigerator and let them thaw overnight. Avoid thawing the cake at room temperature for an extended period because of the creamy topping.
Once thawed, serve the cake chilled. Do not refreeze previously frozen slices.
Serving Leftovers
For a softer texture, let a refrigerated slice sit at room temperature for about 10 minutes before serving. This allows the chocolate filling and peanut butter topping to soften slightly while keeping the dessert cool and creamy.
Frequently Asked Questions
Can I use a homemade chocolate cake instead of boxed cake mix?
Yes. A homemade chocolate cake works very well in this recipe. Bake it in a 9 x 13-inch pan and allow it to cool slightly before poking the holes and adding the filling.
Why is my poke cake soggy?
A poke cake can become overly soft if too much filling is added or if the holes are made excessively large. Measure the filling carefully and space the holes evenly across the cake.
How many holes should I make in a poke cake?
There is no exact number, but aim for evenly spaced holes about 1 inch apart across the entire surface. This helps distribute the chocolate filling throughout the cake.
Can I use crunchy peanut butter?
Yes. Crunchy peanut butter adds small pieces of peanuts to the topping and gives the cake a little extra texture. Creamy peanut butter creates a smoother topping.
Can I use natural peanut butter?
You can, but conventional creamy peanut butter is usually easier to work with. If you use natural peanut butter, stir it thoroughly first so the oils and solids are fully combined.
Can I make this cake the day before?
Absolutely. In fact, preparing it the day before can make the cake even easier to serve. Keep it covered and refrigerated until you are ready to cut it.
Does Peanut Butter Chocolate Poke Cake need to be refrigerated?
Yes. Because the cake has a whipped peanut butter topping and dairy-based ingredients, it should be stored in the refrigerator.
Can I freeze Peanut Butter Chocolate Poke Cake?
Yes, although the topping may have a slightly different texture after freezing and thawing. For best results, freeze individual portions in airtight, freezer-safe containers.
Can I make this cake without peanut butter?
Yes. If you need a peanut-free version, use sunflower seed butter or another suitable nut-free alternative. Check all ingredient labels carefully if the cake is being served to someone with a serious allergy.
What is the best way to cut poke cake?
Chill the cake thoroughly before slicing. Use a sharp knife and wipe it clean between cuts for neat, attractive squares.
Can I add peanut butter cups to the cake?
Yes. Chopped peanut butter cups make an excellent topping and reinforce the classic chocolate and peanut butter combination.
How long does poke cake last in the refrigerator?
When properly covered and refrigerated, this cake is best enjoyed within about 4 days.
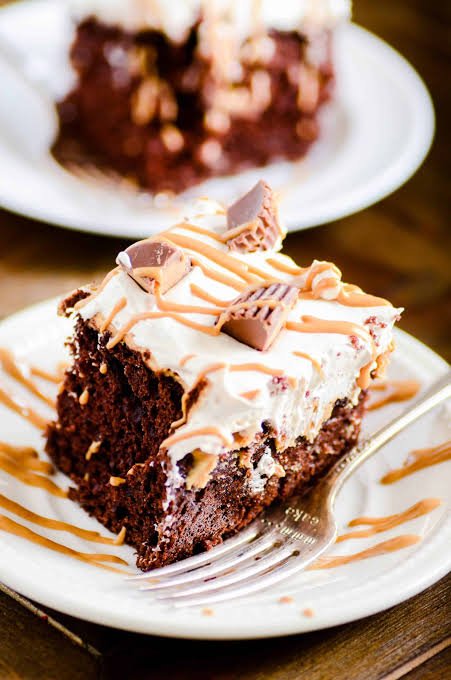

Peanut Butter Chocolate Poke Cake
Ingredients
Method
- Preheat the oven according to the cake mix package directions. Grease a 9 x 13-inch baking pan.
- Prepare the chocolate cake batter according to the package instructions. Stir in the vanilla extract, then pour the batter into the prepared pan.
- Bake until the center is set and a toothpick inserted into the middle comes out with a few moist crumbs. Avoid overbaking.
- Place the cake on a cooling rack and let it cool for about 15 to 20 minutes.
- Use the rounded end of a wooden spoon to poke evenly spaced holes across the cake. Make the holes deep enough to hold the filling without reaching the bottom of the pan.
- Stir together the chocolate fudge sauce and sweetened condensed milk until smooth.
- Spoon the chocolate mixture over the cake, concentrating on the holes. Gently spread the remaining filling across the surface.
- Allow the cake to cool completely. Refrigerate it briefly if needed to speed up the cooling process.
- Beat the peanut butter, powdered sugar, and vanilla until smooth. In a separate chilled bowl, whip the cold heavy cream until soft to medium peaks form.
- Gently fold the whipped cream into the peanut butter mixture until the topping is light and creamy.
- Spread the peanut butter topping evenly over the cooled cake.
- Combine the chocolate chips, peanut butter, and heavy cream in a microwave-safe bowl. Heat in short intervals, stirring between each one, until smooth.
- Allow the chocolate mixture to cool slightly, then drizzle it over the peanut butter topping.
- Add chopped peanuts, mini chocolate chips, chocolate shavings, or chopped peanut butter cups if desired.
- Cover the cake and refrigerate for at least 2 hours before serving.
- Slice the chilled cake into squares and serve.
Video
Notes
- Use creamy conventional peanut butter for the smoothest topping.
- Do not pour hot chocolate drizzle over the peanut butter layer because it can soften or melt the topping.
- Do not skip the chilling time. It helps the filling settle and makes the cake easier to slice.
- The cake can be prepared several hours ahead or the day before serving.
- Store leftovers covered in the refrigerator for up to 4 days.
- For a peanut-free version, use a suitable sunflower seed butter or other nut-free alternative.
- For a gluten-free version, use certified gluten-free packaged ingredients and check all labels carefully.
Final Thoughts
This Peanut Butter Chocolate Poke Cake brings together two classic dessert flavors in a simple, crowd-friendly format. The soft chocolate cake, creamy chocolate filling, fluffy peanut butter topping, and smooth chocolate drizzle create plenty of texture and flavor without requiring complicated baking techniques.
It is also an easy dessert to prepare ahead of time, which makes it especially useful for birthdays, potlucks, family gatherings, and holiday meals. Once the cake has had time to chill, simply slice it into squares and add your favorite toppings.
If you enjoy the combination of chocolate and peanut butter, this poke cake is a recipe worth keeping in your dessert collection. Try it with chopped peanuts for crunch, peanut butter cups for extra richness, or a light sprinkle of flaky salt for contrast.
Serve each slice chilled and enjoy every creamy, chocolatey bite.


One Comment