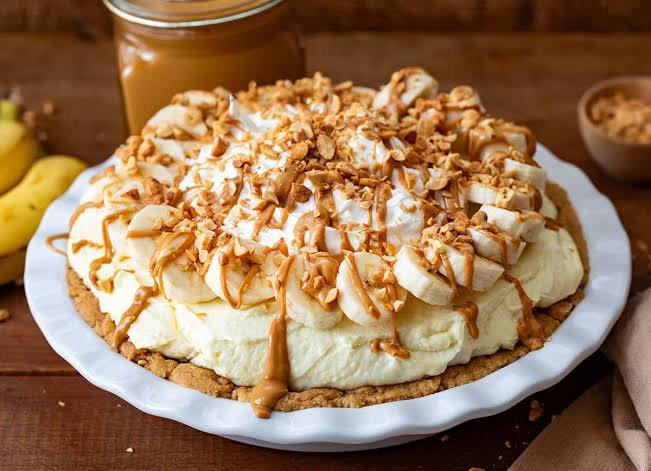
No Bake Peanut Butter Banana Pie
When you want a dessert that feels special without turning on the oven, this No Bake Peanut Butter Banana Pie is an easy choice. It brings together creamy peanut butter, ripe bananas, and a buttery cookie crust in one cool, silky dessert that is both comforting and refreshing.
The texture is what makes this pie so tempting. The crisp, crumbly crust gives way to a smooth peanut butter filling, while fresh banana slices add natural sweetness and a soft, fruity bite. Every layer works together without making the dessert feel heavy.
Best of all, this no-bake pie is simple enough for beginners and convenient enough to prepare ahead of time. It is a wonderful dessert for family dinners, summer gatherings, potlucks, or whenever you have a craving for the classic peanut butter and banana combination.
Why You’ll Love This Recipe
- No oven required: This easy no bake dessert comes together without heating up the kitchen, making it especially convenient on warm days.
- Creamy and crunchy: The smooth peanut butter filling pairs beautifully with a crisp cookie crust for a satisfying contrast in texture.
- Classic flavor combination: Ripe bananas and rich peanut butter create a familiar flavor that feels both nostalgic and comforting.
- Easy for beginners: The steps are straightforward, with no complicated baking techniques or special skills needed.
- Make-ahead friendly: The pie needs time to chill and set, so you can prepare it several hours before serving.
- Perfect for gatherings: Slice it into neat pieces for family dinners, potlucks, holidays, or casual weekend desserts.
- Simple ingredients: Most of the ingredients are easy to find, and several can be swapped to suit your preferences.
- Cool and refreshing: Served straight from the refrigerator, this creamy banana pie makes a lovely dessert when you want something chilled and satisfying.
Ingredients
For the crust:
- 24 chocolate sandwich cookies, finely crushed
- 5 tablespoons unsalted butter, melted
For the peanut butter banana filling:
- 8 ounces cream cheese, softened
- 1 cup creamy peanut butter
- 3/4 cup powdered sugar
- 1 teaspoon pure vanilla extract
- 1 cup heavy whipping cream
- 2 medium ripe bananas, sliced
For the topping:
- 1/2 cup heavy whipping cream
- 2 tablespoons powdered sugar
- 2 tablespoons creamy peanut butter, slightly warmed
- 1 small banana, sliced
- 2 tablespoons chopped peanuts, optional
Use bananas that are ripe but still firm. They should have plenty of natural sweetness without being overly soft, which helps the slices hold their shape inside the pie.
Ingredient Notes & Substitutions
A few simple ingredient choices can make a big difference in the texture and flavor of this no bake peanut butter banana pie.
Cookie Crust
Chocolate sandwich cookies create a rich, slightly crisp base that pairs especially well with peanut butter and banana. If you prefer, use graham crackers, vanilla wafer cookies, or peanut butter sandwich cookies instead.
For a lighter flavor, a traditional graham cracker crust works beautifully.
Peanut Butter
Use creamy, shelf-stable peanut butter for the smoothest filling. Natural peanut butter can work, but make sure it is thoroughly stirred before measuring so the oil and solids are evenly combined.
For a stronger peanut flavor, you can use a little extra peanut butter in the topping.
Cream Cheese
Full-fat cream cheese gives the filling its smooth, rich texture and helps the pie set properly. Reduced-fat cream cheese can be used, although the finished filling may be slightly softer.
Allow the cream cheese to soften at room temperature before mixing. Cold cream cheese can leave small lumps in the filling.
Bananas
Choose ripe yellow bananas with a few brown spots. They provide plenty of sweetness while remaining firm enough to slice neatly.
Avoid very overripe bananas because they can become watery and soft inside the chilled pie.
Heavy Whipping Cream
Cold heavy whipping cream is best for creating a light, fluffy filling. Keep it refrigerated until you are ready to whip it.
For a convenient shortcut, prepared whipped topping can be substituted, although freshly whipped cream gives the pie a softer, more homemade texture.
Dairy-Free Option
For a dairy-free version, use dairy-free cream cheese, dairy-free whipping cream, and a plant-based butter alternative. Check the labels on your cookies and peanut butter to make sure all ingredients meet your dietary needs.
Gluten-Free Option
Use certified gluten-free chocolate sandwich cookies or gluten-free graham-style cookies for the crust. The remaining ingredients should also be checked for gluten-containing additives if you are preparing the pie for someone with celiac disease or a gluten sensitivity.
Kitchen Tools Needed
You do not need much equipment to make this no bake peanut butter banana pie. A few basic kitchen tools are enough.
- 9-inch pie dish: A standard pie plate gives the crust and filling the right shape and thickness.
- Food processor: Helpful for turning the cookies into fine crumbs quickly. A sealed plastic bag and rolling pin also work.
- Mixing bowls: Use one for the crust and another for preparing the creamy filling.
- Electric hand mixer: Makes whipping the cream and blending the filling much easier. A stand mixer works too.
- Rubber spatula: Useful for gently folding whipped cream into the peanut butter mixture without deflating it.
- Measuring cups and spoons: Accurate measurements help the filling set properly.
- Sharp knife: Use a clean, sharp knife to slice the bananas and cut neat pieces of pie.
- Small microwave-safe bowl: Handy for gently warming the peanut butter if you want to drizzle it over the finished pie.
A food processor is convenient, but it is not essential. For a small kitchen or beginner setup, a rolling pin, mixing bowls, and electric hand mixer are all you really need.
Step-by-Step Instructions
1. Prepare the Cookie Crust
Place the chocolate sandwich cookies in a food processor and pulse until they become fine, even crumbs. Pour in the melted butter and pulse again until the mixture resembles damp sand.
Press the crumbs firmly into the bottom and slightly up the sides of a 9-inch pie dish. Use the bottom of a measuring cup or glass to compact the crust evenly.
Refrigerate the crust for at least 20 minutes while you prepare the filling.
Tip: Press the crust firmly, especially around the edges. A loose crust can crumble when you slice the finished pie.
2. Make the Peanut Butter Filling
Add the softened cream cheese, peanut butter, powdered sugar, and vanilla extract to a large mixing bowl.
Beat with an electric mixer until the mixture is smooth, creamy, and free of visible lumps. Scrape down the sides of the bowl as needed.
The filling should look thick and velvety rather than runny.
3. Whip the Cream
Pour the cold heavy whipping cream into a clean bowl. Beat until soft peaks form.
The whipped cream should hold its shape but still look smooth and fluffy. Avoid beating it too long, or it can become grainy.
4. Fold the Whipped Cream Into the Peanut Butter Mixture
Add the whipped cream to the peanut butter mixture in portions. Gently fold with a rubber spatula until everything is evenly combined.
Do not stir aggressively. Gentle folding keeps air in the whipped cream and gives the pie a lighter, mousse-like texture.
5. Add the Banana Layer
Slice two ripe bananas into thin, even pieces.
Arrange a layer of banana slices over the chilled cookie crust. Try to keep the slices in a single, fairly even layer so each piece of pie gets some banana.
6. Add the Peanut Butter Filling
Spoon the creamy peanut butter mixture over the bananas. Spread it gently with a spatula until the surface is smooth and even.
Make sure the filling reaches the edges of the crust so there are no large air pockets.
7. Chill the Pie
Cover the pie loosely with plastic wrap and refrigerate for at least 4 hours, or preferably overnight.
This chilling time allows the filling to firm up and makes the pie much easier to slice cleanly.
Do not rush this step. Cutting the pie before it has properly chilled can result in a soft filling and messy slices.
8. Prepare the Whipped Topping
When you are ready to serve the pie, whip the remaining heavy cream with powdered sugar until soft to medium peaks form.
Spread or pipe the whipped cream over the chilled pie.
9. Add the Finishing Touches
Slice the remaining banana and arrange the pieces over the whipped cream. Drizzle lightly with warmed peanut butter and sprinkle with chopped peanuts if desired.
For the neatest presentation, add the banana slices shortly before serving so they stay fresh and attractive.
10. Slice and Serve
Run a sharp knife under warm water, wipe it dry, and gently slice the pie. Repeat between cuts for cleaner portions.
Serve the pie cold, when the filling is firm and creamy and the crust has a pleasant cookie crunch.
Expert Tips
A few small details can make this no bake peanut butter banana pie easier to prepare and even better to serve.
Use Room-Temperature Cream Cheese
Let the cream cheese soften before mixing. This helps it blend smoothly with the peanut butter and powdered sugar, leaving you with a creamy filling instead of tiny lumps.
Keep the Whipping Cream Cold
Cold heavy cream whips more efficiently and creates a lighter filling. Keep it refrigerated until just before you are ready to whip it.
Do Not Overmix
Once the whipped cream goes into the peanut butter mixture, fold gently. Overmixing can knock out the air and make the filling heavier.
Give the Pie Enough Chilling Time
Four hours is the minimum chilling time, but an overnight rest is even better. The filling becomes firmer and the flavors have more time to come together.
Choose Firm, Ripe Bananas
Bananas with a few brown spots are sweet and flavorful, but they should still be firm enough to slice. Very soft bananas can release excess moisture and make the filling watery.
Make a Firm Cookie Crust
Press the crumbs firmly into the pie dish. Pay special attention to the bottom and corners because a compact crust is much easier to cut and serve.
Warm the Peanut Butter Gently
If you want a smooth peanut butter drizzle, warm it for only a few seconds at a time and stir between intervals. It should be fluid enough to drizzle but not hot.
Chill Before Adding Fresh Banana Topping
If you are decorating the pie with banana slices, wait until shortly before serving. Freshly sliced bananas look brighter and are less likely to become soft or brown.
Get Cleaner Slices
For bakery-style slices, chill the pie thoroughly and use a sharp knife. Dip the blade briefly in warm water, wipe it dry, and then make each cut. This helps the knife glide through the creamy filling without dragging it.
Variations
This no bake peanut butter banana pie is easy to customize, so you can adjust the crust, filling, or toppings to suit different tastes and dietary needs.
Chocolate Peanut Butter Banana Pie
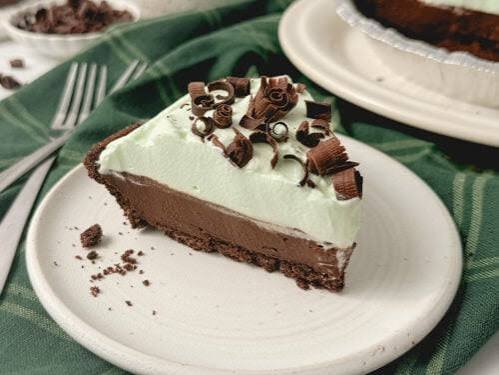
For an extra chocolatey version, use a chocolate cookie crust and add a thin layer of chocolate ganache over the chilled pie. A light sprinkle of chocolate shavings on top makes a simple finishing touch.
Peanut Butter Cup Version
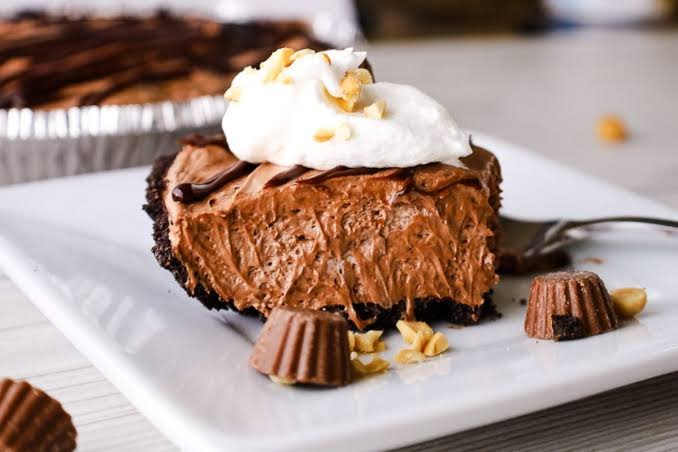
Fold a handful of chopped peanut butter cups into the filling before spreading it over the banana layer. You can also add a few pieces over the whipped cream for extra peanut butter flavor.
Graham Cracker Crust
Swap the chocolate cookie crust for a classic graham cracker crust. The lighter, honey-like flavor lets the banana and peanut butter stand out more clearly.
Extra Crunchy Version
Add chopped roasted peanuts to the crust or sprinkle them over the finished pie. For even more texture, add finely chopped chocolate cookies to the topping.
Dairy-Free Pie
Use dairy-free cream cheese, plant-based whipping cream, and dairy-free butter. Choose cookies that are certified dairy-free and check every package label before preparing the dessert.
Gluten-Free Version
Replace the regular cookies with certified gluten-free chocolate sandwich cookies or gluten-free graham crackers. Make sure the other packaged ingredients are also labeled gluten-free when necessary.
Lighter Banana Pie
For a lighter variation, reduce the amount of powdered sugar and use a reduced-fat cream cheese. The filling may be slightly less rich, but the ripe bananas still provide plenty of natural sweetness.
Chocolate Drizzle
Instead of peanut butter drizzle, finish the chilled pie with melted semi-sweet or dark chocolate. The combination of chocolate, peanut butter, and banana creates a classic dessert flavor without changing the basic recipe.
Storage Instructions
Because this pie contains fresh bananas, cream cheese, and whipped cream, it should be kept chilled until you are ready to serve it.
Refrigerator Storage
Cover the pie loosely with plastic wrap or place it in an airtight pie container. Refrigerate for up to 3 days for the best texture and flavor.
The crust may gradually soften as it sits, and the banana slices can darken over time. For the freshest appearance, add the banana topping shortly before serving.
Freezer Storage
You can freeze the assembled pie without the fresh banana topping. Wrap it tightly in plastic wrap, followed by a layer of aluminum foil, and freeze for up to 1 month.
When ready to serve, transfer the pie to the refrigerator and let it thaw gradually for several hours or overnight. Add fresh banana slices and whipped cream after thawing.
Can You Make It Ahead?
Yes. This is an excellent make-ahead dessert. Prepare the pie the day before serving and keep it refrigerated overnight. Add the final toppings shortly before serving for the best presentation.
Do Not Leave It at Room Temperature
Avoid leaving the pie out for extended periods, particularly in a warm room. Return leftovers to the refrigerator promptly to help maintain the quality and freshness of the dairy-based filling.
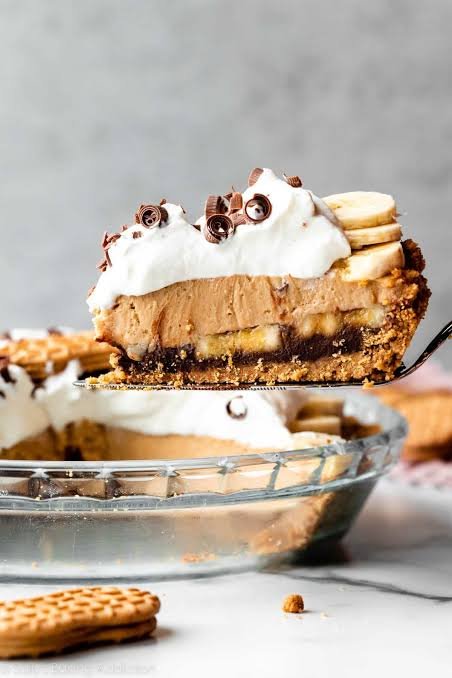

No Bake Peanut Butter Banana Pie
Ingredients
Method
- Crush the chocolate sandwich cookies into fine crumbs. Combine them with melted butter until evenly moistened.
- Press the mixture firmly into the bottom and slightly up the sides of a 9-inch pie dish. Refrigerate for 20 minutes.
- Beat the softened cream cheese, peanut butter, powdered sugar, and vanilla until smooth and creamy.
- In a separate bowl, whip 1 cup of cold heavy cream until soft peaks form.
- Gently fold the whipped cream into the peanut butter mixture until smooth and fluffy.
- Arrange the sliced bananas over the chilled crust.
- Spoon the peanut butter filling over the bananas and smooth the surface.
- Cover and refrigerate for at least 4 hours, preferably overnight.
- Before serving, whip the remaining heavy cream with powdered sugar until soft to medium peaks form
- Spread or pipe the whipped cream over the pie. Add fresh banana slices, a drizzle of warmed peanut butter, and chopped peanuts if desired.
- Slice with a sharp knife and serve chilled.
Video
Notes
- Use ripe but firm bananas for the best texture.
- Make sure the cream cheese is softened before mixing.
- Keep the heavy cream cold until ready to whip.
- Fold the whipped cream gently to maintain a light filling.
- For cleaner slices, chill the pie thoroughly before cutting.
- Add fresh banana slices shortly before serving for the best appearance.
- Store leftovers covered in the refrigerator for up to 3 days.
- For gluten-free preparation, use certified gluten-free cookies and check all packaged ingredients carefully.
Final Thoughts
This No Bake Peanut Butter Banana Pie is the kind of dessert that makes homemade baking feel wonderfully simple. With a crisp cookie crust, creamy peanut butter filling, and sweet banana layers, it brings together familiar flavors in a cool, satisfying pie that does not require an oven.
It is especially handy when you need a make-ahead dessert for a family dinner, weekend gathering, or summer occasion. Give it plenty of time to chill, add the fresh toppings just before serving, and you will have a pie that is easy to slice and even easier to enjoy.
If you make this recipe, try one of the variations to make it your own. A chocolate drizzle, chopped peanuts, or extra peanut butter can each add a slightly different finish while keeping the classic banana and peanut butter combination at the center.